Page 7
Once the direction nding antenna is pointing in the direction of the highest signal strength,
you can begin to locate the phone being detected by slowly walking in that direction. If you see
the signal strength drop, simply stop moving and rotate in place just as you did before until the
strongest signal stregnth is again displayed. Continue moving in the direction that the directional
antenna is now pointing and repeat these steps until you reach the source.
You can return to the previous screen at any time by touching the back arrow on the upper left
side of the screen. From there you can try to locate the same cellular source again or choose a
different one. Just remember to replace the direction nding antenna with the omni-directional
antenna when you are not in the direction nding screen or your RF surveys will not be accurate.
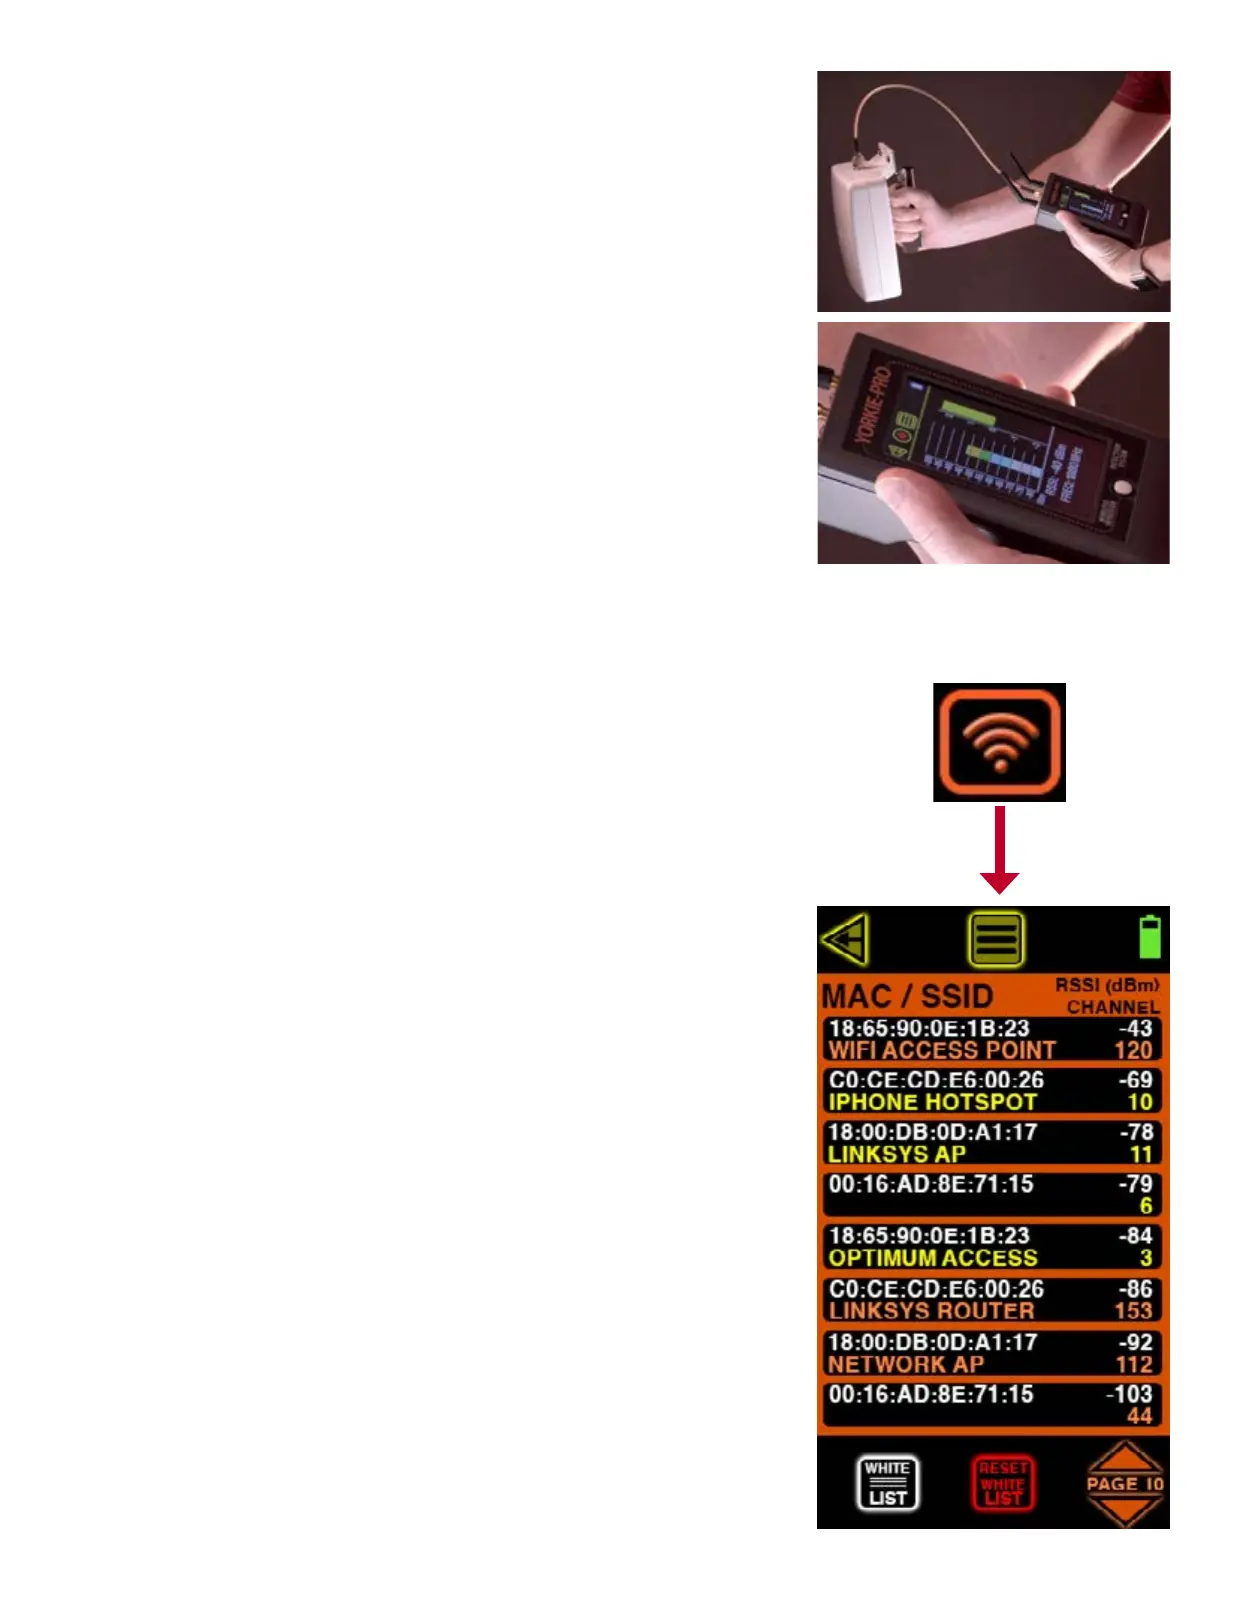
WI-FI MEASUREMENTS
Starting from the MAIN MEASUREMENT screen, touch the Wi-Fi icon located on the bottom to scan
all nearby Wi-Fi access points. This screen indicates MAC address, RSSI signal strength in dBm,
802.11 channel number and SSID of every 2.4 GHz and 5 GHz access point detected. Orange
colored SSIDs indicate 2.4 Ghz and yellow SSIDs indicate 5 GHz. Yorkie-Pro will not detect any
client Wi-Fi devices.
Depending upon the number of access points and their activity, you might see the list updating
very frequently or not frequently at all. The strongest Wi-Fi access point will move to the top of
the list followed by the next strongest one and so on, but if you nd the list too long or changing
too frequently you can adjust the RF SCAN PERSISTENCE in the MAIN MENU settings. RF SCAN
PERSISTENCE does not affect measurements, it only affects how long measurements remain on
the screen after a signal is lost. The choices include ALWAYS ON, ALWAYS OFF, 10 SECS and 10
MINS. You might need to experiment with these settings depending upon your environment but
BVS recommends 10 SECS for most busy RF environments and 10 MINS for less busy RF environ-
ments.
WI-FI MEASUREMENT screen includes sorting and navigation buttons on the bottom. Touch the up
or down PAGE arrows in the lower right of the screen to navigate through the pages of APs and
their respective measurements
The WHITE LIST button allows users to remove known access points from the list. This feature
allows users to spend more time identifying unknown and possibly dangerous rogue APs instead
of continually sorting through access points that have already been scanned and accounted for.
Simply touch this button to activate this feature (the button will invert to indicate activation).
Next, touch each listed Wi-Fi device that you wish to white list. Every AP you choose will disap-
pear from the list and not return until the unit power is reset or until you choose to reset yuor
white list. Touch the WHITE LIST button again when you are nished whitelisting access points.
RESET WHITE LIST button simply resets the white list of removed access points. Touch this button
to reset the list.