This document is an installation and operating manual for Beverage-Air PH Warming Cabinets. It provides comprehensive information for the safe and efficient use, installation, and maintenance of these commercial food service units.
Function Description:
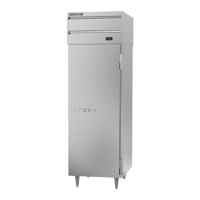
The Beverage-Air PH Warming Cabinets are designed for commercial food service applications, such as bars and restaurants, to maintain food at a desired warm temperature. These units are not intended for heating cold food but rather for holding pre-heated food. The cabinets feature an electronic controller that allows users to set and monitor the internal temperature, ensuring food is kept in optimal condition for serving. Various models are available, including those with solid or glass doors, and pass-thru configurations, catering to different operational needs. The units are designed to keep food warm over extended periods, with recommendations provided for specific food types and holding times. Proper ventilation is crucial, and some models include adjustable dampers to control moisture levels, preventing sogginess for certain foods.
Important Technical Specifications:
- Voltage: All models operate on 208-240 volts, 60 Hz AC.
- Room Air Temperature Range: Minimum 60°F, Maximum 100°F.
- Power Cord Plug (NEMA): 6-20P for all models.
- Full Load Amps: Varies by model, with PH1 series at 6.3 Amps and PH2 series at 13 Amps.
- Cabinet Dimensions (w x d x h):
- PH1 series: 26 1/2 x 34 3/8 x 83 3/4 inches (standard depth) or 26 1/2 x 38 3/8 x 83 3/4 inches (pass-thru depth).
- PH2 series: 52 1/8 x 34 5/8 x 83 3/4 inches (standard depth) or 52 1/8 x 38 5/8 x 83 3/4 inches (pass-thru depth).
- Height includes legs.
- Clearances:
- Top: 10 inches minimum.
- Rear: 0 inches minimum.
- Left/Right Sides: 0 inches minimum.
- Bottom: 0 inches minimum.
- Controller: Electronic controller with a display for temperature, alarms, and settings. Features include heating element status, circulating fan status, and temperature scale indication.
- Wiring Diagram: Provided for service technicians, detailing connections for control circuit, heater relay, heater safety thermal switch, heaters, light relay, cabinet lights, fan relay, and blower.
- Agency Approvals: UL Classified, CUL, and EPH marks indicate compliance with safety and sanitation standards.
Usage Features:
- Preheating: The cabinet should be preheated for one hour before placing food inside.
- Temperature Adjustment: The factory set temperature is 160°F, but it can be adjusted using the Increase/Decrease buttons on the electronic controller. The display automatically reverts to showing the current temperature 30 seconds after adjustment.
- Real-Time Clock: The controller includes a real-time clock feature that can be set for hour, minute, and day.
- Alarm Codes: The controller displays alarm codes (e.g., probe failures, high/low temperature alarms, door open alarm) to alert users to potential issues. A flow chart is provided to navigate the controller menu and view these alarms.
- Moisture Control: Some models are equipped with vents or dampers to control moisture levels, which is beneficial for foods that require a crisp exterior.
- Roll-In/Roll-Thru Units: Specific installation instructions are provided for these models, including the requirement to seal them to the floor for NSF compliance.
- Shelf Installation: Detailed steps are outlined for properly installing shelves and clips, emphasizing the importance of secure attachment to prevent damage or injury.
- Dedicated Power Supply: The unit requires a dedicated power outlet and should not be connected to GFI/GFCI outlets or extension cords.
- Door Operation: The circulating fan runs continuously when the unit is plugged in. The cabinet light turns on when the door is open or the door button is pressed, and turns off when the door is closed.
Maintenance Features:
- Daily Exterior Cleaning: Wash with a mild, non-chlorine detergent, rinse with clean water, dry with a soft cloth, and polish with stainless steel cleaner weekly.
- Weekly Interior Cleaning: Remove food and shelves, disconnect power, clean loose food particles, scrub interior surfaces and door gaskets with a warm detergent solution, rinse, air dry, and restore power.
- Gasket Inspection: Visually inspect door gaskets daily for a tight seal and any damage. Clean with mild dish detergent and warm water.
- Warranty Registration: Users are encouraged to register their product online or by mail within ten days of installation to ensure warranty coverage.
- Troubleshooting Guide: A comprehensive "HELP" section provides possible causes and remedies for common issues such as the cabinet not operating, not holding temperature, being noisy, or overheating.
- Stainless Steel Cleaning Methods: A detailed table outlines various cleaning agents and methods for different types of stains and discolorations on stainless steel, along with their effects on the finish.
- Condensing Coil Cleaning: Regular cleaning of condensing coils is recommended (minimum monthly) to prevent compressor malfunction and voiding the warranty.
- Warranty Information: A limited warranty covers parts and labor for three years from installation (or 39 months from shipment), with an additional two-year compressor part warranty. Specific limitations apply, including exclusions for normal wear parts, improper maintenance, and residential applications.