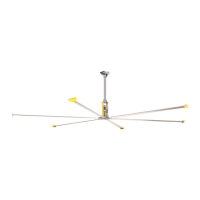
12’–24’ BASIC 6
®
WWW.BIGASSFANS.COM ©2012 DELTA T CORP. ALL RIGHTS RESERVED
12’–24’ BASIC 6
®
Contents
Introduction
Safety Instructions ii
Mounting Reference Guide iii
Thank You 1
About Big Ass Fans 1
Pre-Installation
About this Fan 2
What’s in the Box 3
Parts Included 4
Tools Needed 5
Understanding Roof Pitch 5
Fan Diagram 6
Preparing the Work Site 7
Understanding Airow Patterns 8
Mounting Structure:
I-Beam
1. Measure I-Beam Width 10
2. Attach Upper Yoke (to I-Beam) 11
Mounting Structure:
Bar Joists
1. Select Proper Angle Irons 12
2. Pre-drill Angle Irons 13
3. Fasten Angle Irons Together (if span is longer than 8 ft) 13
4a. Fasten Single Angle Irons to Roof Structure Mounting Points 14
4b. Fasten Double Angle Irons to Roof Structure Mounting Points 15
5a. Attach Upper Yoke (to Angle Irons) 16
5b. Attach Main Fan Unit (to Angle Irons) 17
Hanging the Fan
1. Attach Extension Tube (to Upper Yoke) 18
2. Secure Safety Cable 18
3. Attach Lower Yoke (to Extension Tube) 19
4. Attach Main Fan Unit (to Lower Yoke) 19
5. Conrm Orientation 19
Installing Guy Wires
1. Attach Locking Carabiners to Main Fan Unit 20
2. Attach Beam Clamp 20
3. Route Guy Wire through Gripple
®
21
4. Install Remaining Guy Wires 21
Installing Airfoils
1. Attach Winglets to Airfoils 22
2. Attach Airfoils to Hub 22
Electrical Installation
Electrical Installation Safety 23
Electrical Installation Overview 24
Controller Storage 24
Power Requirements for Fan Controllers 24
Mounting the Wall Controller 24
Input Power Conditioning 25
Conduit and Piping Guidelines 25
Power Wiring Guidelines 26
Grounding 27
Installing the Electronic Programming Module (EPM) 28
Wiring: ESFR (Early Suppression Fast Response) 29
Wiring: 100–125V/200–250V Single-Phase Fan Controllers 30
Wiring: 200–250V Three-Phase Fan Controllers 31
Wiring: 400–480V & 575–600V Three-Phase Fan Controllers 32
Daisy Chaining 33
Wiring the Motor: 9 Lead, Dual Voltage, Wye Motor Congurations 34
Operating the Fan Controller 35