MARQUE, MODELES ET BREVETS DEPOSES - PRODUITS EXCLUSIFS
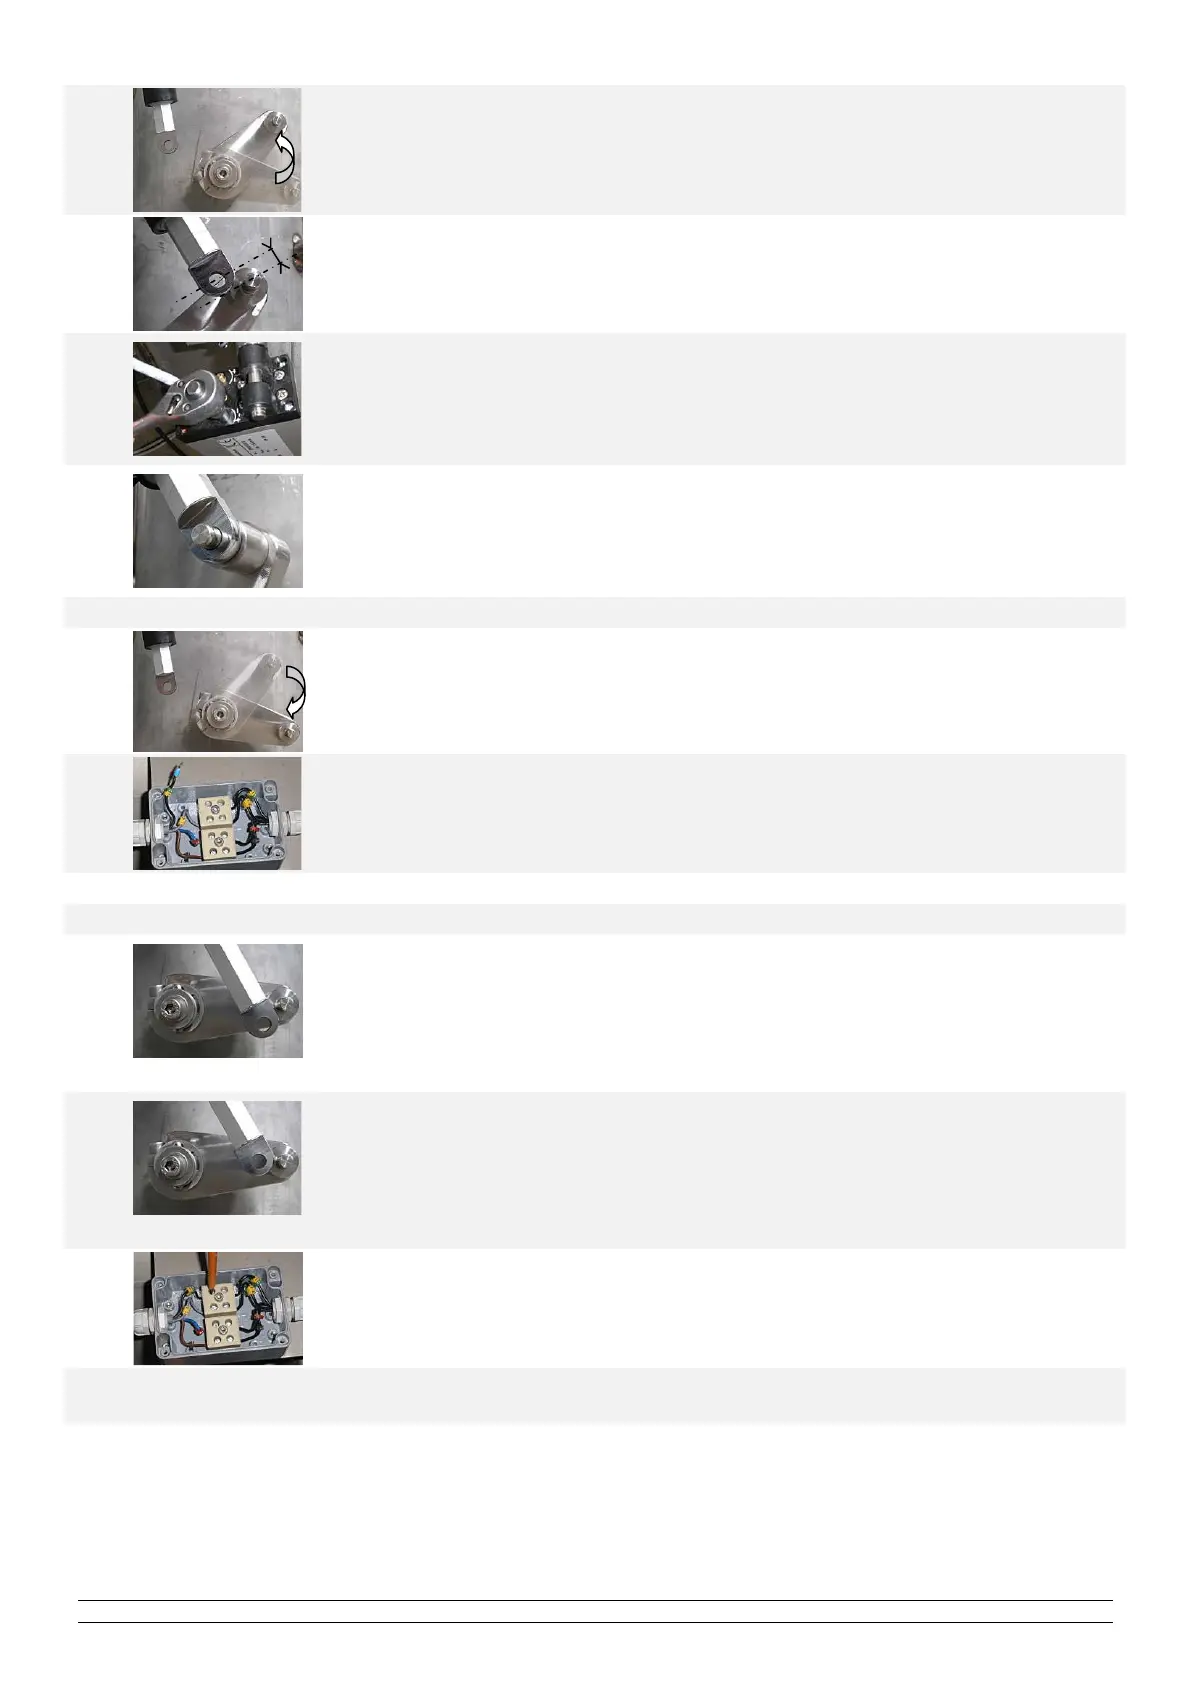
3 Move the arm of the cleaning system by hand to the "retracted" position.
4 Assess the distance to be made up between the piston attachment pin and that of the arm.
5
Turn end of stroke set screw number 2:
- In the " + " direction to move the piston into the actuator.
- In the " - " direction to move the piston out of the actuator.
One turn of the screw represents approximately a change of 1mm of the piston's stroke.
Remark: a 6mm allen key is required for this operation (if not use the locking bar).
6
Switch the automatic cleaning system off and on from the MIII monitor.
Wait until the end of the electric actuator cycle and try to attach the piston to the cleaning
system arm.
The attachment of the actuator to the cleaning arm must be carried out easily without
forcing it, if this is not the case then repeat the above steps to improve the adjustment
7 When the "retracted" position has been adjusted, set the "extended" position:
8 Move the arm of the cleaning system by hand to the "extended" position.
9 Disconnect the cable "I5" (24Volts dc) from the electric actuator box.
10 Switch the automatic cleaning system off and on from the MIII monitor.
11 Assess the distance to be made up between the piston attachment pin and that of the arm.
12
"Too far out"
If the piston is extended too far, turn the set screw number 1 in the " - " direction so that
the piston is "too far in".
Reconnect the cable " I5 " to allow the piston the come back to the "retracted" position.
Then disconnect this cable again and switch on the automatic cleaning from the MIII
monitor.
If the piston is too far in, go to the next step or repeat this step.
13
"Too far in"
If the piston is too far in, turn set screw number 1 in the " + " direction until the
Piston/Arm attachments are perfectly aligned.
Any movement of the set screw simultaneously moves the piston (only in the "+ »
direction)
The attachment of the actuator to the cleaning arm must be carried out easily without
forcing it, if this is not the case then repeat the above steps to improve the adjustment.
14 Once the setting of the two stops has been adjusted, reconnect the cable " I9 ".
15
Fix the electric actuator to the reactor with the circlips and switch the automatic cleaning back on from the
monitor MIII to check that the system is operating correctly.
 Loading...