Handheld Pulse Oximeter
27
Trend Function PalmCare plus
Measuring of SpO2
28
PalmCare plus
Step3) You can go back to the initial screen if you press ESC button ( ) after completing trend
examination.
Palmcare plus can show you the value at each time in the trend form which has been measured for1hr,
12hr, 24hr, 48hr and 72hr of the patients oxygen saturation (SpO
2) and Pulse Rate (HR) That’s to say,
you can examine and print the long-term change and the previous data of the measurement value of
the patient (However, the printing is possible only in case of attaching the printer on Palmcare plus.
■
Trend Information Check
Step1) If you want to examine the trend information on the initial screen, please press TREDN button
( ) then the following Trend printing screen will be seen on the LCD.
Step2) You can examine the Trend Data by pressing the UP/DOWN button ( / ). Whenever
pressing the TREDN button ( ) one time, you can check Trend information as below.
•1 hour SpO
2 / Pulse Rage Trend - mean value of the 1 minute unit
•12 hours SpO2 / Pulse Rage Trend - mean value of the 5 minutes unit
•24 hours SpO2 / Pulse Rage Trend - mean value of the 10 minutes unit
•48 hours SpO
2 / Pulse Rage Trend - mean value of the 20 minutes unit
•72 hours SpO2 / Pulse Rage Trend - mean value of the 30 minutes unit
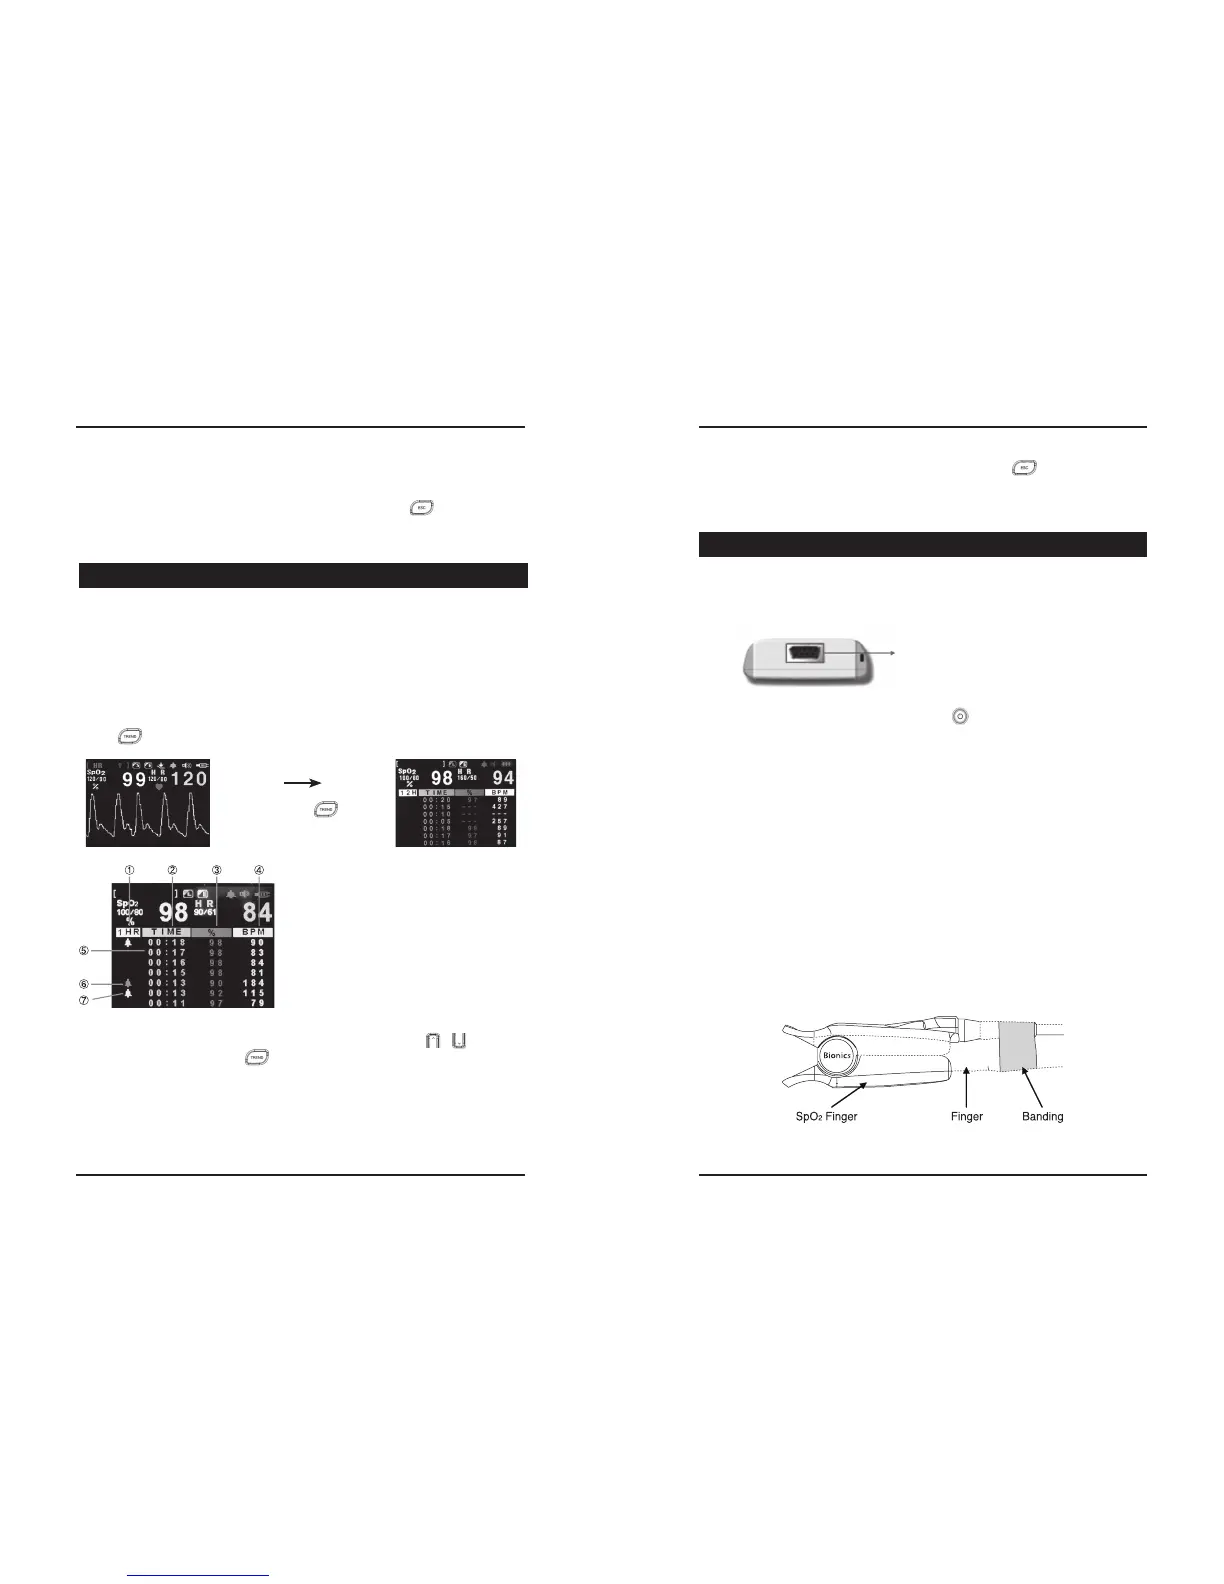
6. Trend Function PalmCare plus
①It indicates the type of the trend being displayed on the
curren screen.
②Time(hour: minute-It starts at 00:00) for initial trend
saving time
③Saved SpO2 value
④Save HR Value
⑤Event data which is saved by the user
⑥Data mark which is saved by Medium Priority Alarm
⑦Data mark which is saved by High Priority Alarm
ii. OFF : If there is no key input, do not setting Back Light is controlled automatically after 30
seconds.
Step3) You can go back to the previous (SETUP screen) if you press ESC ( ) button.
Press the TREND ( ) button.
■
Preparation before Measuring SpO2
Step1) Plug in the SpO2 probe to SpO connection port on upper side of Palmcare plus.
Step2) Turn the power on by pressing the power button ( ) PalmCare plus.
◆Attaching of Probe
Step 1) Clean the area of the body to be measured by using alcohol.
Step 2) Attach the probe to a finger as shown on the following drawing. (When measuring NIBP,
SpO
2 probe is attached to the other arm than the one that NIBP is measured. Do not use
with other medical instruments that can affect the blood flow, and do not attach the probe
where medical interference can be generated.)
Step 3) Be sure that red light of the probe is on, the sensor gives out the light, the both sides of
the probe faces rightly
Step 4) For a stable SpO
2 measurement, movement of body should be restricted, and band the
probe cable on the finger. When banding the probe cable, make sure it does not hinder
with blood flow.
Step 5) Make sure to check the skin condition in the attached location and the sensor whether
they are facing each other in a proper way, every 2 to 3 hours.
If skin condition changes, change the attaching location.
7. Measuring of SpO2
① SpO2 probe connection port
①
(How to apply SpO2 finger probe)