CALIBRATION
PROCEDURE FOR HIGH
OXYGEN CONTROL
(Oxygen control gas)
1. Remove sensor from cham-
ber and let it stabilize in room air
(minute or two). In work mode, watch
the sensor response to immersion in
21% oxygen to tell when it stabilizes.
Note whether oxygen reading is above
or below "21.0" and by how much.
2. Enter program mode by hold-
ing down the "up" and "down" but-
tons for three seconds,navigate
to"LEVL" function and while holding
down the " * " button, push the "up"
button until you reach "3". Then
navigate to the "ZEro" function and
increase the setting if reading was
low, or decrease the setting if reading
was high. To change the number
hold down the " * " button and push
the up or down button until you reach
the desired number. Exit program
mode to see new reading by holding
down the "up" and "down" buttons for
three seconds. Repeat until reading
is what it should be "21.0". The
number in the "ZEro" function stands
for the same amount in work mode.
For example: if you change the num-
ber in "ZEro" function by ".2" the
number in work mode will change by
".2", but the number in progam mode
is not the same number in work
mode.
3. Now to set the SPAN. Con-
nect the 1/4 in. ID tubing coming from
the compressed oxygen gas source
to the barb labeled "GAS SUPPLY
40 PSIG MAX" on the back of the
Proox 360. Make sure the gas is
regulated to 0-40 PSIG. Never ex-
ceed 40 PSIG. For the best results
use approximately15-20 PSIG.
4. Make sure the switch on the
front panel labeled "GAS" is in the
"OFF" position. This will ensure that
no gas is being wasted while calibrat-
ing.
5. Check to make sure that the
gas is connected properly by open-
ing the bleed valve on the front panel,
if gas is heard expelling from the
bleed barb then the gas is connected
properly. Once you have confrimed
that the gas is connected correctly,
close the bleed valve.
6. Hook up the calibration cham-
ber to the bleed barb on the front
panel of Proox 360. Slightly open
bleed valve knob on front panel until
you can hear the gas expelling slightly
from the calibration chamber this will
establish an oxygen level of 100%
through calibration chamber.
7. Insert sensor tip into calibra-
14
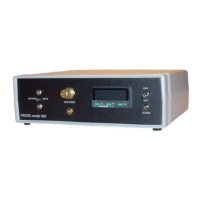
Proox model 360
version 1.0
tion chamber and let sensor stabilize
in 100% oxygen (minute or two). In
work mode, watch sensor response
to immersion in oxygen to tell when
it stabilizes. Note whether oxygen
reading is above or below "100.0"and
by how much.
8. Enter program mode,
change "LEVL" to "3" and navigate
to "SPAn" function, and raise the
setting if reading was low, or de-
crease the setting if reading was
high. Exit program mode to see new
reading. Repeat until reading is what
it should be "100.0". The number in
"SPAn" function isn't an exact
corresponse with the number in work
mode, it is a coarse adjustment. A
little adjustment goes a long way.
Sensor is calibrated when it
reads 21% oxygen after stabilization
in air and reads 100% oxygen after
stabilization in oxygen.
Once the sensor is calibrated,
attach the sensor to the chamber.
TEMPERATURE
EFFECT
Temperature can affect cali-
bration. If sensor will be used in a
temperature controlled chamber (eg.
refrigerator or incubator), always
bring sensor to operating tempera-
ture first before calibrating. It takes
at least 15 minutes for sensor to
thoroughly equilibrate to tempera-
ture of surroundings.
Temperature effect places a
time limit on calibration procedure. A
change in temperature will not affect
the sensor reading for almost 5-6
minutes. It takes that long for tem-
perature inside the sensor to change.
Fortunately sensor responds to oxy-
gen much faster, within a minute or
two.
Eliminate temperature interfer-
ence by promptly calibrating sensor
after externalization from chamber,
before it has time to change tempera-
ture. Be ready. Have calibration
chamber in position. Calibration is
easily accomplished before tempera-
ture starts to throw off sensor: 1-2
minutes to stabilize in low oxygen
standard gas followed by quick ad-
justment of "ZEro" function, then 1-2
minutes to stabilize in high oxygen
standard followed by quick adjust-
ment of "SPAn" setting, and it's back
into the chamber.
 Loading...