Chapter 2: Hardware installaon | 11
Chapter 2: Hardware installaon
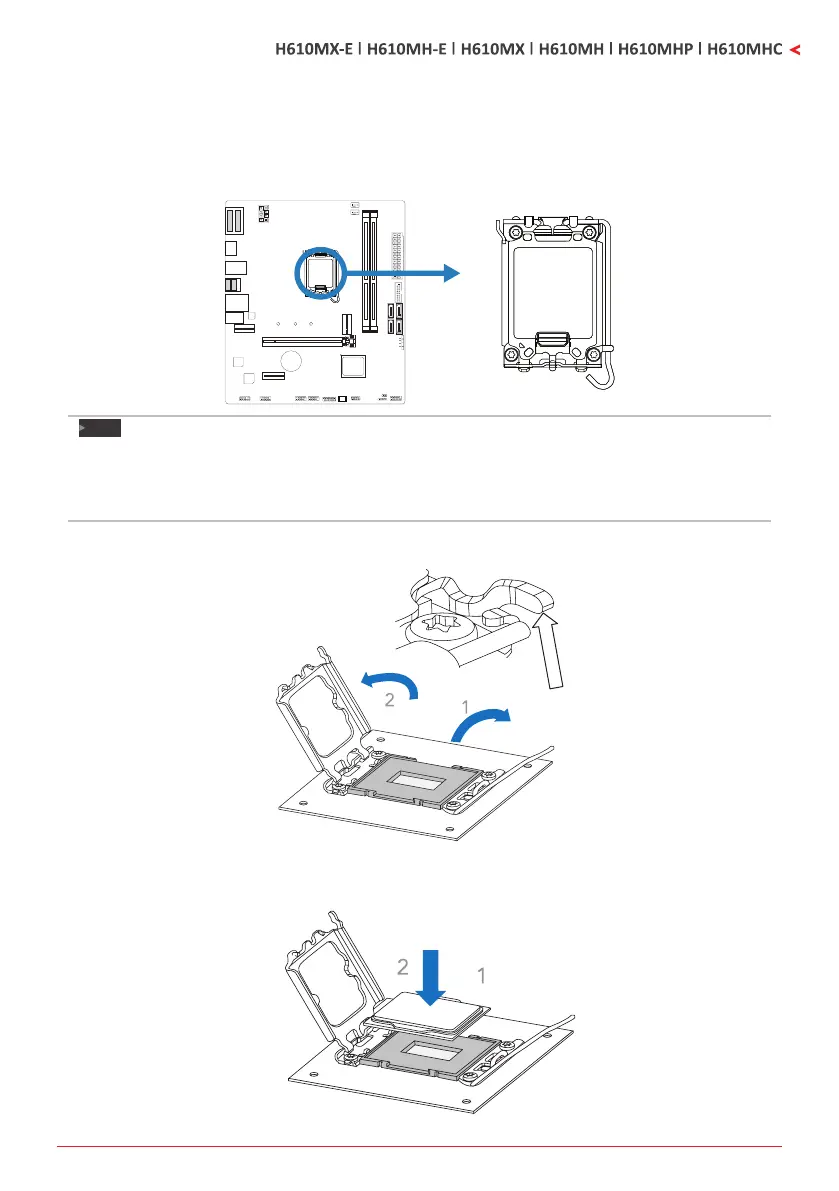
2.1 Install Central Processing Unit (CPU)
Step 1: Locate the CPU socket on the motherboard
Note
»
Removepincapbeforeinstallaon,andmakegoodpreservaonforfutureuse.WhentheCPUis
removed,coverthepincapontheemptysockettoensurepinlegswon’tbedamaged.
»
Themotherboardmightequipwithtwodierenttypesofpincap.Pleasereferbelowinstruconto
removethepincap.
Step 2: Open ILM Lever and then load plate using nger tab.
Step 3: Align and seat processor package on socket.