Settings
7
Configuring your Settings
Configuring settings on Blackmagic MultiView 16 is easy. If you have read the Getting Started section,
you already know how to enter the settings menu by pressing the menu button, then selecting and
confirming your settings by pressing the 'set' button. Changes to your settings can be made using
the rotary knob or the view buttons.
The remainder of this section describes common settings for Blackmagic MultiView 16.
Setting your Sources and Views
One of the key features of Blackmagic MultiView 16 is the ability to assign your connected SDI sources to
different views. By adjusting these settings you can easily change the arrangement of your views. For example,
if you want SDI input 5 to appear on view 1, you can easily configure Blackmagic MultiView 16 to do that.
To set which source appears on a desired view:
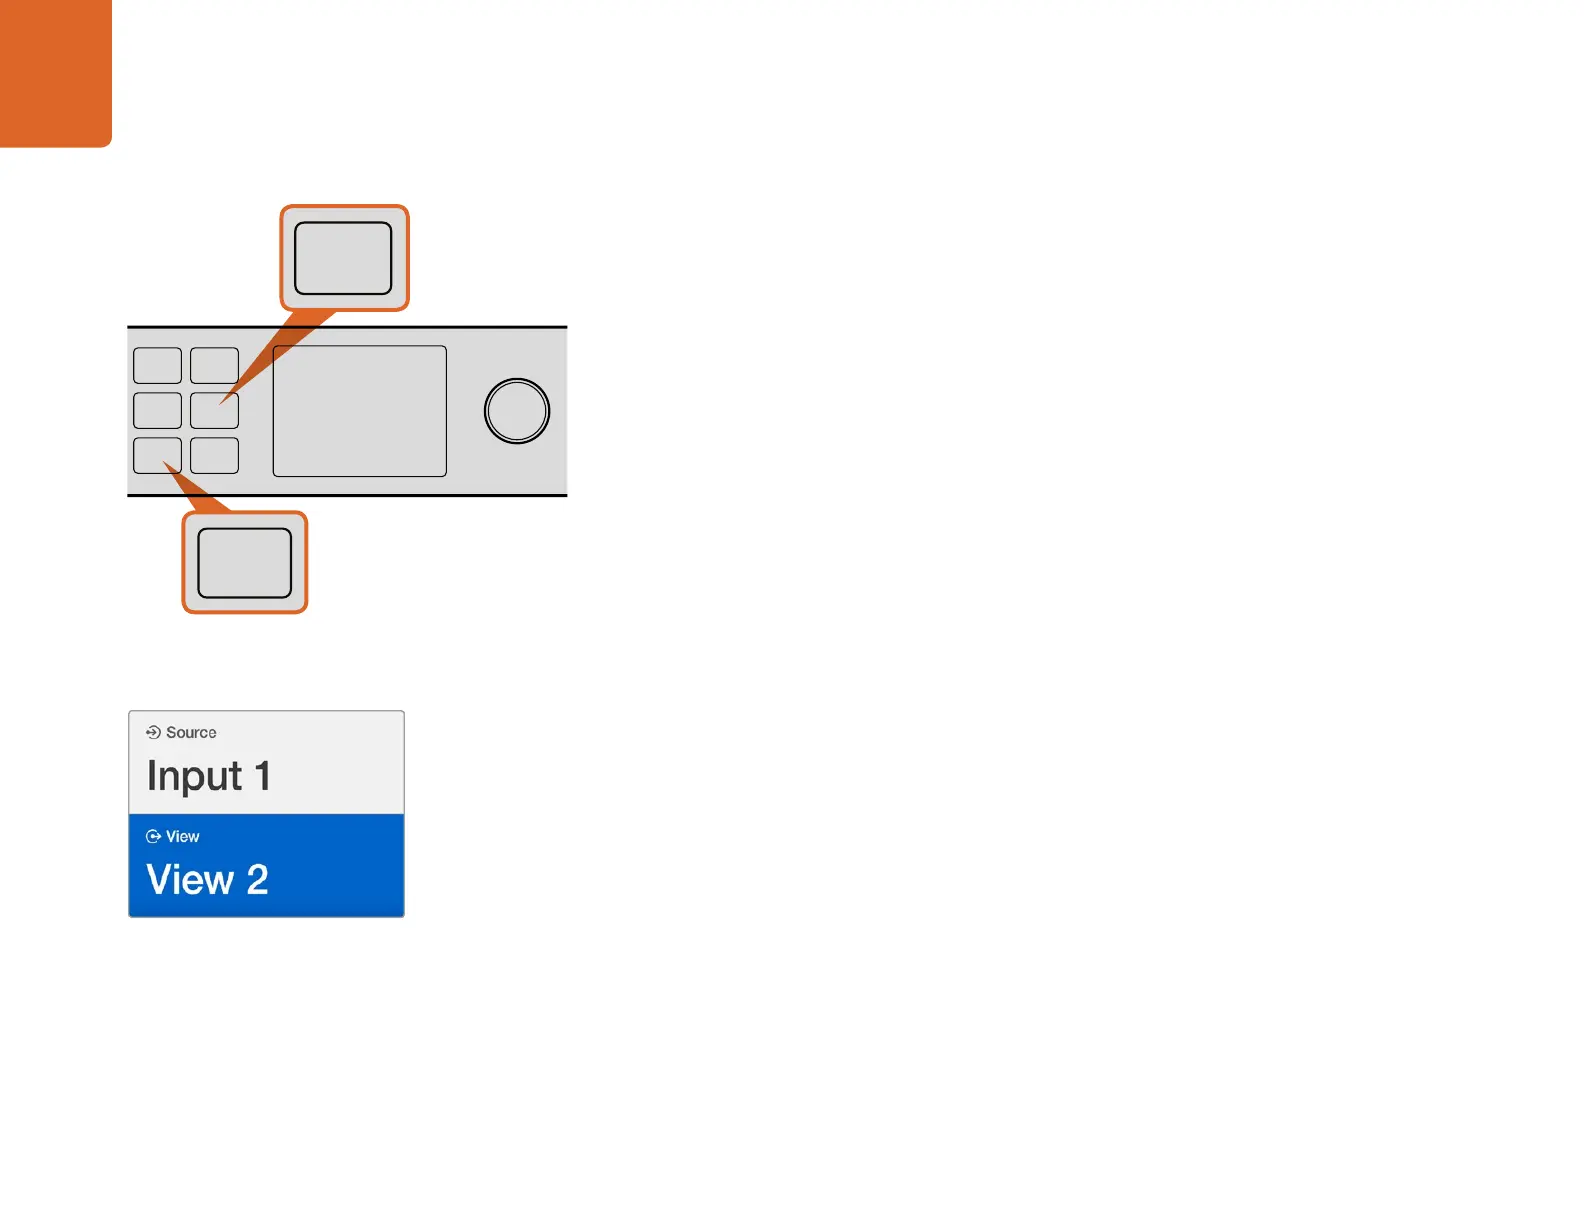
Step 1. Press the 'view' button on the front control panel to open the view selection screen. The view
selection will be highlighted with a blue background.
Step 2. Press a numbered view button to select your desired view. Alternatively, you can use the
rotary knob to scroll through the views. Confirm your setting by pressing the 'set' button.
Step 3. Press the 'src' button. The source section of the LCD will be highlighted.
Step 4. Press a numbered view button on the control panel to select your desired input. Alternatively,
you can use the rotary knob to scroll through your inputs on the LCD.
Step 5. Press the 'set' button to confirm your setting.
Setting your Layout
As shown in the getting started section, you can select the number of views that appear on your multi
view output. For example, if you have 4 inputs connected, you can easily select the 2x2 layout which
displays four views in a vertical x horizontal grid. For optimum monitoring of your inputs, select the
view layout to suit the number of inputs connected.
There are four multi view layouts you can choose from:
2x2 displays 4 views. If you have an Ultra HD monitor connected, each source will be
displayed in native HD resolution.
3x3 displays 9 views.
4x4 displays all 16 views.
You can also monitor a view in full screen mode by pressing the 'solo' button on Blackmagic MultiView
16's control panel, then selecting a view button.
To set a source to a view, press the 'view' button to enter the
view setting, make your selection, then press the 'set' button
to confirm your setting.
16
SOLO
SET
SRC
VIEW
MENU
Blackmagic MultiView 16
ETHERNET SD/HD/3G/6G-SDI IN
REF IN
LOOP OUT
IN
HDMI OUT 6G-SDI OUT HD-SDI OUT
RS-422
CNTRL
USB
1 2 3 4 5 6 7 8 9 10 11 12 13 14 15 16
1
2
3
4
5
6
7
8
9
10
11
12
13
14
15
16
SOLO
SET
SRC
VIEW
MENU
Blackmagic MultiView 16
ETHERNET SD/HD/3G/6G-SDI IN
REF IN
LOOP OUT
IN
HDMI OUT 6G-SDI OUT HD-SDI OUT
RS-422
CNTRL
USB
1 2 3 4 5 6 7 8 9 10 11 12 13 14 15 16
1
2
3
4
5
6
7
8
9
10
11
12
13
14
15
16
SOLO
SET
SRC
VIEW
MENU
Blackmagic MultiView 16
ETHERNET SD/HD/3G/6G-SDI IN
REF IN
LOOP OUT
IN
HDMI OUT 6G-SDI OUT HD-SDI OUT
RS-422
CNTRL
USB
1 2 3 4 5 6 7 8 9 10 11 12 13 14 15 16
Select your view you wish to assign a source
to using the rotary knob or view buttons.
Settings