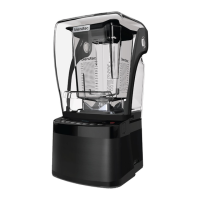
CN-8
4.2CONNOISSEURIN-COUNTERINSTALLATION
Preparation
1. Identify desired blender location. Consider preferences such as proximity to ingre-
dients, available counter space, and access to a power source.
(Alicensedelectricianmayneedtoinstallappropriatepowersourcefor
theblender.)
2. Ensure potential site meets all dimensional requirements (See Figure 4.)
• Countertop can be no thicker than 3/4 inch (19 mm). A countertop thicker than
3/4 inch (19 mm) will obstruct ventilation louvers on the upper sides of the
blender base.
• If installing more than one blender, allow 14-16 inches (356-406 mm) center-to-
center blender spacing.
NOTE: The blender unit draws ambient air into the louvers located on the bottom of
the blender base. It then evacuates hot air through the louvers located on the upper
sides of the blender base. Ensure a sufcient amount of air circulates beneath the
blender base to allow cooling. Hot air should not be trapped beneath the counter
top. Nothing should be stored closer than 3 inches (76 mm) from the bottom of the
blender motor.
3. Cut a hole in the counter top 4 3/8 inches (111 mm) wide and 5 7/8 inches (149
mm) long with the shorter side facing the operator. (See Figure 4). Makesure
allspacerequirementsandmeasurementsarecorrectBEFOREcutting.
Dependingonthetypeandstyleofyourcountertop,differenttypesof
equipmentmaybeneededtocuttheappropriatehole.Itisalwaysrecom-
mendedtoconsultwithaprofessionalbeforecutting.
InstallationInCounter
1. Ensure that an electrical receptacle is readily accessible when you locate the
equipment.
2. Slide the blender base into the hole cut in your counter top (per instructions above)
with the LCD indicator and touchpad facing the operator side of the counter top. The
formed rubber gasket on the rim of the motor base should t into the hole and rest
lightly on the counter top.
3. Make sure the power switch is off before plugging the unit into the wall. Plug the
unit into a separate 120 volt receptacle with 15 amp protection.