OPERATION
3 --- 2
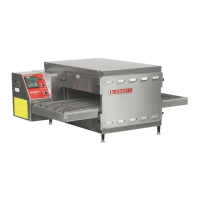
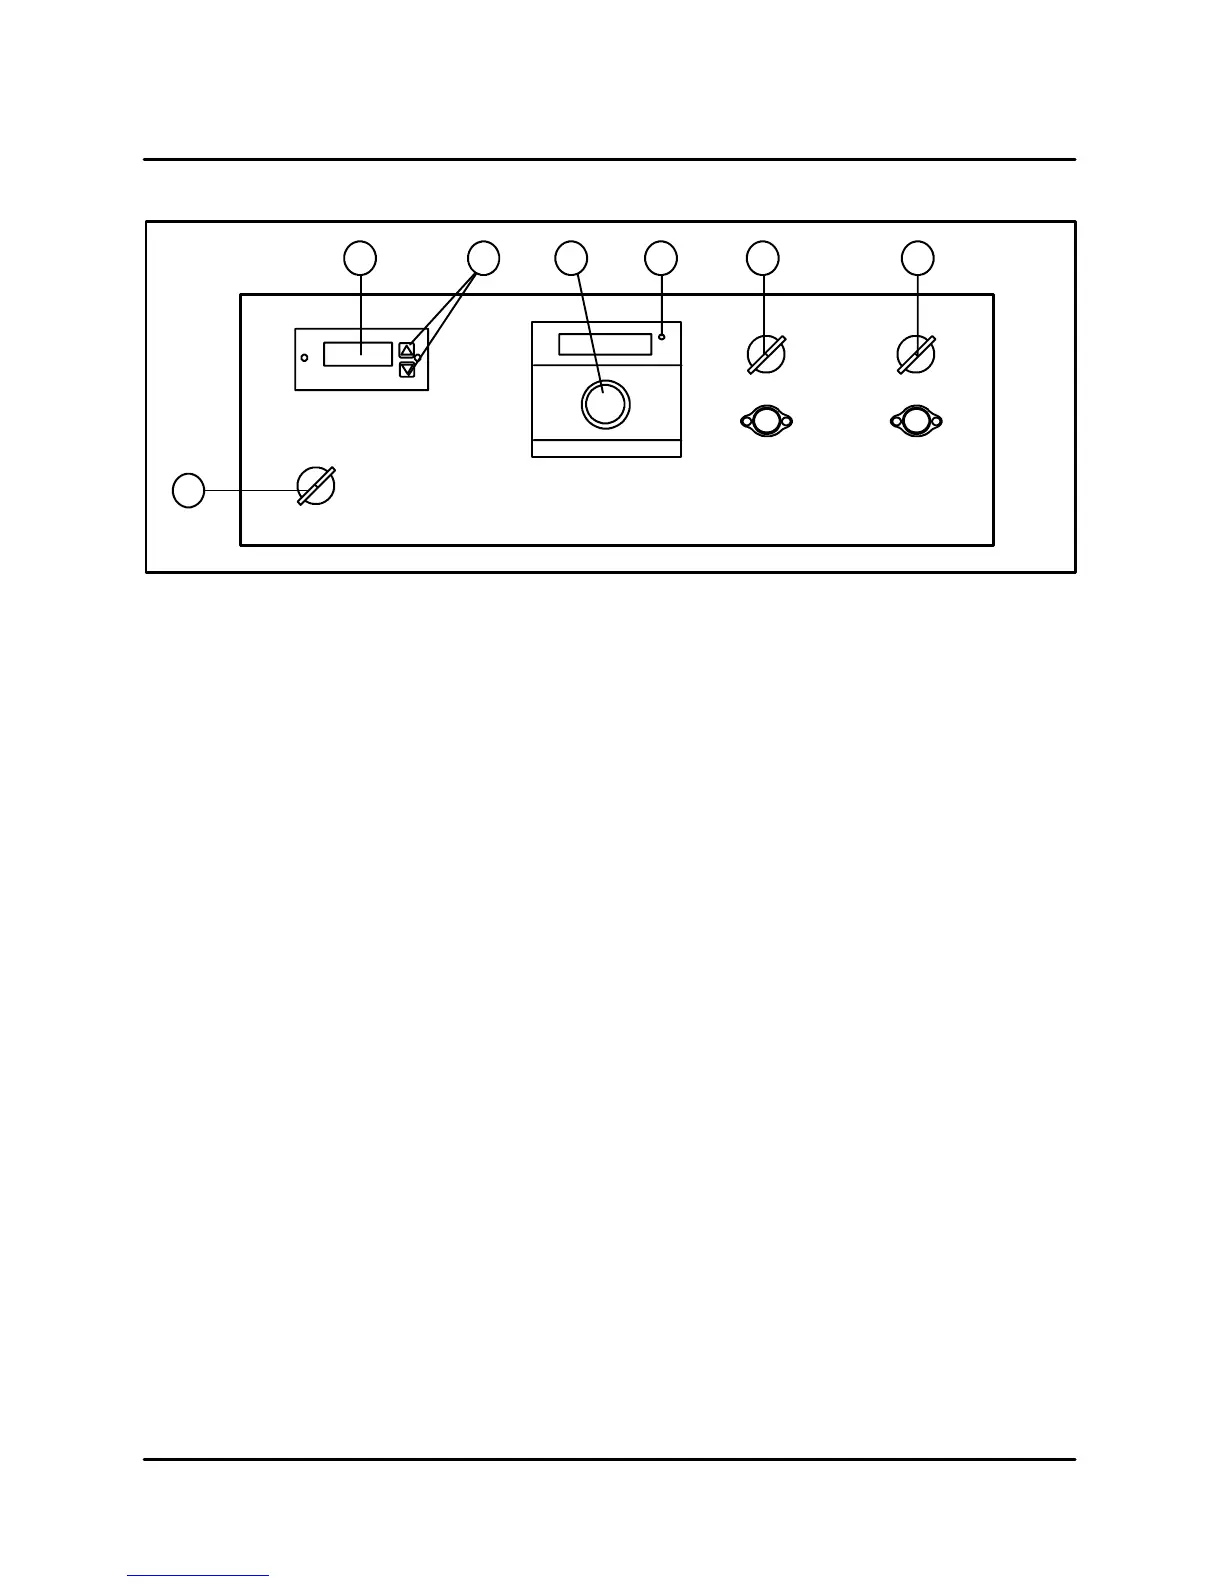
U.E. TEMPERA TURE CONTROLLER WITH CLOSED LOOP DC DRIVE SYSTEM
7
TEMPERATURE
ON OFF
HEAT
ON OFF
BLOWER
6
COOK TIME
ON OFF
CONVEYOR
1 532 4
FIGURE 2
CONTROL DESCRIPTION
1. COOK TIME DISPLAY --- Displays the belt
speed.
2. CONVEYOR ADJUSTMENT KEYS --- Press to
adjusttheconveyorspeed.
3. TEMPERATURE CONTROL KNOB --- Turn to
set cook temperature.
4. HEAT LIGHT --- Indicates the control is calling
for heat.
5. HEAT SWITCH --- Controls power to the burner.
6. BLOWER SWITCH --- Controls power to the
blowers.
7. CONVEYOR SWITCH --- Controls power to the
conveyor motor.
CONTROL OPERATION
1. Turn the manual gas valve to the OPEN posi -
tion. This is only necessary on initial start- up.
2. Turn the BLOWER SWITCH (6) to ON.
3. Push and turn the TEMPERATURE CONTROL
KNOB (3) clockwise to the desired setting.
4. Turn the HEAT SWITCH (5) to ON.Theburner
purge timer will be energized. After approxi-
mately thirty (30) seconds, a spark ignites the
burner. Initial start may require longer due to air
in the gas line.
NOTE: If the oven fails to ignite after the thirty
(30) second purge, turn the HEAT
SWITCH (5) to OFF and wait 5 minutes
before turning back to ON.
5. Turn th e CONVEYOR SWITCH (7) to ON.The
conveyor belt starts to travel through the oven.
This circuit is independent and can be turned
on or off without affecting any other opera-
tions. Adjust the conveyor speed as follows:
Press the UP ARROW (2) to increase the con -
veyor speed and the DOWN ARROW (2) to de -
crease the conveyor speed.
6. Turn th e BLOWER (6), C ONVEYOR (7) and
HEAT (8) SWITCHES to OFF. The Cool Down
circuit is energized. The blower motor(s) con-
tinue to run until the oven temperature is be-
tween 135---170_F (57---77_C). The digital
temperature display remains lit until the cool
down circuit de-energizes.
The oven will hold t hese parameters daily and will
require no further adj ustments unless a different
product is placed in t he oven.
NOTE: E ach oven contains different components
and must be adjusted individually.
 Loading...