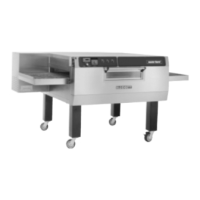
MT3255 and MT3270
4 --- 7
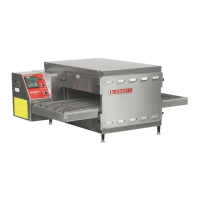
TEMPERATURE CALIBRATION --- ATHENA CONTROLLER
THE CONFIGURATION MENUS
1. Press and hold the actual temperature key for
approximately 10 seconds. When the menu
system has been accessed, the display
toggles between
and either or .
Setting the Default Display
The default display determines w hether the con -
troller displays the actual or the setpoint tempera-
ture.
1. Use the arrow keys to select the desired dis-
play default.
NOTE: We recommend using the setpoint dis-
play default.
2. Press the actual temperature key to enter the
selected display default. The display will
toggle between
and a numerical value.
Setting the Control Hysteresis
The control hysteresis, or the burner cycle is used
to prevent rapid cycling around the setpoint. The
hysteresis is adj ustable from 2_F to 252_F(0_Cto
140_C).
1. Use the arrow keys to select the desired con-
trol hysteresis.
NOTE: We recommend using the 5_F initially.
2. Press the actual temperature key to enter the
selected hysteresis value. The display will
toggle between
and a numerical value.
Setting the Display Offset
The display offset is used to provide a limited ad-
justment of the displayed temperature as a com-
pensation for offsets between the actual t empera-
ture and the temperature seen by the
thermocouple. The display offset is adjustable
from -126_F to +126_F(-70_Cto70_C).
1. Use the arrow keys to select the desired dis-
play offset.
2. Press the actual temperature key to enter the
selected offset value. The display will toggle
between
and a numerical value.
Setting the Deviation Band Alarm
The deviation band alarm causes the display to
flash when the actual temperature varies (in either
direction) from the setpoint. The deviation band
alarm is adjustable to off or values from 1_Fto
252_F(1_ C to 740_C).
1. Use t he arrow keys to select the desired devi-
ation band alarm.
2. Press the actual temperature key to enter the
selected alarm value.
To exit the Configuration Menus
1. Push and hold the actual temperature k ey for
approximately 3 seconds.
NOTE: The unit exits the configuration menus if the
controller is not touched for 1 minute at any
time during the programming process.
SETTING THE DISPLAY UNITS
1. Disconnect the power from the control. Re-
move all wires and the back of the control.
2. Locate the black jumper on the microcontroller
board next to the thermocouple connection.
Install the jumper on both pins.
3. Reconnect the power to the control.
4. Press and hold the actual temperature key for
approximately 10 seconds until the display
reads
and flashes or .Presstheupor
down arrow key to toggle between _Fand_C.
5. Press and hold the a ctual temperature key un -
til the control exits the programming mode.
NOTE: DO NOT disconnect power and move the
jumper back to single pin until the control
has returned to normal operation.
LOW LIMIT ADJUSTMENT
1. Bring the oven to 200_F(93_C).
2. Turn both the blower and the heat switches to
OFF. The blower should continue to run.
3. Monitor the digital temperature control display.
The blower motors should shut off within the
range of 170 -135_F(77-57_C).
4. To adjust the temperature, turn the low-limit
potentiometer. A clockwise rotation increases
 Loading...