8
OFF/O
ON/I
3
C
D
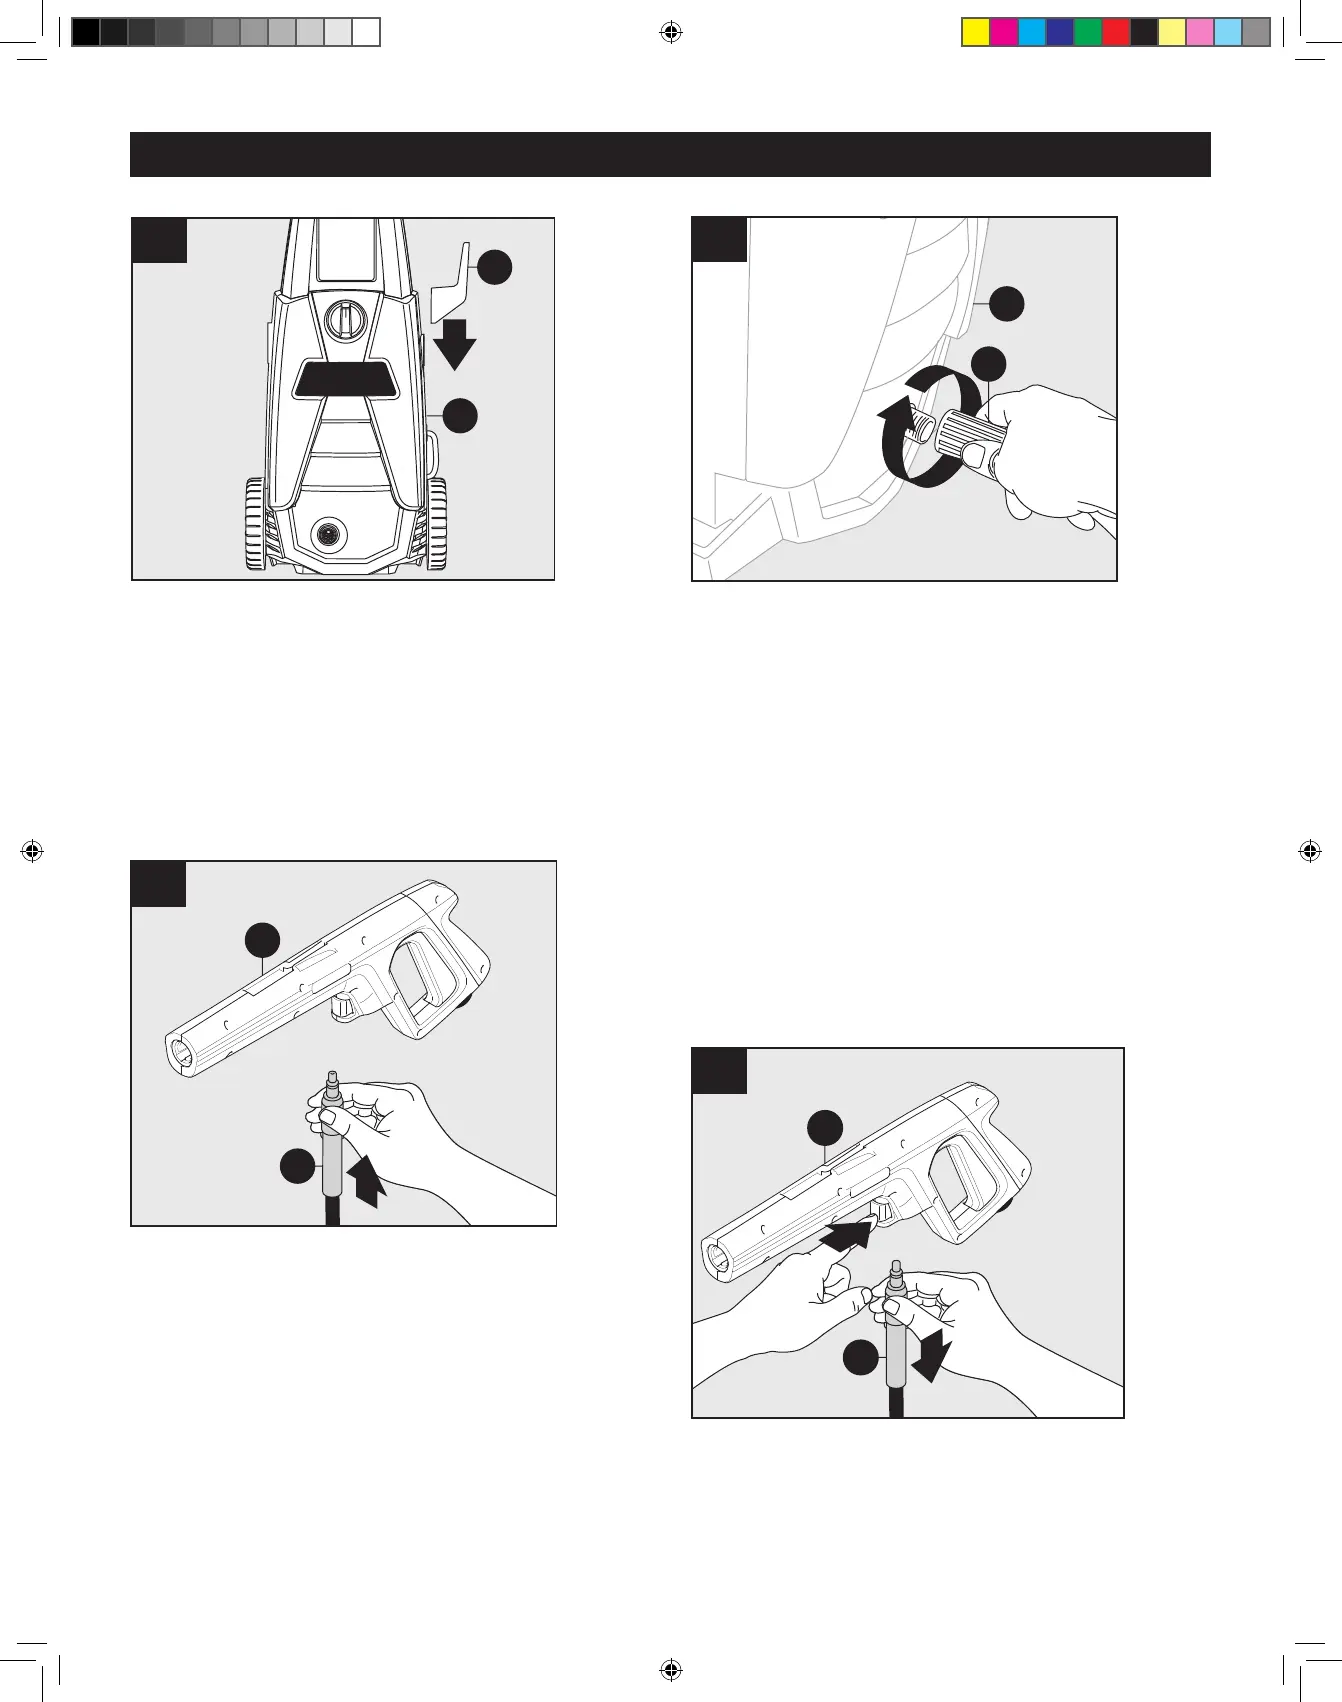
Slide cord hook holster (D) onto right side, when facing
thepower washer unit (C) as shown.
Note: This step does not require any screws.
4
C
E
Super Soft High Pressure Hose Assembly
Screw Super Soft high pressure hose (E) clockwise onto
bottom front of power washer unit (C). Pull back collar
and insert o-ring post into water outlet far enough so
collar can thread onto outlet threads until hand tight.
If it takes fewer than six turns you have not properly
tightened the Super Soft high pressure hose tting. It
is easier to position the power washer in front of you to
ensure that the threads are started correctly. Failure
to properly tighten high pressure hose will result in the
hose slipping or popping off immediately upon turning
unit on. Do not worry about damage if this occurs–just
reinstall and take extra care when screwing on the
Super Soft high pressure hose tting.
Note: DO NOT use pliers or locking pliers to tighten.
5
E
F
Connect the other end of Super Soft high pressure
hose (E) to spray gun (F) by inserting the silver metal
tip of high pressure hose into the tting just ahead of
trigger guard. It will lock into spray gun with a “click”.
Conrm hose is locked into spray gun by slightly pulling
on hose. The hose is now securely attached to spray
gun.
Note: DO NOT press button on underside of gun when
connecting hose to gun.
2
1
6
E
F
To release hose (E) from spray gun (F), press button on
underside of gun toward trigger guard. The hose will
slide out from connection.
ASSEMBLY INSTRUCTIONS
95499_IM_BC 142 HS_ENG-FR-SP.indd 8 2020/5/22 下午2:46