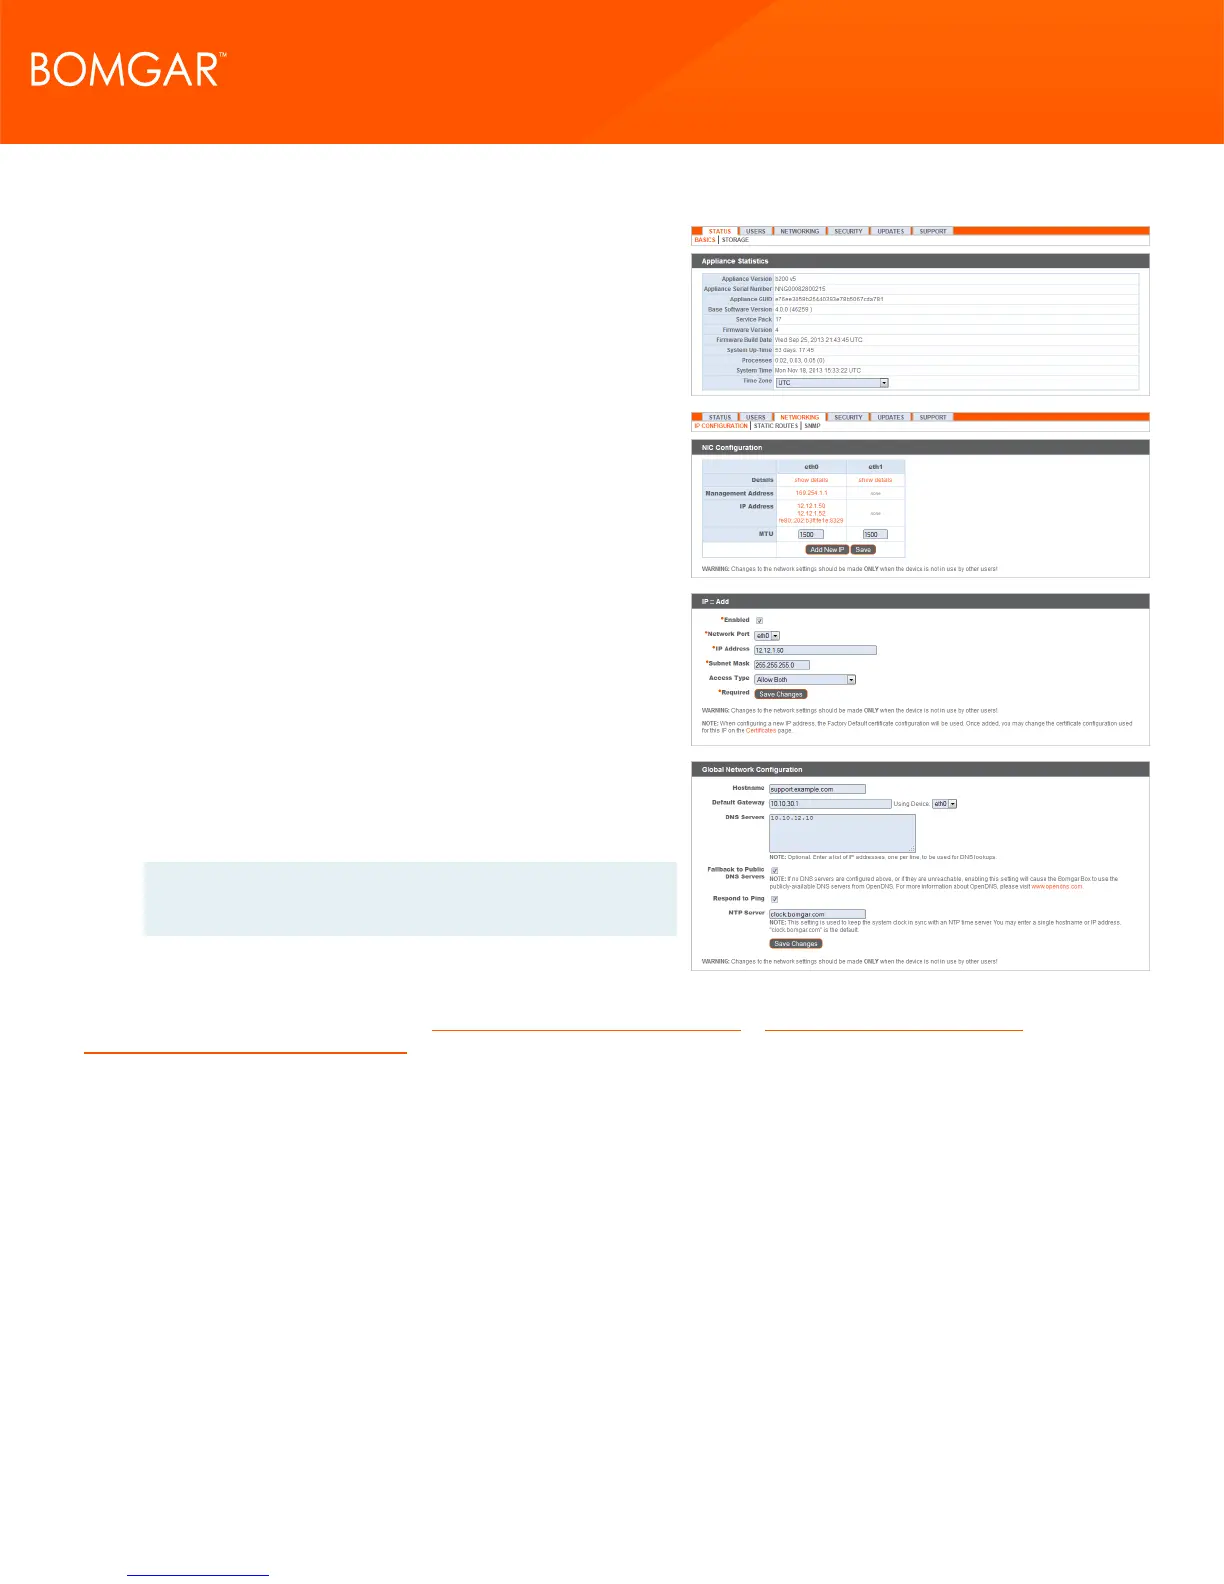
5. Once you are logged into the /appliance interface, you will see
the Status > Basics page. This page includes information such
as the serial number which Bomgar Technical Support requires
to register the appliance with the Bomgar licensing servers.
Take a screenshot of this page and send it to Bomgar Technical
Support so that the Support team can register your appliance.
6. Next, go to Networking > IP Configuration. Under the NIC
Configuration section, click Add New IP.
7. Enter the static IP address and subnet mask for your Bomgar
Appliance. Typically you should leave the default values for
both fields. You can decide if this IP address will support
session traffic, web traffic, or both. Then click Save Changes.
8. Under the Global Network Configuration section, set your
default gateway. Enter your default Gateway and DNS server
addresses. After entering the required information, click Save
Changes.
Note: Valid DNS settings are required for failover and
automatic updates to function properly.
For more about network configuration, see The Bomgar Appliance in the Network at www.bomgar.com/docs/remote-
support/getting-started/deployment/dmz.
CONTACT BOMGAR info@bomgar.com | 866.205.3650 (US) | +44 (0) 1628 480 210 (UK/EMEA) BOMGAR.COM 17
© 2017 Bomgar Corporation. All rights reserved worldwide. BOMGAR and the BOMGAR logo are trademarks of Bomgar Corporation; other trademarks shown are the property of their respective owners. TC: 1/11/2018
REMOTE SUPPORT APPLIANCE INSTALLATION