8. Installing, Removing, Cabling, and Securing the System in the
Rack
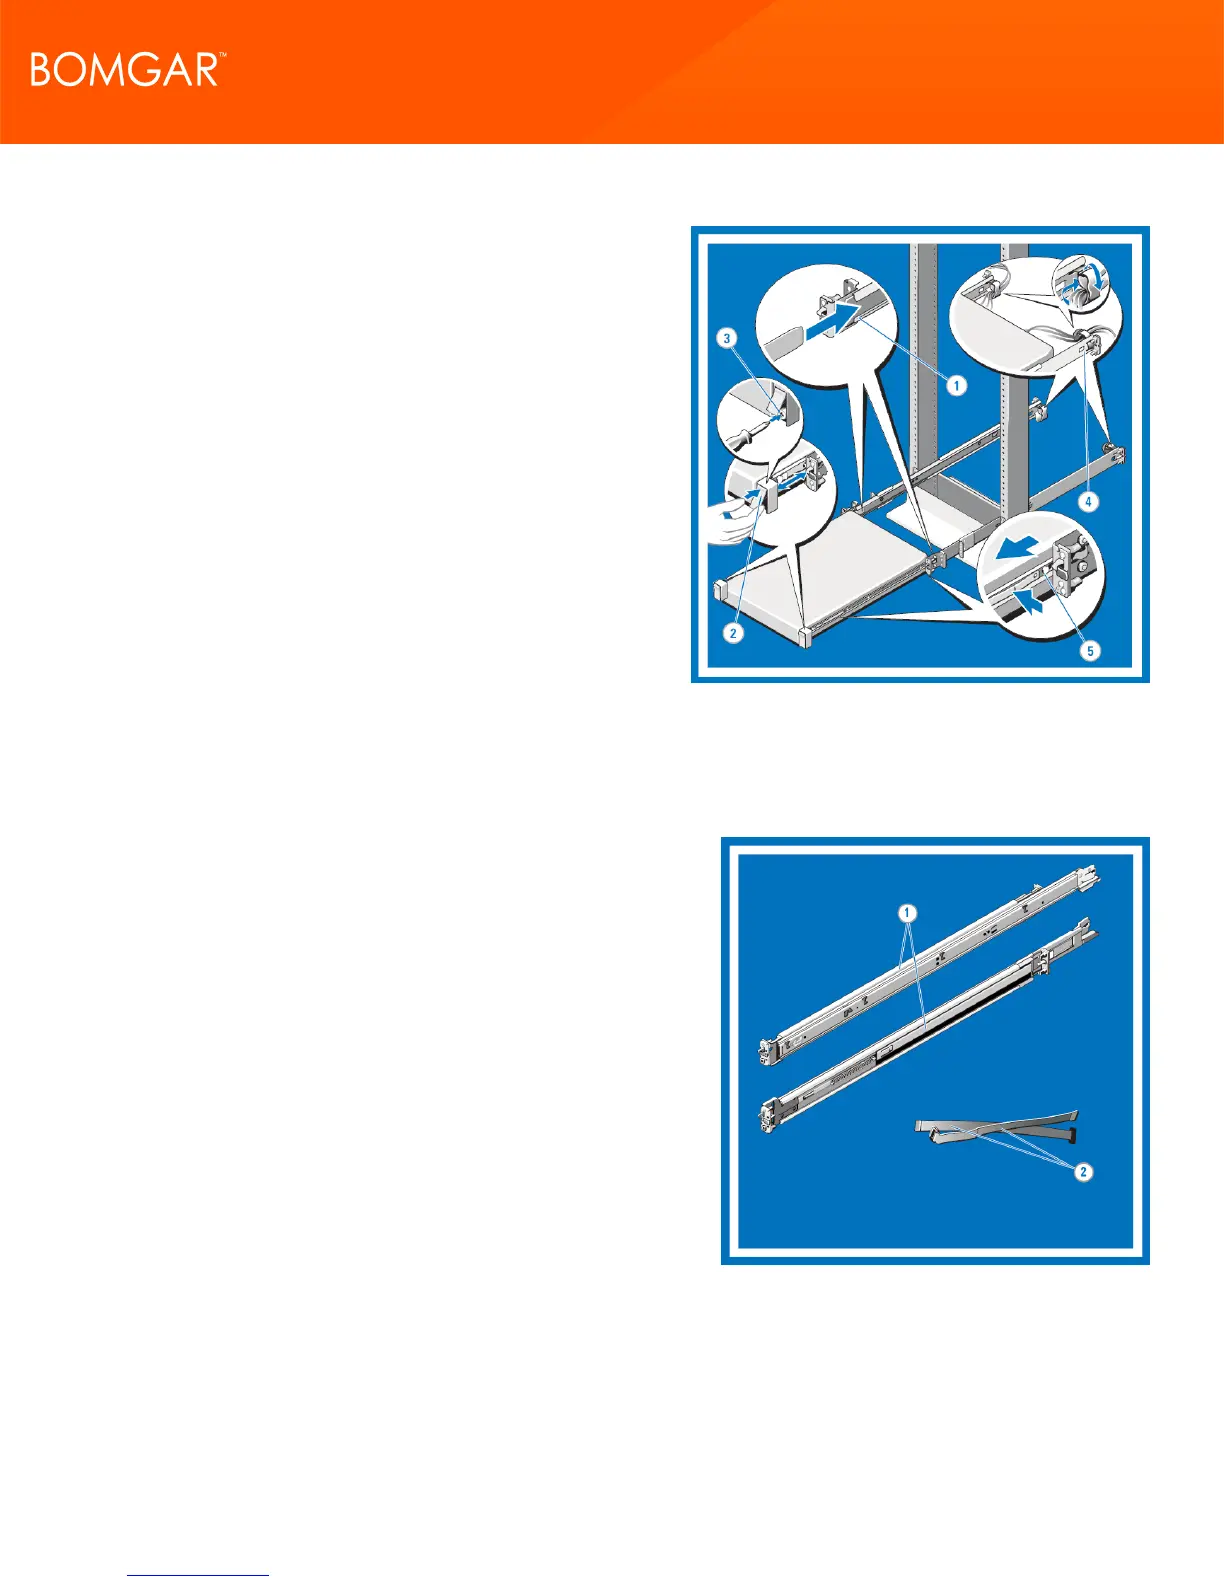
Insert the ends of the chassis rail members into the front of the
static rails and push the system into the rack.
For tool-less four-post racks and center-mount two-post
configurations, the slam latches engage automatically as the
system is pushed into the rack.
To secure the system for shipment in the rack or for other
unstable environments, locate and tighten the hard-mount
screw under each latch.
Bundle the system cables, pulling them clear of the system
connectors to the left and right sides. Secure the bundles by
threading the Velcro straps through the tooled rail slots.
To remove the system from the rack, pull the system out of the
rack until
the rails lock into place. The lock position is intended to provide
the opportunity to reposition the grip for removal, it is not
intended for service. Locate the blue tabs on the sides of the
chassis rail members. Push the tabs inward and continue pulling the system until the chassis rail members are completely
clear of the rails.
Install the Bomgar B300 or B400 Appliance in Your Server Rack
1. Identifying the Rail Kit Contents
Locate the components for installing the rail kit assembly:
l Two A7 Dell ReadyRails II sliding rail assemblies (1)
l Two hook and loop straps (2)
CONTACT BOMGAR info@bomgar.com | 866.205.3650 (US) | +44 (0) 1628 480 210 (UK/EMEA) BOMGAR.COM 10
© 2017 Bomgar Corporation. All rights reserved worldwide. BOMGAR and the BOMGAR logo are trademarks of Bomgar Corporation; other trademarks shown are the property of their respective owners. TC: 1/11/2018
REMOTE SUPPORT APPLIANCE INSTALLATION