Maintenance Section 5
5-1
SECTION V
MAINTENANCE
5-1. INTRODUCTION.
5-2. This section contains the safety requirements,
required test equipment, and procedures for cleaning,
removal and replacement, inspection, performance test,
and adjustment for the Model 1121A Audio Analyzer.
5-3. SAFETY REQUIREMENTS.
5-4. Although this instrument has been designed in
accordance with international safety standards, general
safety precautions must be observed during all phases of
operation, service and repair of the instrument. Failure to
comply with the precautions listed in the Safety Summary
at the front of this manual or with specific warnings given
throughout this manual could result in serious injury or
death. Service and adjustments should be performed only
by qualified service personnel.
5-5. REQUIRED TEST EQUIPMENT.
5-6. Test equipment required for the performance tests,
adjustments and troubleshooting is listed in Table 5-1.
Any equipment that satisfies the critical specifications in
the table may be substituted for the recommended
models. However, the performance tests are based on
the assumption that the recommended test equipment is
used.
5-7. CLEANING PROCEDURE.
5-8. Painted surfaces can be cleaned with a commer-
cial, spray-type window cleaner or with a mild soap and
water solution.
Avoid the use of chemical cleaning agents which might
damage the plastics used in the instrument.
Recommended cleaning agents are isopropyl alcohol, a
solution of 1 part kelite and 20 parts water, or a solution of
1% mild detergent and 99% water.
5-9. REMOVAL AND REPLACEMENT.
5-10. Instrument Covers. Remove the instrument
covers as follows:
a. Disconnect the power cord and all signal cables
from the instrument.
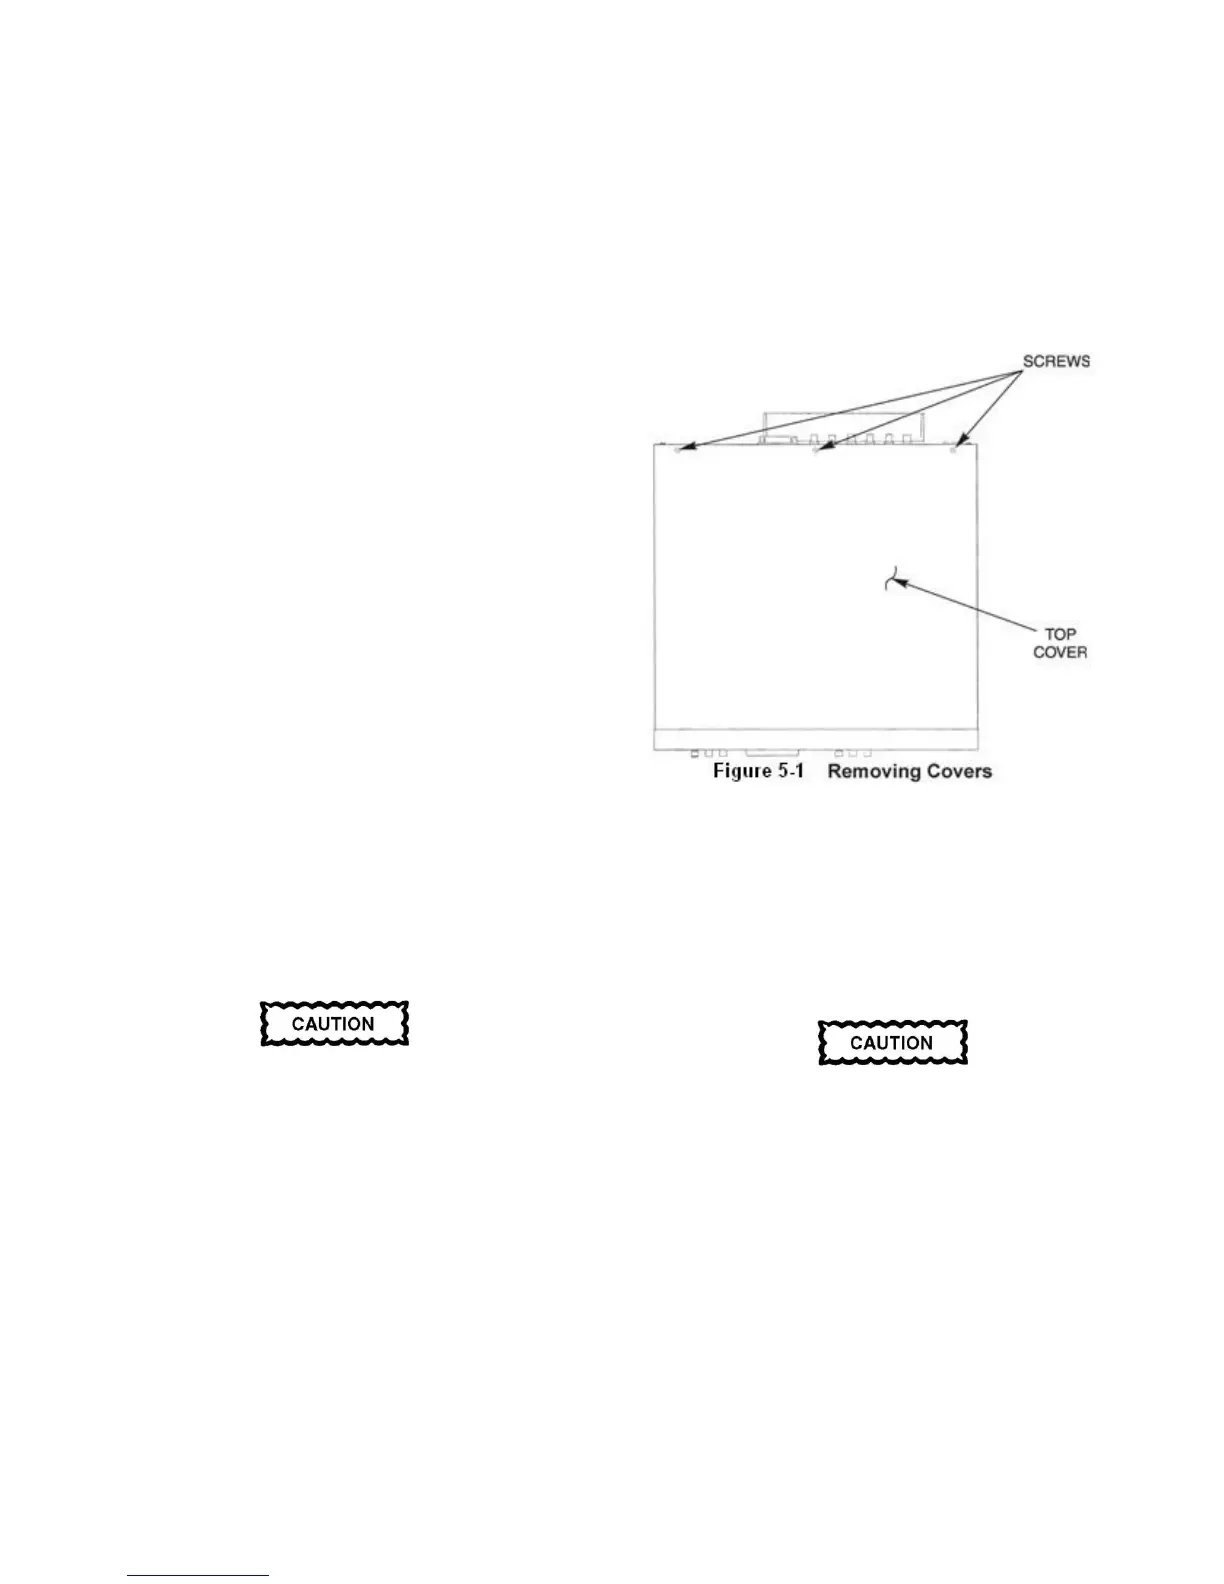
b. Remove the three screws located at the rear of the
cover (Figure 5-1) and slowly lift the cover up and to the
rear.
c. Turn the unit over and remove the bottom cover in
the same manner as the top cover was removed.
d. To replace the covers, reverse the removal
procedure.
5-11. Display/Keyboard Access. To gain access to
the display and keyboard proceed as follows:
a. Remove the instrument covers as described in
paragraph 5-10.
b. Remove the three screws that hold the top trim
extrusion and remove the trim strip (Figure 5-2).
When removing the display window be careful not to
scratch the inner surface of the window.
c. Remove the plastic display window.


 To Next Page