Maintenance Section 5
5-23
5-50. ADJUSTMENTS.
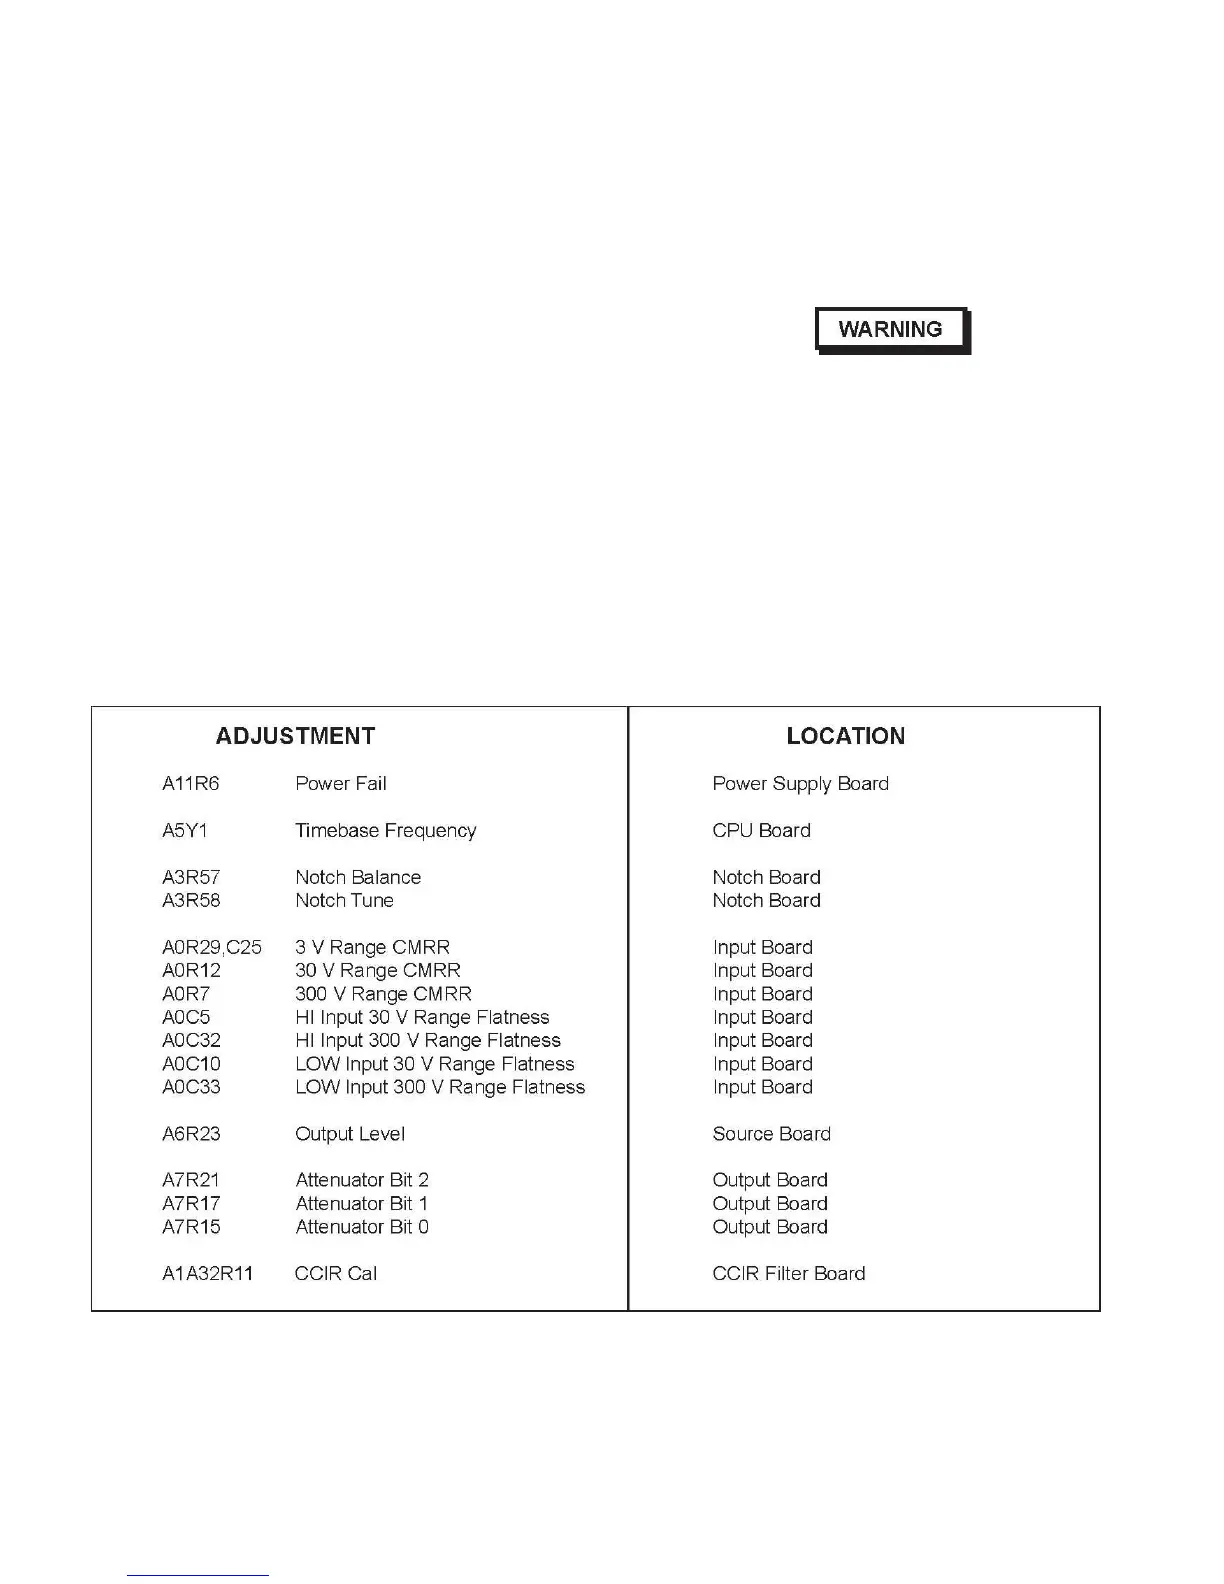
5-51. The Model 1121A adjustments are listed in Table
5-22. Test equipment required for the adjustments is
listed in Table 5-1.
5-52. A11 Power Supply Adjustment.
5-53. The power supply has only one adjustment which is
the power supply Power Fail Adjustment. The Power
Fail Adjustment sets the low line trip level that interrupts
the processor operation until the proper AC voltage is
applied.
5-54. A11R6 Power Fail Adjustment. Perform the
adjustment as follows:
a. Disconnect all power to the Audio Analyzer and
remove the top cover.
b. Set the rear panel line voltage switch to the
appropriate voltage.
c. Verify that the line fuse is the proper value as listed
on the LINE VOLTAGE SELECT chart located on the rear
panel.
d. Connect the variac to an appropriate power
source and adjust for a line indication of nominal -10%
(90, 108, 200 or 216 volts).
There are voltages at various points in the instrument
which can, if contacted, cause personal injury. Observe
all safety precautions.
e. Connect the Audio Analyzer power cord to the
variac and set the LINE ON/OFF switch to ON.
f. Observe the display and adjust A11R6 clockwise
until the display just blanks, then slowly counterclockwise
until the display returns.
TABLE 5-22. LIST OF ADJUSTMENTS.


 To Next Page