27 of 76
4.0 Hardware Installation
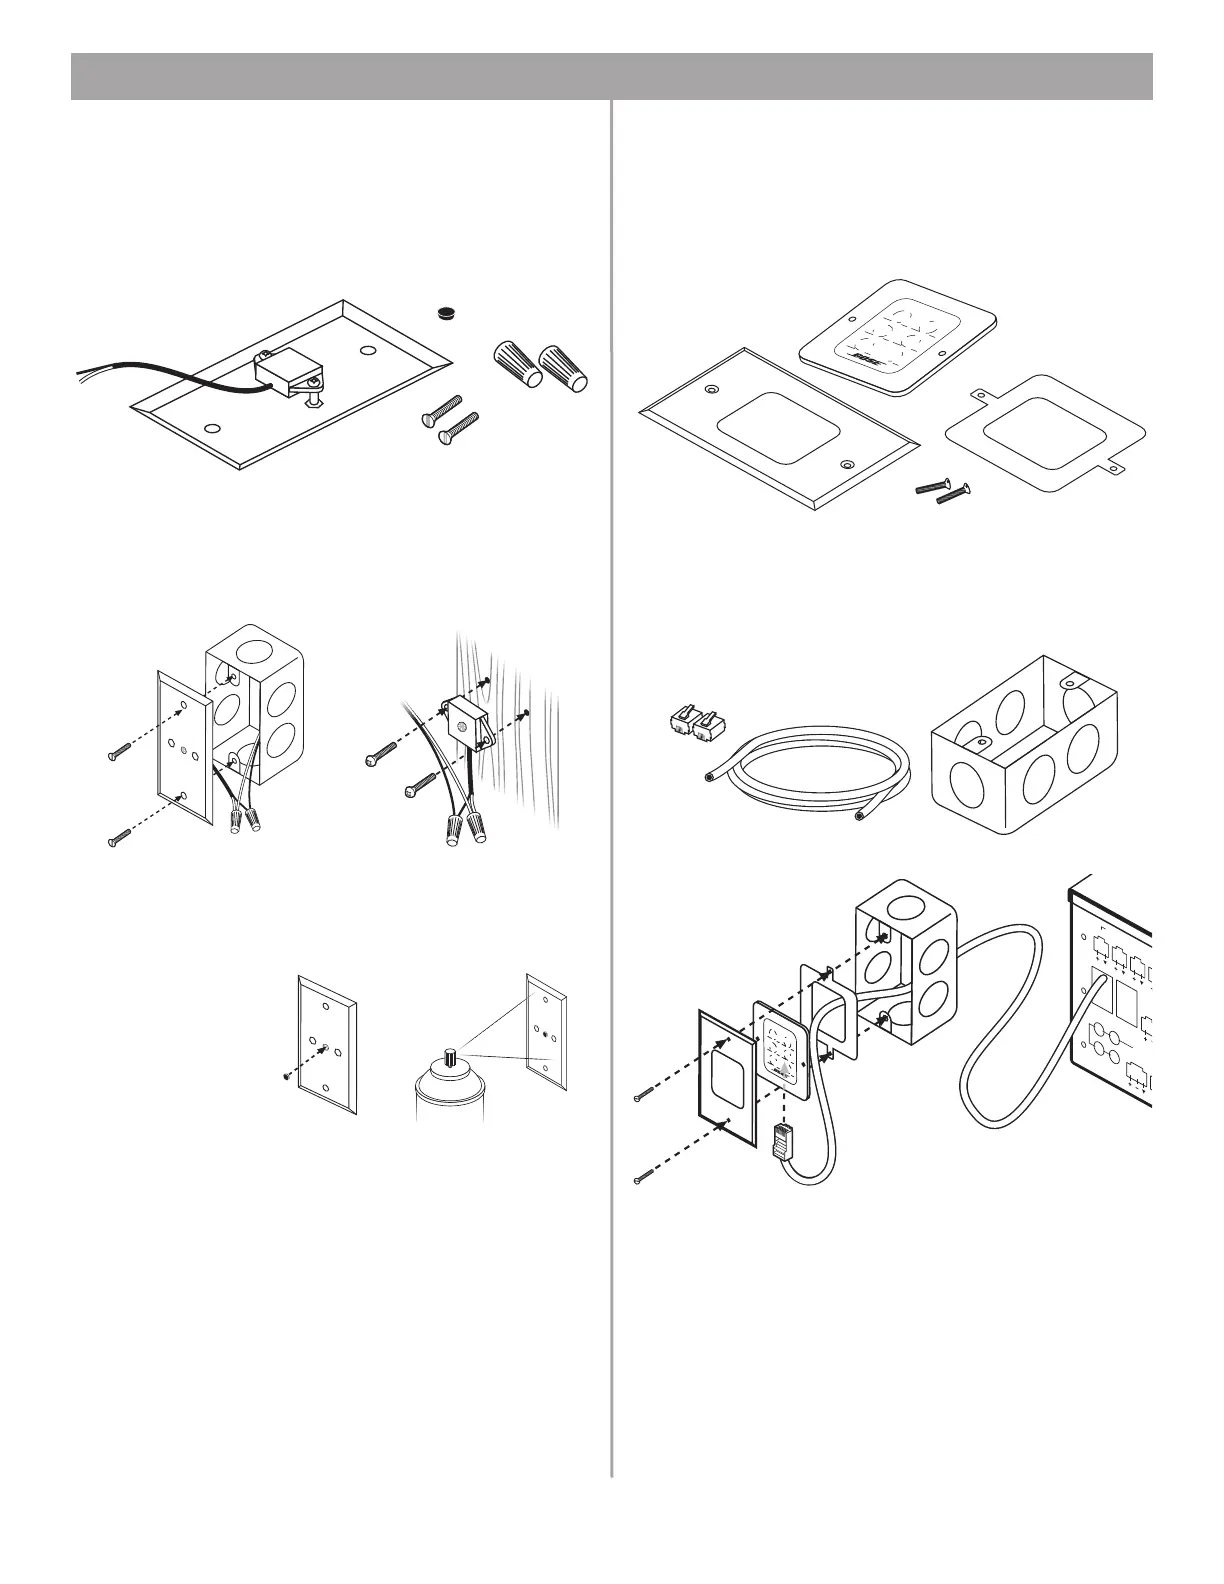
4.6 Installing accessories
4.6.1 Sensing microphones
Required accessory:
FreeSpace
®
E-4 System Auto Volume Mic Kit [PC029859 (U.S.),
PC029860 (Euro)]
Microphone installation:
The wall plate-microphone assembly can be installed using a
junction box, or the microphone can be removed from the wall
plate and mounted directly on a flat surface.
Recommended wire length:
Up to 2000 feet (610 m) max., 24 AWG (0.2 mm
2
) shielded twisted
pair (shield tied to minus at E-4, floated at sense mic).
Painting:
Before painting the wall
plate, install the sup
-
plied temporary plug
over the microphone
opening. Remove the
plug when finished.
Mounting locations:
For mounting instructions, see “Mounting guidelines for sensing
microphones” on page 15.
4.6.2 User interfaces
Required accessory: FreeSpace E-4 System User Interface Kit
[PC029856 (U.S.), PC029857 (Euro)] or
FreeSpace E-4 Auto Volume Interface Kit
[PC030101 (U.S.), PC030102 (Euro)]
Required additional equipment (not supplied):
Assembly:
Wall plate-microphone
assembly
(2) #6-32 (3 mm) screws
(2) Wire nuts
Temporary plug
Junction box installation Surface mounted mic
A
Wall plate
B
Keypad
C
Back plate
D
#6 x 32 (3 mm) screws
E
RJ45
connectors
F
Cat 5 cable
(with 4 twisted pairs)
G
Single-gang
electrical box
SENSE MICROPHONES
ZONE 1 ZONE 2 ZONE 3 Z
WALL PLATE CONNECTIONS
REM
ON/O
LINE 2
AUX MIC/
LINE 3
1
3
2
4
LINE 1
AUDIO S
A
B
C
D
E
F
G