Do you have a question about the Bose SoundTouch 30 Series III and is the answer not in the manual?
Details electrical input and output ratings.
Provides acoustic parameters including driver sizes and impedance.
Outlines the physical dimensions, weight, and enclosure type.
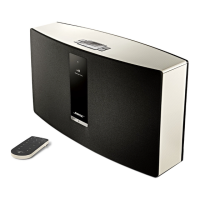
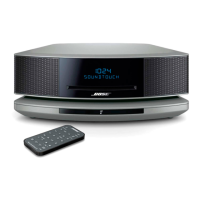
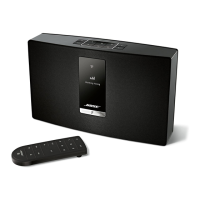
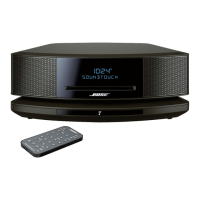
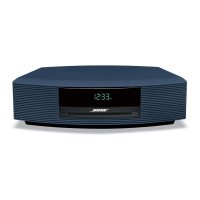
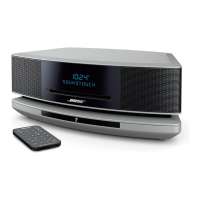
Describes the SoundTouch 30's features, connections, and design.
Details the included remote control and its battery.
Explains how to update the system's software.
Outlines the procedure to restore the unit to factory settings.
Lists all resistor components with part numbers.
Lists all capacitor components with part numbers.
Lists all integrated circuit components with part numbers.
Lists all inductor components with part numbers.
Lists all diode components with part numbers.
Lists all transistor components with part numbers.
Lists various other electrical components.
Step-by-step guide for removing the product's grille.
Instructions for removing the rear cover of the unit.
Procedure to detach the left and right end caps.
Steps to remove the top cap assembly.
Guide to detach and remove the button board.
Steps to disconnect and remove the SoundTouch Common Module.
Instructions for removing the power supply PCB.
Guide for removing the I/O PCB.
Detailed steps for removing the woofer assembly.
Instructions for correctly installing the top cap.
Steps for installing the end caps properly.
Guide for installing the front grille.
Procedure for securing the rear cover.
Procedure to check for air leaks around the Twiddler speakers.
Method to test for air leaks around the woofer.
Test to verify correct operation of left and right drivers.
Procedure to test for extraneous noises during frequency sweep.
Lists the necessary hardware for TAP command setup.
Identifies required software for TAP command setup.
Guide for setting up Tera Term for USB terminal communication.
Steps for configuring Tera Term for serial communication.
Procedure to set the Wi-Fi country code for frequency compliance.
Steps to set the region code for power level compliance.
How to set the product variant (e.g., SoundTouch 30).
Procedure to program the unit's serial number.
Instructions to set the product's variant mode.
Method to check the current system settings.
Guide to load end-user software onto the Wi-Fi PCB.
Steps to set up Wi-Fi functional testing using TAP commands.
Procedure for connecting the unit to a Wi-Fi router.
Steps to test the Wi-Fi module's functionality and demo mode.
Command to perform a factory default reset on the unit.
Procedure to test the functionality of the IR remote control buttons.
Steps to test each button on the unit's keypad.
Guide to test the USB port for device recognition.
Procedure to test the micro USB port connection.
Steps to verify the functionality of the Ethernet connector.
Procedure to set the product variant using TAP commands.
Steps to set the country code for Wi-Fi channel selection.
How to set the region code for Wi-Fi power output.
Procedure to program the serial number into the unit.
Steps to connect the unit to a Wi-Fi router using TAP commands.
Procedure to play audio from a demo URL using TAP commands.
Steps to enter manufacturing mode using TAP commands.
TAP commands to set the Wi-Fi country code.
TAP commands to set the product variant.
TAP commands to set the unit's serial number.
Command to display the system's software version.
TAP commands to test the OLED display sections.
TAP command to perform a factory default reset.
Key presses to access system information like MAC addresses and serial number.
Key press sequence to reset the system to factory defaults.
Key presses to initiate a software update.
Key presses to enter Wi-Fi setup mode.
Key presses to manage network connectivity.
Mandatory safety test for electrical leakage after repair.
Detailed steps for performing the Hi-Pot electrical safety test.
| Included Remote | Yes |
|---|---|
| Connectivity | Wi-Fi, Bluetooth, Ethernet |
| Audio formats supported | MP3, WMA, AAC, Apple Lossless |
| Inputs | 3.5mm auxiliary input |
| Power Source | Internal |
| Compatibility | Amazon Alexa |
| Audio Output | Stereo |