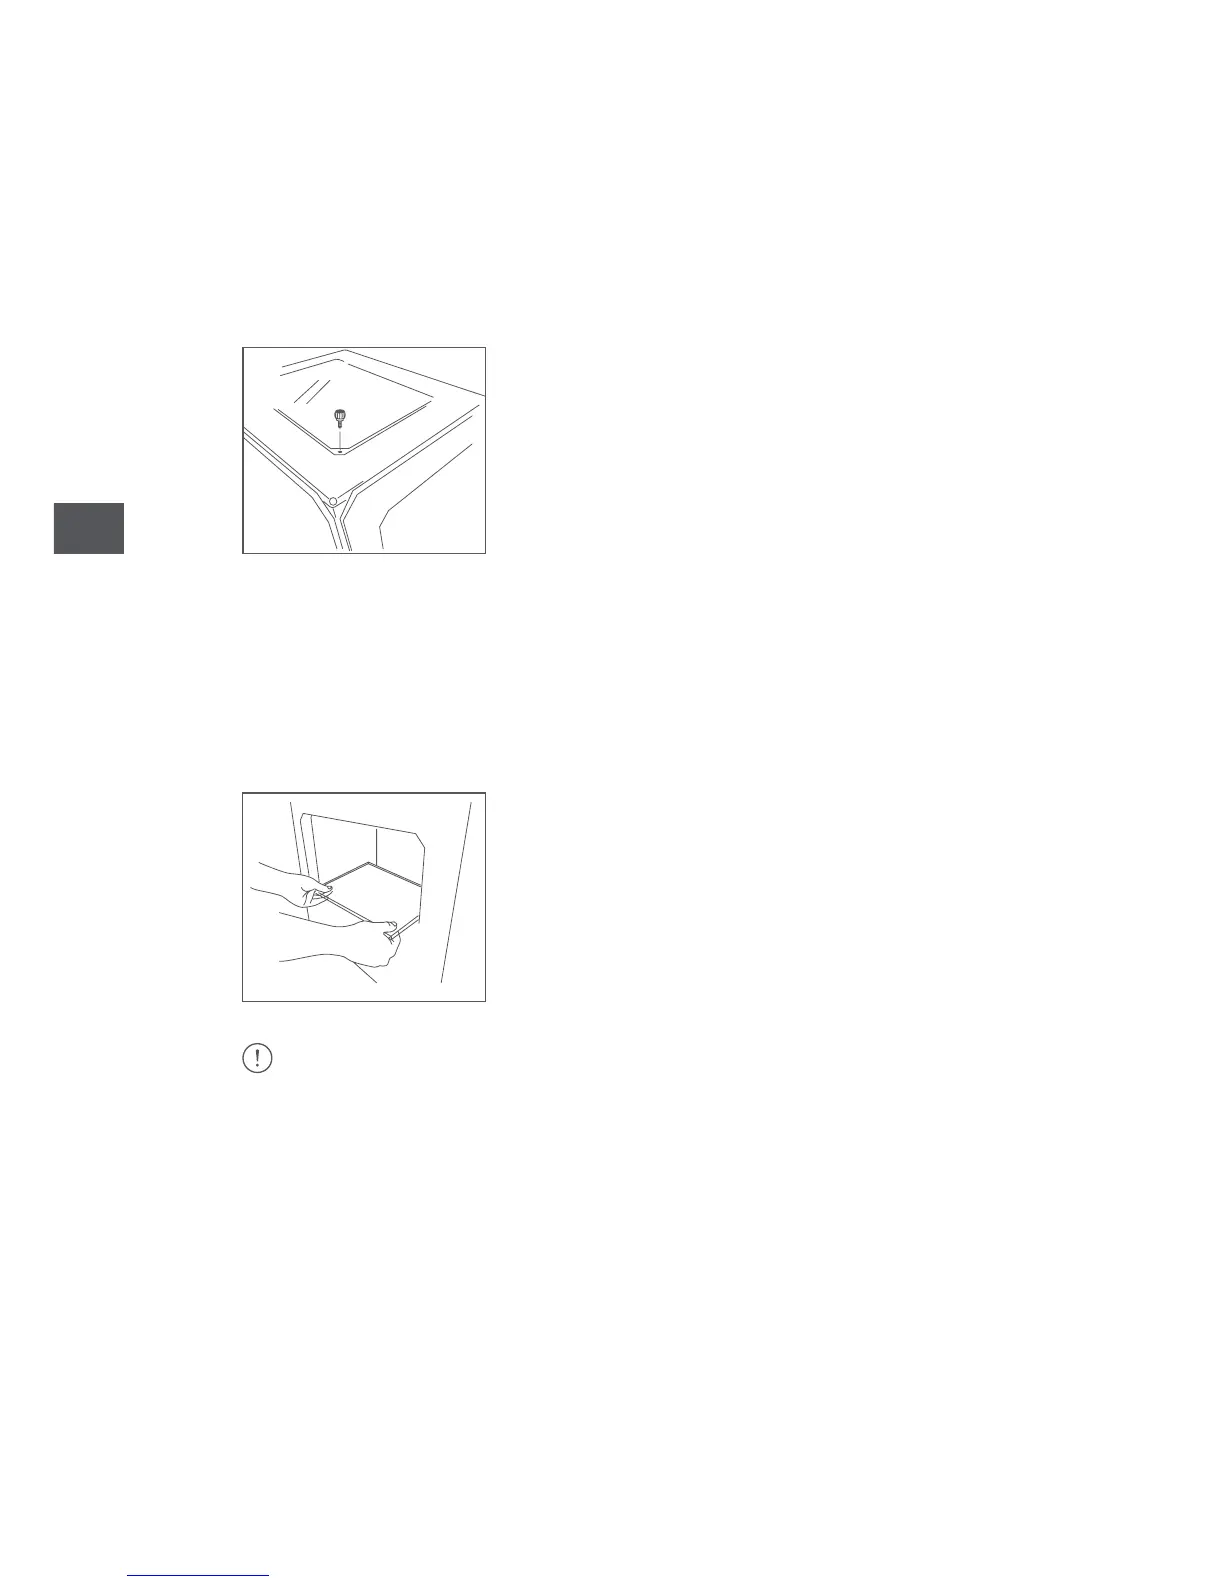
Attaching the top panel
Remove the plastic protectors from each side of the top panel.
Place the panel on top of the Witbox 2. You will find four screws in the accessories
box. Place them into the holes in the corners and tighten them by hand.
Inserting the print bed
You will find the print bed in the box of accessories. Place it gently on the support
inside the printer, ensuring that the methacrylate and the magnets are facing
downwards, as shown in the diagram.
Handle the print bed with care.