Checking the print
Once the printing process has been completed, open the safety door and remove
the print bed. Place it onto a table for support and then remove the pieces by
pulling firmly, or use the spatula provided in the accessories box to assist you.
You can now check that both pieces match and fit together with the test pieces
included with your Witbox 2.
General Configuration.
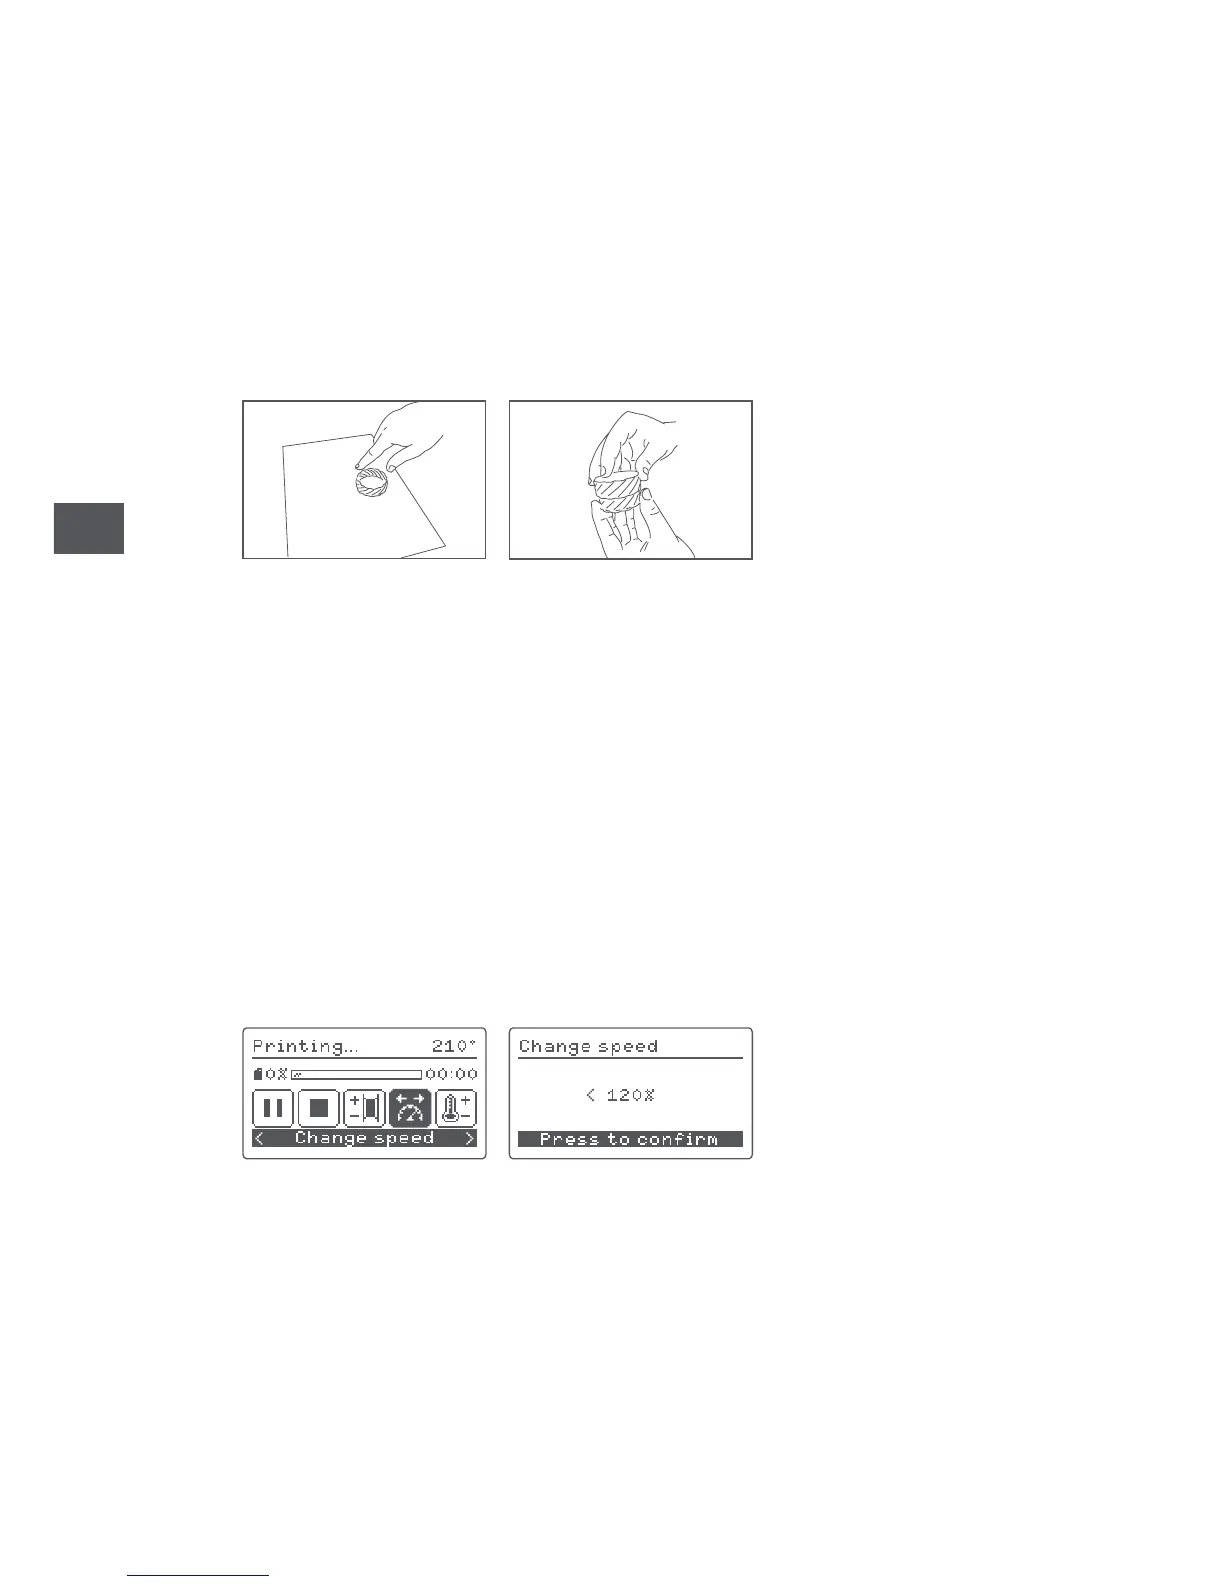
Customising the speed during printing
You can adjust the speed during printing by pressing Change speed. This option
enables you to set the percentage of the initial value that you want it to print. It is
set at 100% by default. Take care when changing it, as any increase or decrease
will modify the values of all speeds within the .gcode that you are printing.
Changing the filament and the temperature during printing
You can change the filament during printing by pressing Change filament and
adjust the temperature under Temperature.