Brent 1082/882 — Maintenance
4-6
Auger System (continued)
Lower Auger Assembly (continued)
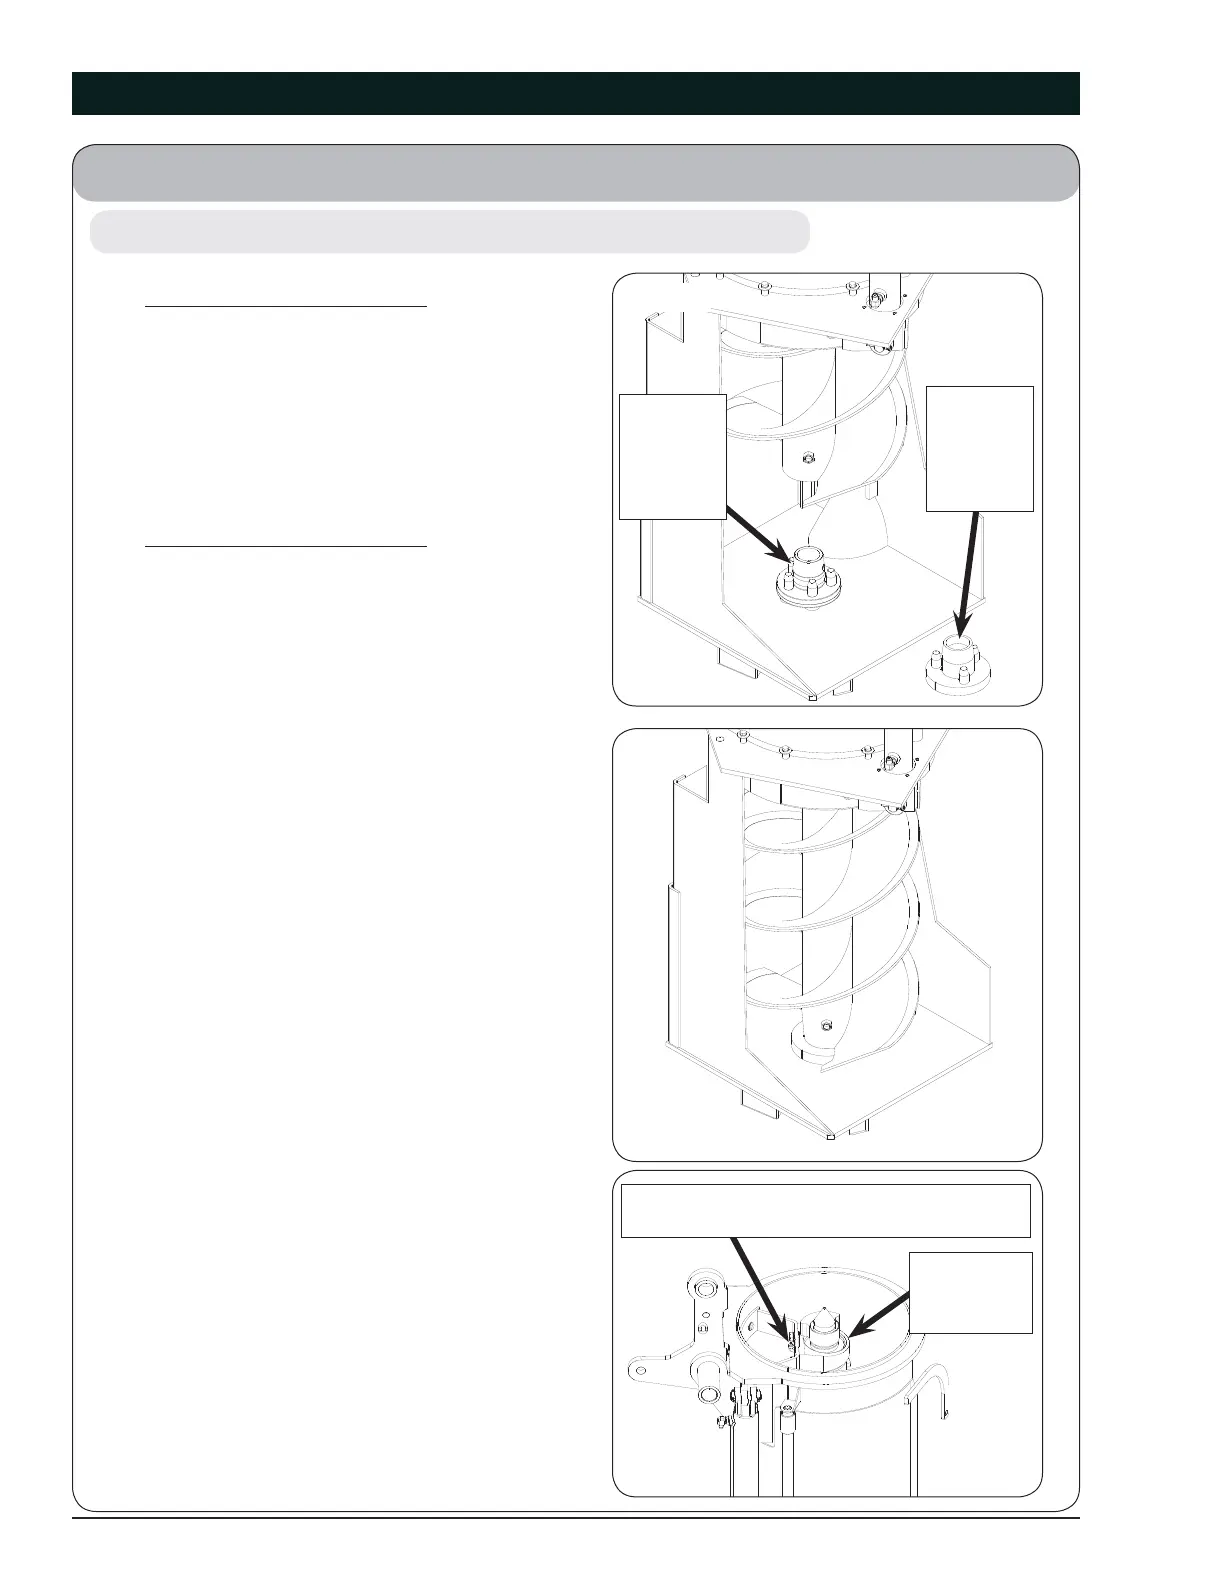
4. 5-Pin Drive Bushing Weldment:
Rotate auger 360 degrees to ensure it is cen-
tered on the drive bushing weldment (286436)
and the fi ve pins are engaged with auger end.
Check for fl ighting interference or binding
along housing and at lower end. A portion of
fl ighting may need to be removed from lower
end of auger to ensure operational clearances.
(Fig. 4-4 & Fig. 4-5)
3-Pin Drive Bushing Weldment:
Rotate auger 360 degrees to ensure it is cen-
tered on the drive bushing weldment (284296)
and the three pins are engaged with auger
end. Check for fl ighting interference or binding
along housing and at lower end. A portion of
fl ighting may need to be removed from lower
end of auger to ensure operational clearances.
(Fig. 4-4 & Fig. 4-5)
5. Raise the upper auger into position, checking
upper drive dog engagment with lower auger
drive dog.
6. Lower the upper auger. Lubricate the pillow
block bearing (9004731) (Fig. 4-6). Check and
remove any loose parts in the auger tube inte-
rior prior to start-up.
Pillow Block
Bearing
(9004731)
Grease Zerk (93426), 90° Elbow (9004764),
and Grease Nipple (9004765) Assembly
(April 2015)
Drive
Bushing
Weldment
(286436)
5-Pin
Fig. 4-4
Fig. 4-5
Fig. 4-6
Drive
Bushing
Weldment
(284296)
3-Pin


 To Next Page