84
UTILITY STITCHES — — — — — — — — — — — — — — — — — — — — — — — — — — — — — — — — — — — — — — — — — — —
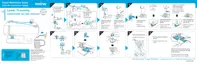
Zipper Insertion
A zipper can be sewn in place.
There are many methods for inserting zippers. The procedures for inserting a centered zipper and a side
zipper are described below.
Inserting a centered zipper
Stitching is sewn on both pieces of fabric butted
against each other.
a Right side of fabric
b Stitching
c End of zipper opening
a
Attach zigzag foot "J".
b
Sew straight stitches up to the zipper opening.
With the right sides of the fabric facing each
other, sew reverse stitches after reaching the
zipper opening.
• For details, refer to "Basic stitching" (page
73).
c
Using a basting stitch, continue sewing to the
edge of the fabric.
a Basting stitching
b Reverse stitches
c Wrong side of fabric
d End of zipper opening
d
Press open the seam allowance from the
wrong side of the fabric.
a Wrong side of fabric
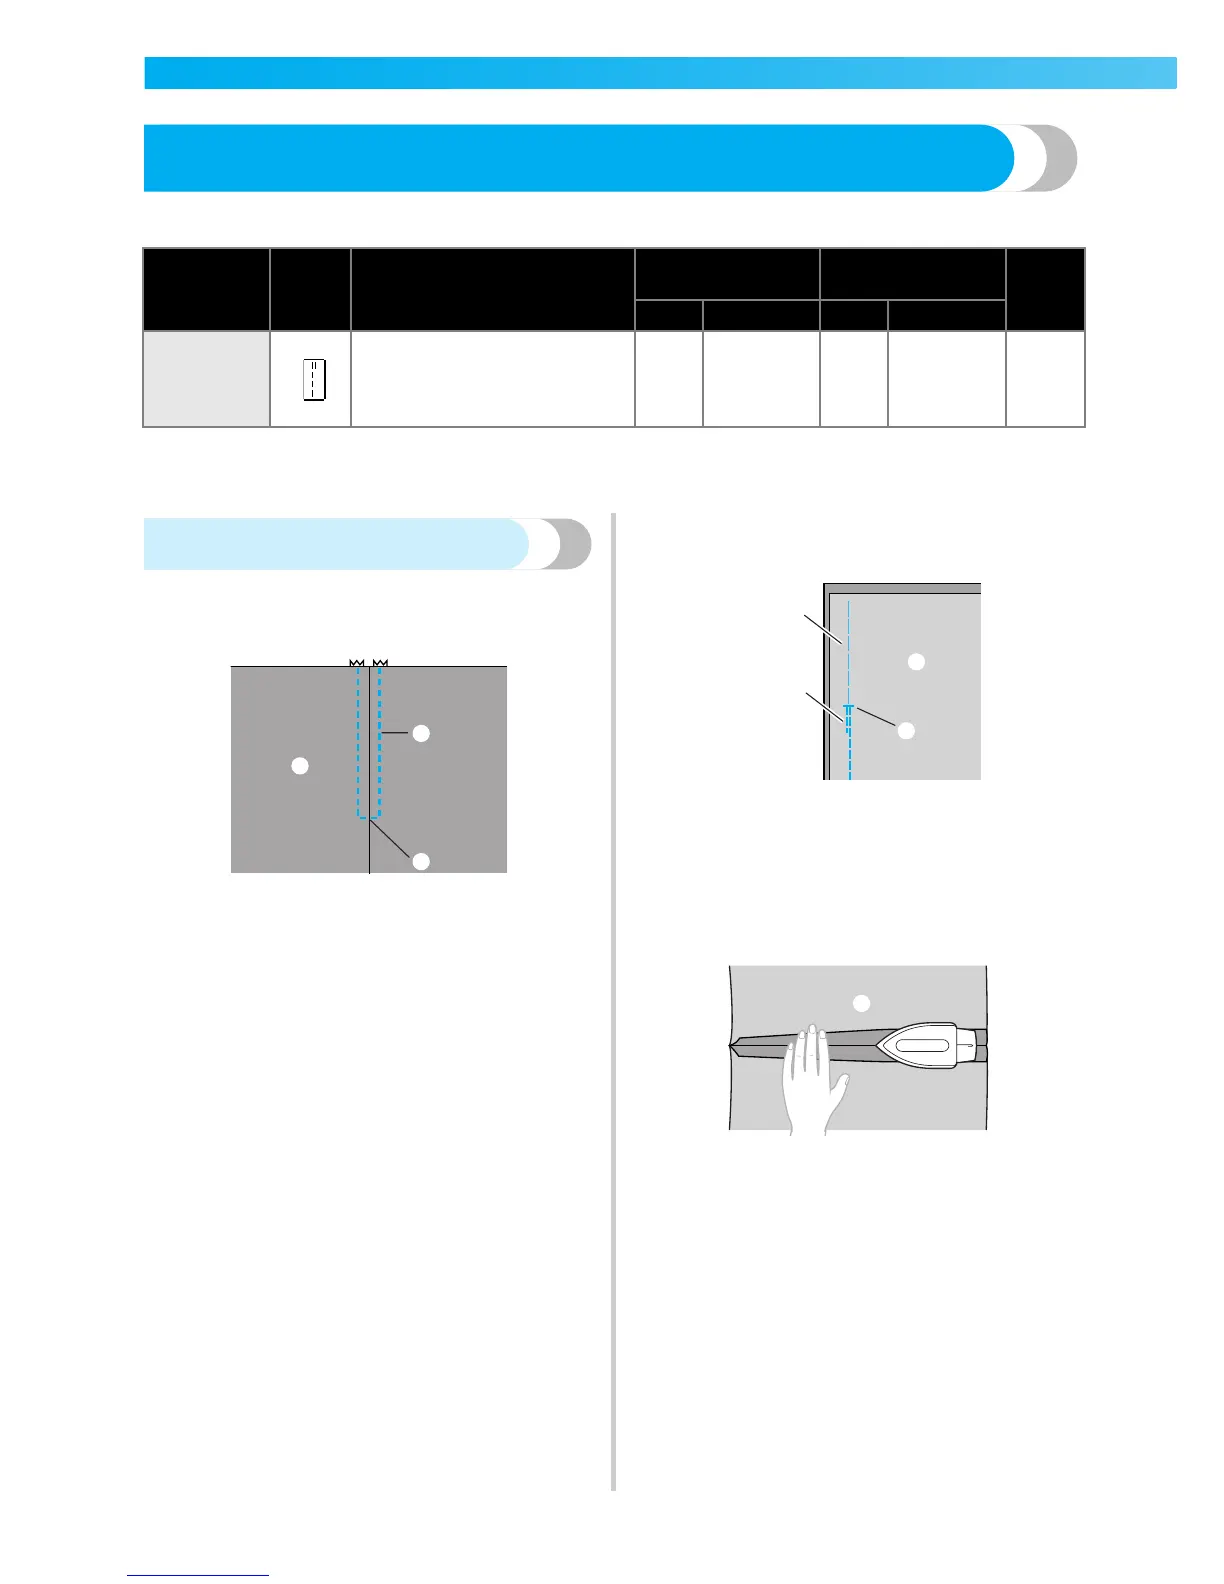
Stitch Name Pattern Application
Stitch Width
[mm (inch.)]
Stitch Length
[mm (inch.)]
Presser
Foot
Auto Manual Auto Manual
Straight stitch
(center
needle
position)
3
Attaching zippers
Sewing concealed seams and
pintucks
––
2.5
(3/32)
0.2–5.0
(1/64–3/16)
I
1
2
3
1
2
3
4
1

 Loading...