Level 1 Level 2 Level 3 Descriptions
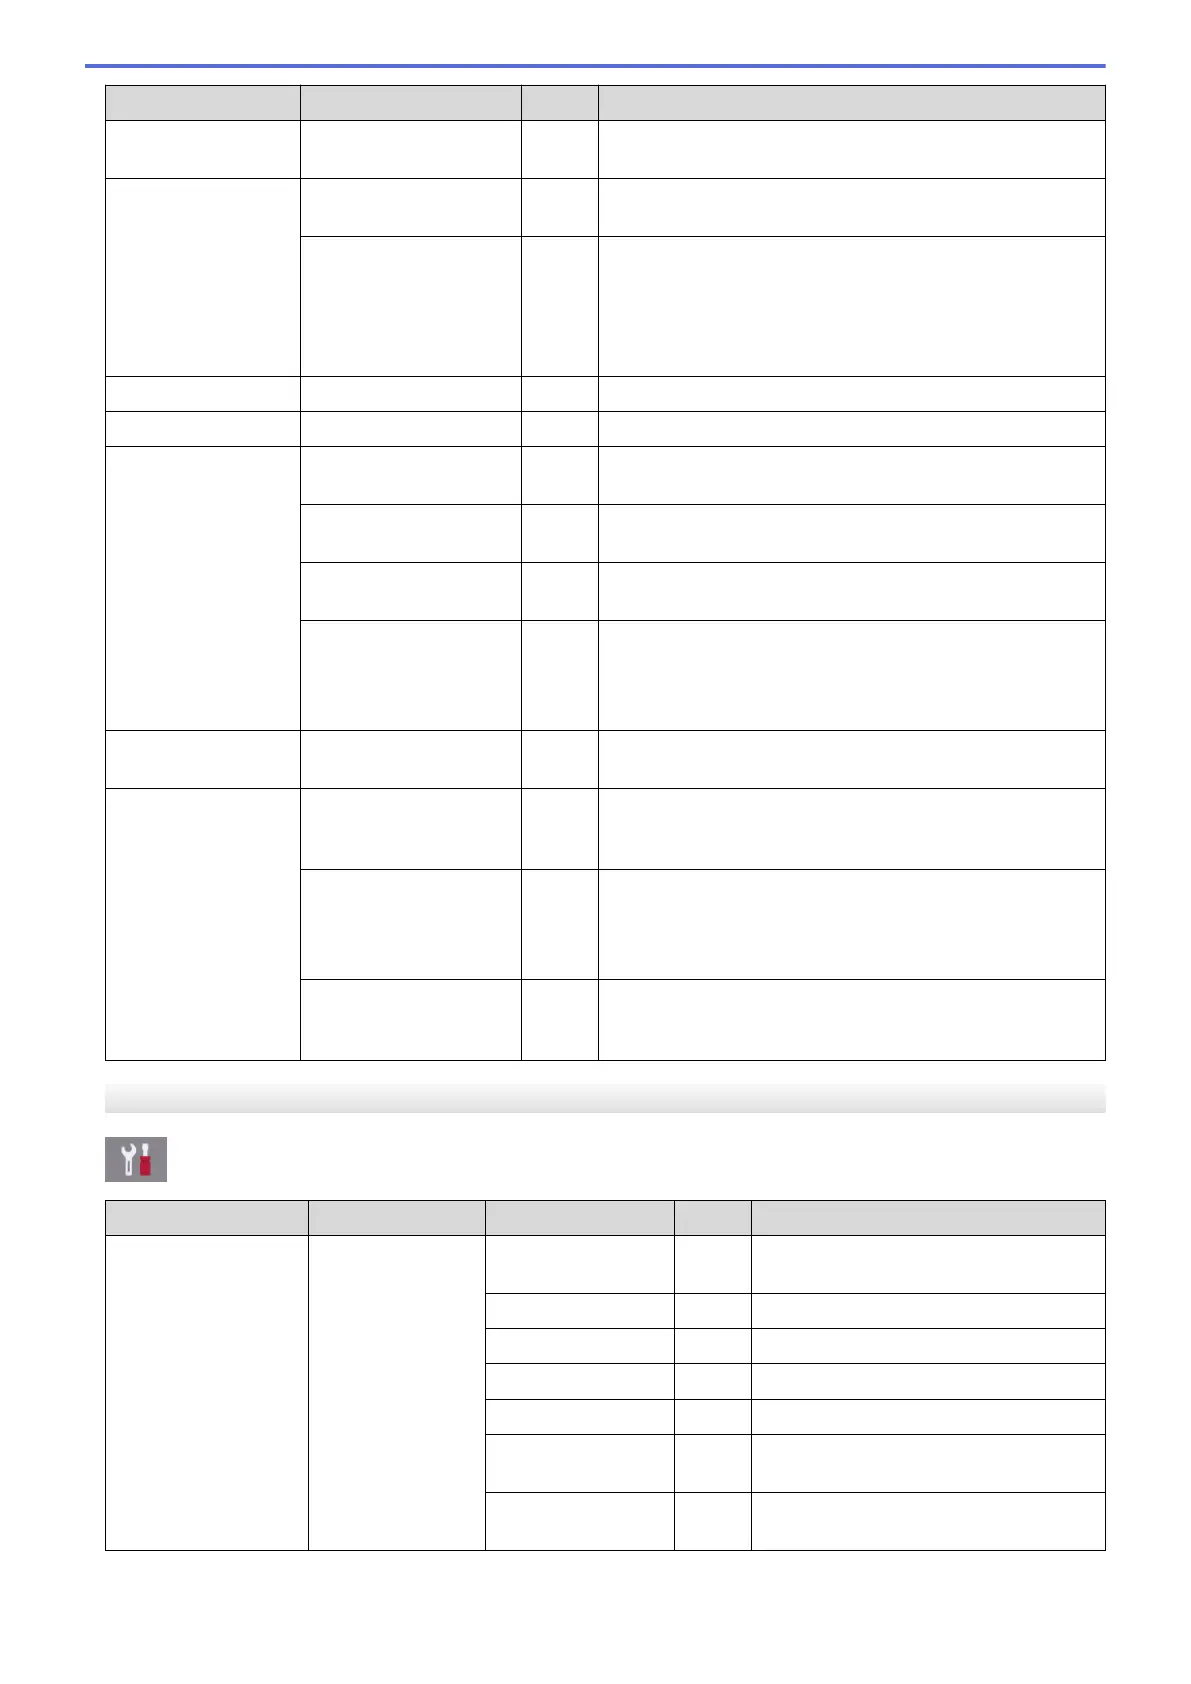
Setup Receive Fax Rx Stamp
- Print the received time and date on the top of received
faxes.
Report Setting XMIT Report
- Select the initial setup for the Transmission Verification
Report.
Journal Period
- Set the interval for automatic printing of the Fax Journal.
If you select an option other than Off and Every 50 Faxes,
you can set the time for the option.
If you select Every 7 Days, you can set the day of the
week.
Print Document
- - Print received faxes stored in the machine's memory.
Remote Access
- - Set your own code for Remote Retrieval.
Dial Restriction
(MFC-J1300DW)
Dial Pad
- Set the machine to restrict dialling when using the dial
pad.
Address Book
(MFC-J1300DW)
- Set the machine to restrict the dialling when using the
Address Book.
Shortcuts
(MFC-J1300DW)
- Set the machine to restrict the dialling when using a
Shortcut.
LDAP Server
(MFC-J1300DW)
(Available only for some
countries.)
- Set the machine to restrict dialling when using LDAP
search.
Remaining Jobs
- - Check which scheduled jobs are in the machine's memory
and cancel selected jobs.
Miscellaneous Distinctive
(For some countries)
- Use with telephone company distinctive ringing service
allows you to have a voice number and fax number on the
one phone line.
FaxAbility
(For New Zealand only)
- If you have FaxAbility from Telecom, use this function to
store the ringing pattern of your fax number.
And if you set in to On, you should use the registered
number only.
Call Waiting
(For New Zealand only)
- If you have Call Waiting service, use this function to
answer second call when you are on the phone and
someone rings you.
[Network]
[Settings] > [All Settings] > [Network]
Level 1
Level 2 Level 3 Level 4 Descriptions
Wired LAN
(MFC-J1300DW)
TCP/IP BOOT Method
- Select the Boot method that best suits
your needs.
IP Address
- Enter the IP address.
Subnet Mask
- Enter the Subnet mask.
Gateway
- Enter the Gateway address.
Node Name
- Enter the Node name.
WINS
Configuration
- Select the WINS configuration mode.
WINS Server
- Specify the IP address of the primary or
secondary WINS server.
608
 Loading...
