Do you have a question about the Brother MFC MFC-790CW and is the answer not in the manual?
Steps to unpack the machine and verify all included components are present.
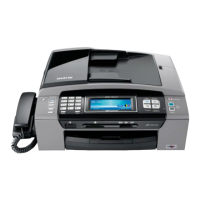
Connect the curled handset cord to the handset for the MFC-790CW model.
Steps to pull out, open, and adjust the paper tray guides for loading paper.
Instructions for fanning paper, inserting it correctly, and closing the paper tray.
Connect the power cord to the machine and outlet, and the telephone line to the LINE jack.
Prepare, release seal, match lever color, and install ink cartridges following the arrow.
Gently push ink cartridges until they click and close the ink cartridge cover.
Check printed color blocks, confirm clarity, and initiate cleaning for any issues.
Access Initial Setup and Local Language options to select the desired language.
Navigate menus to select Fax Only, Fax/Tel, or Manual receive mode based on usage.
Record outgoing message and activate the Message Center mode.
Navigate General Setup and LCD Settings to adjust contrast and display settings.
Input the year, month, day, and time using the touchscreen interface.
Input fax number and name for printing on fax pages via Initial Setup.
Access Initial Setup to select between Tone or Pulse dialing modes.
Configure General Setup to automatically adjust for daylight savings time.
Fill out the registration sheet, enter fax number, and place sheet in ADF or on scanner.
Install battery, slide cover, and charge handset in cradle for at least 12 hours.
Set the country for correct operation on local telecommunication lines.
Navigate menus to select the language for the cordless handset's LCD.
Choose a location considering temperature, environment, and interference.
Choose between USB, Wired Network, or Wireless Network connection types.
Ensure computer is ON, logged in as Administrator, with no memory cards or USB drives inserted.
Insert CD, choose model/language, and click 'Install MFL-Pro Suite' to begin.
Select 'Local Connection', follow prompts, and accept license agreements.
Connect cable to machine's USB socket and PC, routing it through the trench.
Connect the power cord to the machine to proceed with the installation process.
Click 'Finish' to restart the computer and finalize the software installation.
Ensure Mac is ON, logged in as Admin, with no memory cards or USB drives inserted.
Connect cable to machine's USB socket and Mac, routing it through the trench.
Launch installer, choose connection, select model, add it, and then quit Print Center.
Double-click the Presto! PageManager icon and follow the installation instructions.
Ensure computer is ON, logged in as Admin, and temporarily disable firewalls.
Connect the network cable to the LAN socket inside the machine.
Route cable, connect to network, and close the scanner cover.
Connect the power cord to the machine to begin the installation process.
Insert CD, launch installer, and accept license agreements for PaperPort and MFL-Pro Suite.
Select 'Wired Network Connection', click Next, and adjust firewall for network access.
Follow registration steps, then click 'Finish' to restart and complete setup.
Ensure Mac is ON, logged in as Admin, and has correct network interface settings.
Connect the network cable to the LAN socket inside the machine.
Route cable, connect to network, and close the scanner cover.
Insert CD, launch 'Start Here OSX', choose 'Wired Network', and proceed.
Select machine, choose XXX-XXXX, add it, and then quit Print Center.
Double-click the Presto! PageManager icon and follow the installation instructions.
Prepare to configure wireless settings by ensuring the machine communicates with the access point.
Write down SSID, authentication type, and WEP/WPA keys from your router/access point.
Select SecureEasySetup, Wi-Fi Protected Setup, or AOSS for one-push wireless setup.
Access Network > WLAN > Setup Wizard and select Yes to start.
Match network security settings (authentication/encryption) and enter WEP/WPA keys.
Enter the WPA/WPA2-PSK password and apply settings.
Machine attempts connection; verify settings if connection fails.
Confirm router symbol, place machine nearby, push router button, and start wizard.
Verify 'Connected' status on LCD; troubleshoot if 'Connection Failed' occurs.
Ensure computer is ON, logged in as Admin, with no memory cards or USB drives inserted.
Insert CD, choose model/language, and click 'Install MFL-Pro Suite'.
Select 'Wireless Network Connection' and click 'Next' to proceed.
Check settings box, click Next, and adjust firewall for network access.
Follow registration steps, close browser, and proceed with installation.
Click 'Finish' to restart the computer and finalize the software installation.
Ensure Mac is ON, logged in as Admin, and has correct network interface settings.
Insert CD, launch installer, choose wireless, and the software will search for the device.
Follow prompts, select model, add it, and then quit Print Center.
Double-click the Presto! PageManager icon and follow the installation instructions.
Click the 'FaceFilter Studio' button to begin the installation.
Run FaceFilter Studio, click button, and check for updates on the Reallusion web page.
Click the 'BookScan&Whiteboard Suite' button to start installation.
Click 'Advanced' > 'Network Utilities', then launch BRAdmin Light and follow instructions.
Double-click device, choose STATIC, enter IP, Subnet Mask, Gateway, and click OK.
Double-click device, choose STATIC, enter IP, Subnet Mask, Gateway, and click OK.
Disconnect cables, navigate menus to Factory Reset, confirm, and restart.
Provides part numbers for black, yellow, cyan, and magenta ink cartridges.
| Brand | Brother |
|---|---|
| Model | MFC MFC-790CW |
| Category | All in One Printer |
| Language | English |