SSS
™
1127
|
11
Visit Static Control
®
on the web @ www.scc-inc.com
SSS
™
1127
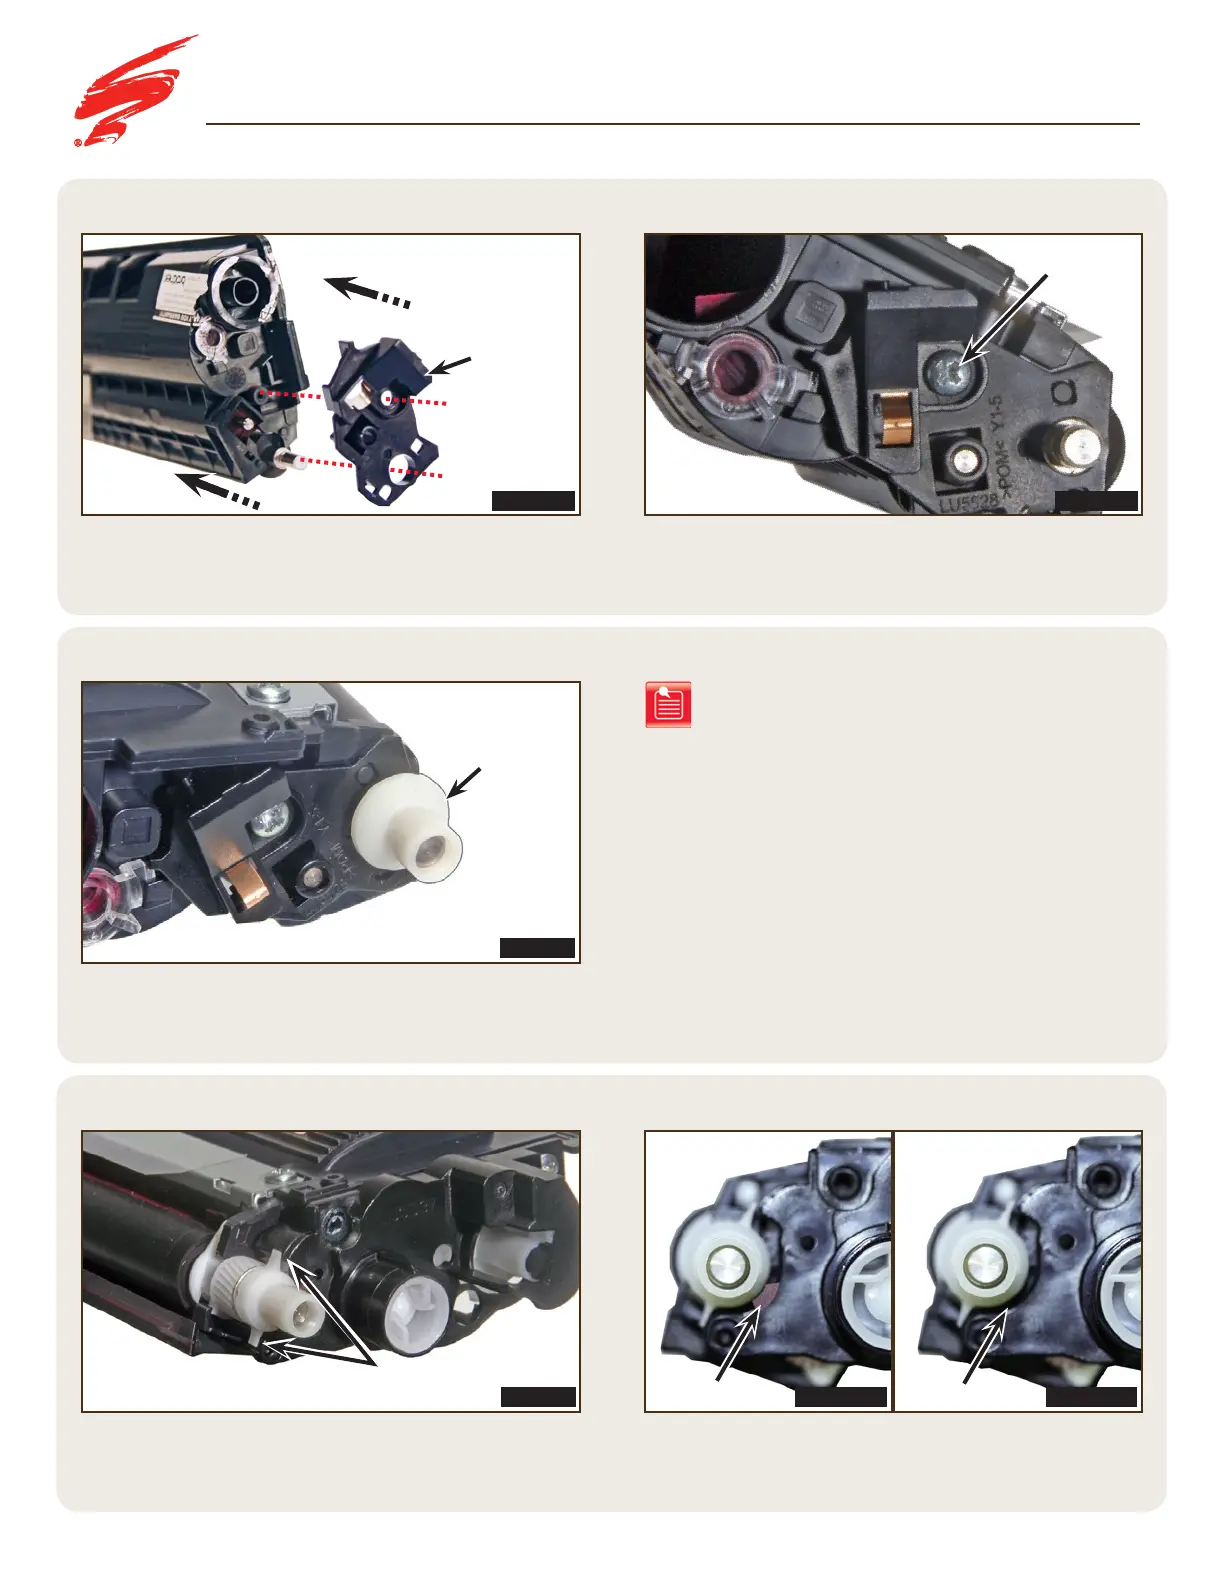
STEP 3.8
STEP 3.7
STEP 3.9
Place the drive side end cap onto the cartridge and ensure that
the drive side support bearing tabs are on the outer part of the
drive side end plate (Figure 3.9).
Place the contact side developer roller support spring and
bearing onto the developer roller axle (Figure 3.8).
Place the contact side end cap and secure with a screw
(Figures 3.7A and 3.7B).
FIGURE 3.8
FIGURE 3.7BFIGURE 3.7A
FIGURE 3.9
ASSEMBLING THE CARTRIDGE
Note: Reference Figures 4.1A and 4.1B on page 13
under the “Resetting the Flag Gear” section, to
ensure the flag gear tab is in the reset location
prior to placing the drive side end cap onto the
cartridge. Print error failures could result if the
gear is not set properly.
Screw
Drive Side Support Bearing Tabs
Contact Side
Developer Roller
Support Bearing
STEP 3.10
Use a small slotted screwdriver to gently set the foam under
the drive side developer roller support bearing back into place
(Figures 3.10A and 3.10B).
FIGURE 3.10A FIGURE 3.10B
Before after
Foam No Foam
Contact
Side End
Cap
 Loading...