SSS
™
1127
|
10
Visit Static Control
®
on the web @ www.scc-inc.com
SSS
™
1127
STEP 3.4
STEP 3.2
STEP 3.3
STEP 3.1
STEP 3.5 STEP 3.6
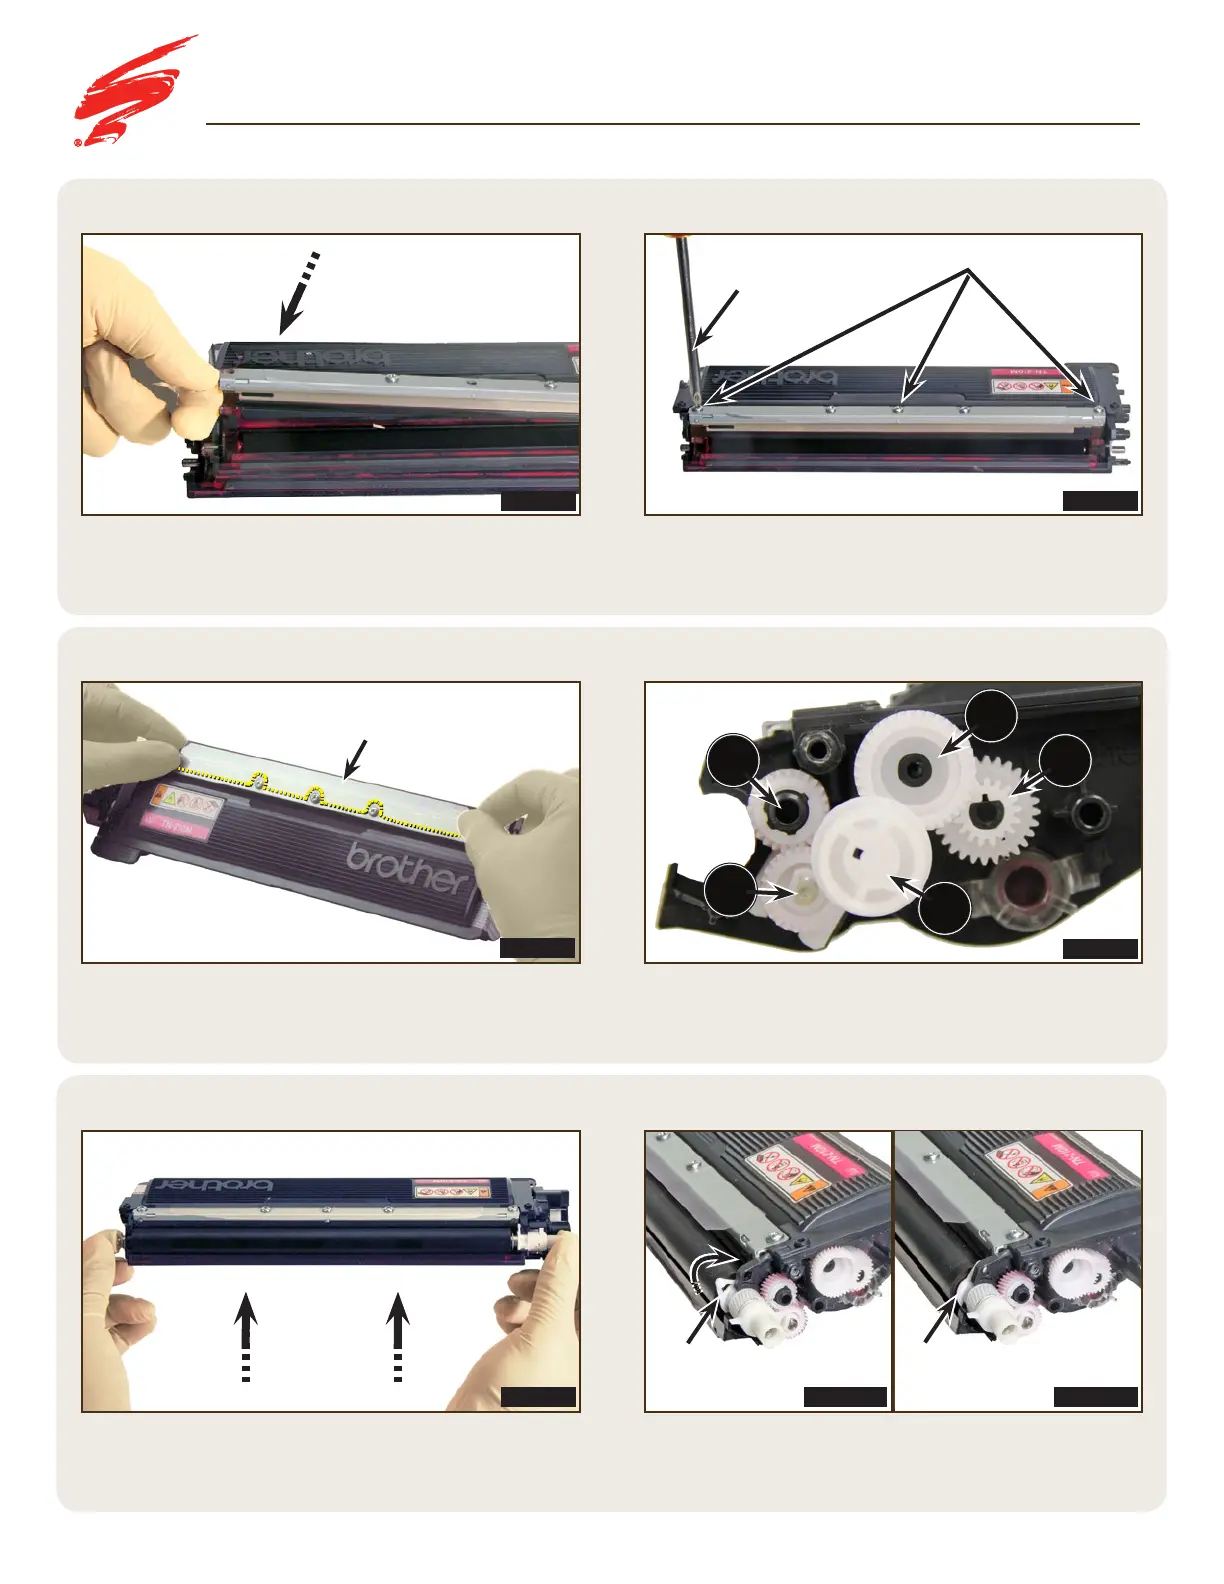
Rotate the developer roller stabilizer as noted in Figure 3.6A
so the locking tab engages. The completed step will look like
Figure 3.6B.
Install the gears on the drive side of the cartridge in the order
shown. Toner adder roller drive gear (1), idler gear (2), agitator
drive gear (3), idler drive gear (4), and the cartridge driver gear
(5) (Figure 3.4).
Secure the doctor blade into the cartridge with three screws
shown in Figure 3.2.
Install the developer roller into the cartridge (Figure 3.5).
If removed during disassembly, replace the doctor blade cover.
Remove the adhesive backing from the blade cover and align the
blade cover with the back edge of the doctor blade. Ensure the three
screws are centered in the grooves. Apply pressure along the length
of the doctor blade cover to activate the adhesive (Figure 3.3).
Place the doctor blade onto the cartridge (Figure 3.1).
FIGURE 3.4
FIGURE 3.3
FIGURE 3.2FIGURE 3.1
FIGURE 3.6AFIGURE 3.5
ASSEMBLING THE CARTRIDGE
Locking Tab
Blade Cover
FIGURE 3.6B
Screws
Phillips
Screwdriver
3
4
5
2
1
Locking Tab

 Loading...