SSS
™
1127
|
6
Visit Static Control
®
on the web @ www.scc-inc.com
SSS
™
1127
STEP 2.4
STEP 2.2
STEP 2.3
STEP 2.1
STEP 2.5 STEP 2.6
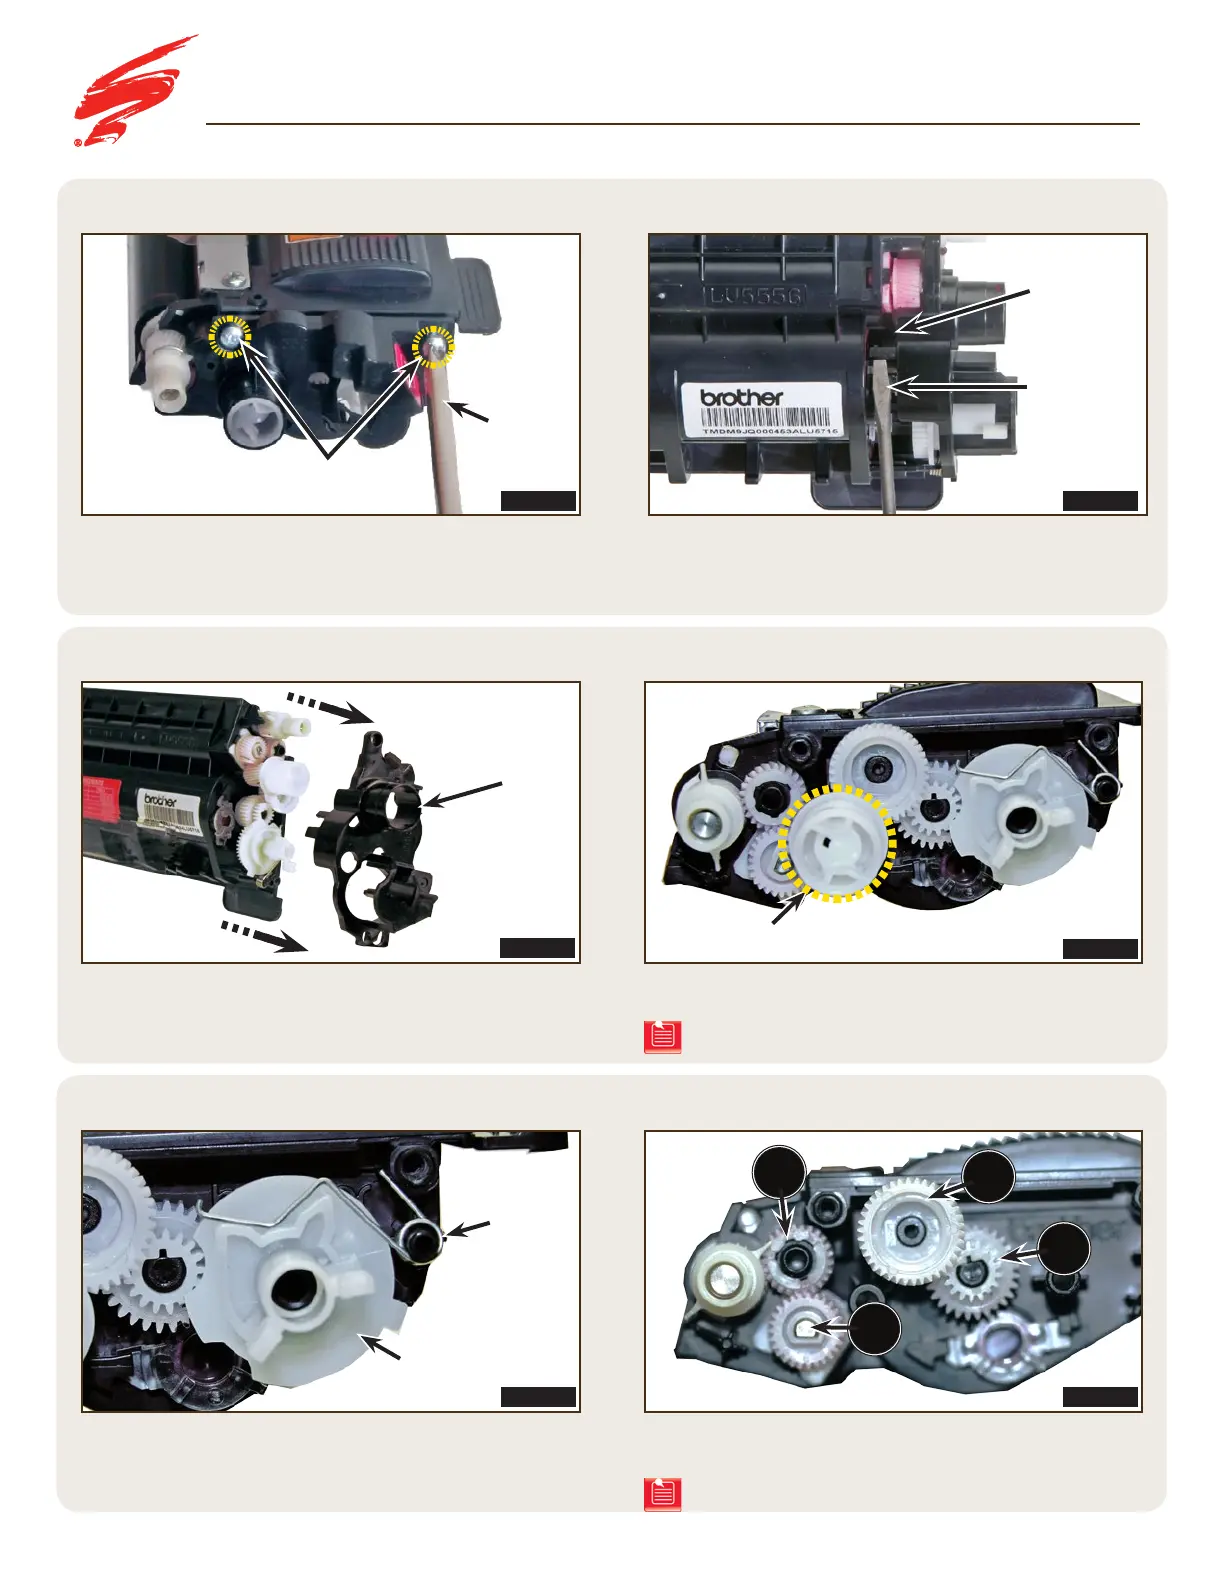
Remove the gears from the drive side of the cartridge in the order
shown. Idler drive gear (1), agitator drive gear (2), idler gear (3), and
the toner adder roller drive gear (4) (Figure 2.6).
Remove the cartridge drive gear (Figure 2.4) and check the
boss for alignment.
Use a small slotted screwdriver to release the locking tab on
the underside of the drive side end plate (Figure 2.2).
Remove the flag gear spring and the flag gear (Figure 2.5).
Remove the drive side end plate (Figure 2.3).
On the drive side end plate, remove the two screws as shown
in Figure 2.1.
FIGURE 2.4
FIGURE 2.3
FIGURE 2.2FIGURE 2.1
FIGURE 2.6FIGURE 2.5
DISASSEMBLING THE CARTRIDGE
Note: See warning on page 5.
Note: See warning on page 5.
3
4
2
1
Screws
Phillips
Screwdriver
Small Slotted
Screwdriver
Remove Gear
Flag Gear
Spring
Flag Gear
Drive Side
End Plate
Locking Tab
 Loading...