EasyManua.ls Logo

Brother TN-210 Series User Manual

Brother TN-210 Series
21 pages
To Next Page IconTo Next Page
Page #1 background imageLoading...
Page #1 background image
REMANUFACTURING INSTRUCTIONS
V 5.6: 09-14
SSS
1127
CONTENTS
Tools & Supplies ..................................... 2
Wirelines .............................................. 3
Toner and Drum Unit Differences ............... 4
Check the Alignment of the Boss ............... 5
Separating the Drum Unit & Toner Hopper .. 5
Disassembling the Cartridge ..................... 6
Assembling the Cartridge ....................... 10
Resetting the Flag Gear ......................... 13
Disassembling the Drum Unit .................. 14
Assembling the Drum Unit ...................... 16
Drum Reset Instructions .......................... 19
Color Calibration Process ...................... 20
About Static Control .............................. 21
Brother
®
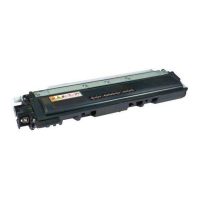
HL-3040CN Cartridge
HL-3070/MFC-9010CN/9120CN/9320CN
TN-210 & DR-210
www.scc-inc.com
Question and Answer IconNeed help?

Do you have a question about the Brother TN-210 Series and is the answer not in the manual?

Brother TN-210 Series Specifications

General IconGeneral
BrandBrother
ModelTN-210 Series
CategoryPrinter Accessories
LanguageEnglish

Summary

Separating Drum Unit and Toner Hopper

Check Drive Gear Boss Alignment

Inspect the cartridge drive gear boss for proper alignment or warping. Warped bosses prevent proper engagement.

Disassembling the Cartridge

Developer Roller Removal

Release the developer roller stabilizer's locking tab and remove the developer roller.

Doctor Blade Cover and Doctor Blade Removal

Inspect and remove the doctor blade cover, then remove the doctor blade using a small slotted screwdriver.

Assembling the Cartridge

Doctor Blade and Cover Installation

Place and secure the doctor blade, then replace the doctor blade cover with adhesive.

Developer Roller and Stabilizer Engagement

Install the developer roller and ensure the developer roller stabilizer's locking tab engages correctly.

Toner Filling

Fill the cartridge with the approved toner using the designated filling method.

Resetting the Flag Gear

Flag Gear Tab Position Check

Verify the flag gear tab is in the correct reset location to prevent print errors.

Flag Gear Spring Installation

Install the flag gear spring correctly, ensuring the short arm is on the left side of the cartridge post.

Disassembling the Drum Unit

Assembling the Drum Unit

Drum Reset Instructions

Drum Reset for MFC/DCP Models

Instructions for resetting the drum unit counter on MFC 9010CN, DCP 9010CN, MFC 9120CN, and 9125CN printers.

Drum Reset for 9320CW/9325CW Models

Procedure to reset the drum unit counter on 9320CW and 9325CW printer models.

Color Calibration Process

Printer Control Panel Calibration

Perform color calibration via the printer's control panel for automatic color density adjustment.

Related product manuals