SSS
™
1127
|
8
Visit Static Control
®
on the web @ www.scc-inc.com
SSS
™
1127
STEP 2.13
STEP 2.12
STEP 2.14
STEP 2.15
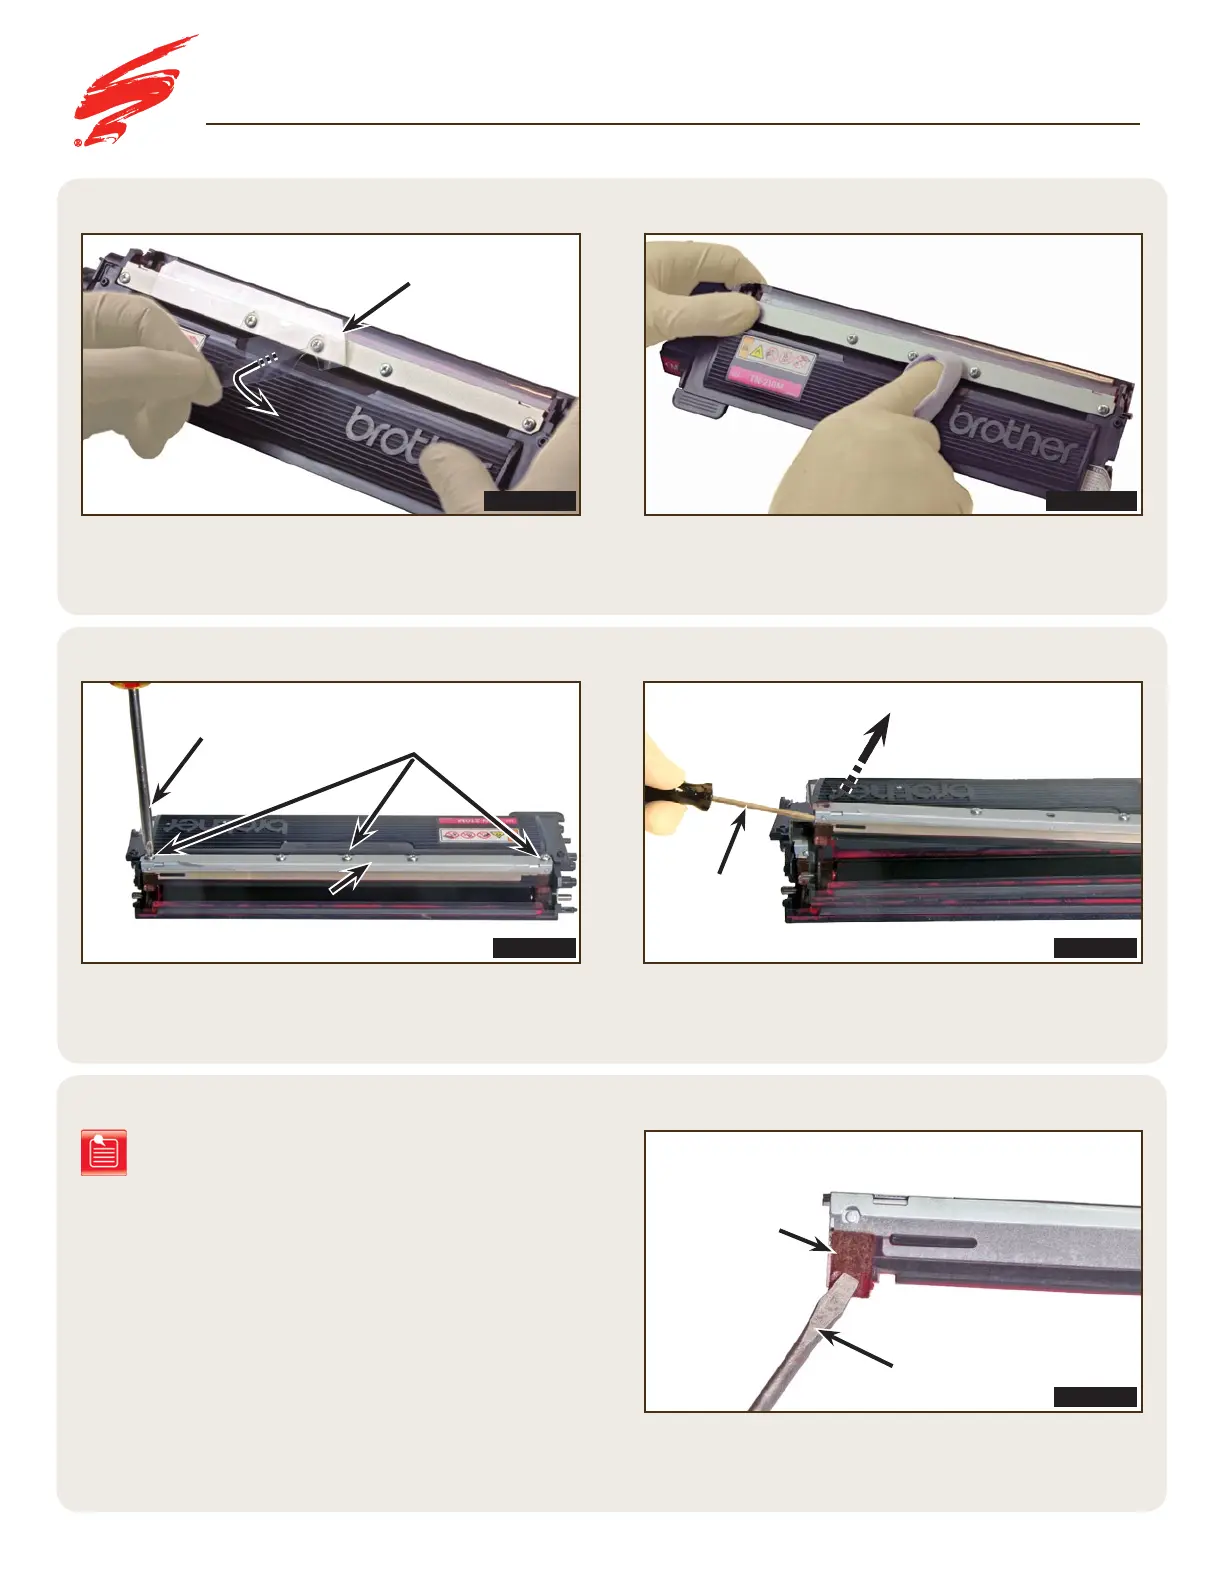
Using a small slotted screwdriver, gently fluff the doctor blade
sealing felts so the fibers are standing (Figure 2.15).
Use a lint-free cleaning cloth dampened with 91-99% isopropyl
alcohol to clean any adhesive residue from the doctor blade’s
metal stamping (Figure 2.12B).
Using a small slotted screwdriver, gently pry the doctor blade up
from the cartridge and remove the doctor blade (Figure 2.14).
Remove the three screws on top of the doctor blade (Figure 2.13).
Inspect the doctor blade cover. If wrinkled or damaged, remove
the blade cover from the doctor blade (Figure 2.12A).
FIGURE 2.13
FIGURE 2.12BFIGURE 2.12A
FIGURE 2.15
FIGURE 2.14
DISASSEMBLING THE CARTRIDGE
Note: To clean the doctor blade, saturate a lint-free
cleaning cloth with 91-99% isopropyl alcohol,
gently clean the black material portion of the
doctor blade. Then clean with a lint-free cleaning
cloth saturated with de-ionized water, then blow
with dry, filtered, ionized compressed air.
Doctor Blade Cover
Doctor Blade
Doctor Blade
Sealing Felts
Screws
Phillips
Screwdriver
Small Slotted
Screwdriver
Small Slotted
Screwdriver
 Loading...