SSS
™
1127
|
9
Visit Static Control
®
on the web @ www.scc-inc.com
SSS
™
1127
STEP 2.19
STEP 2.17
STEP 2.18
STEP 2.16
STEP 2.20
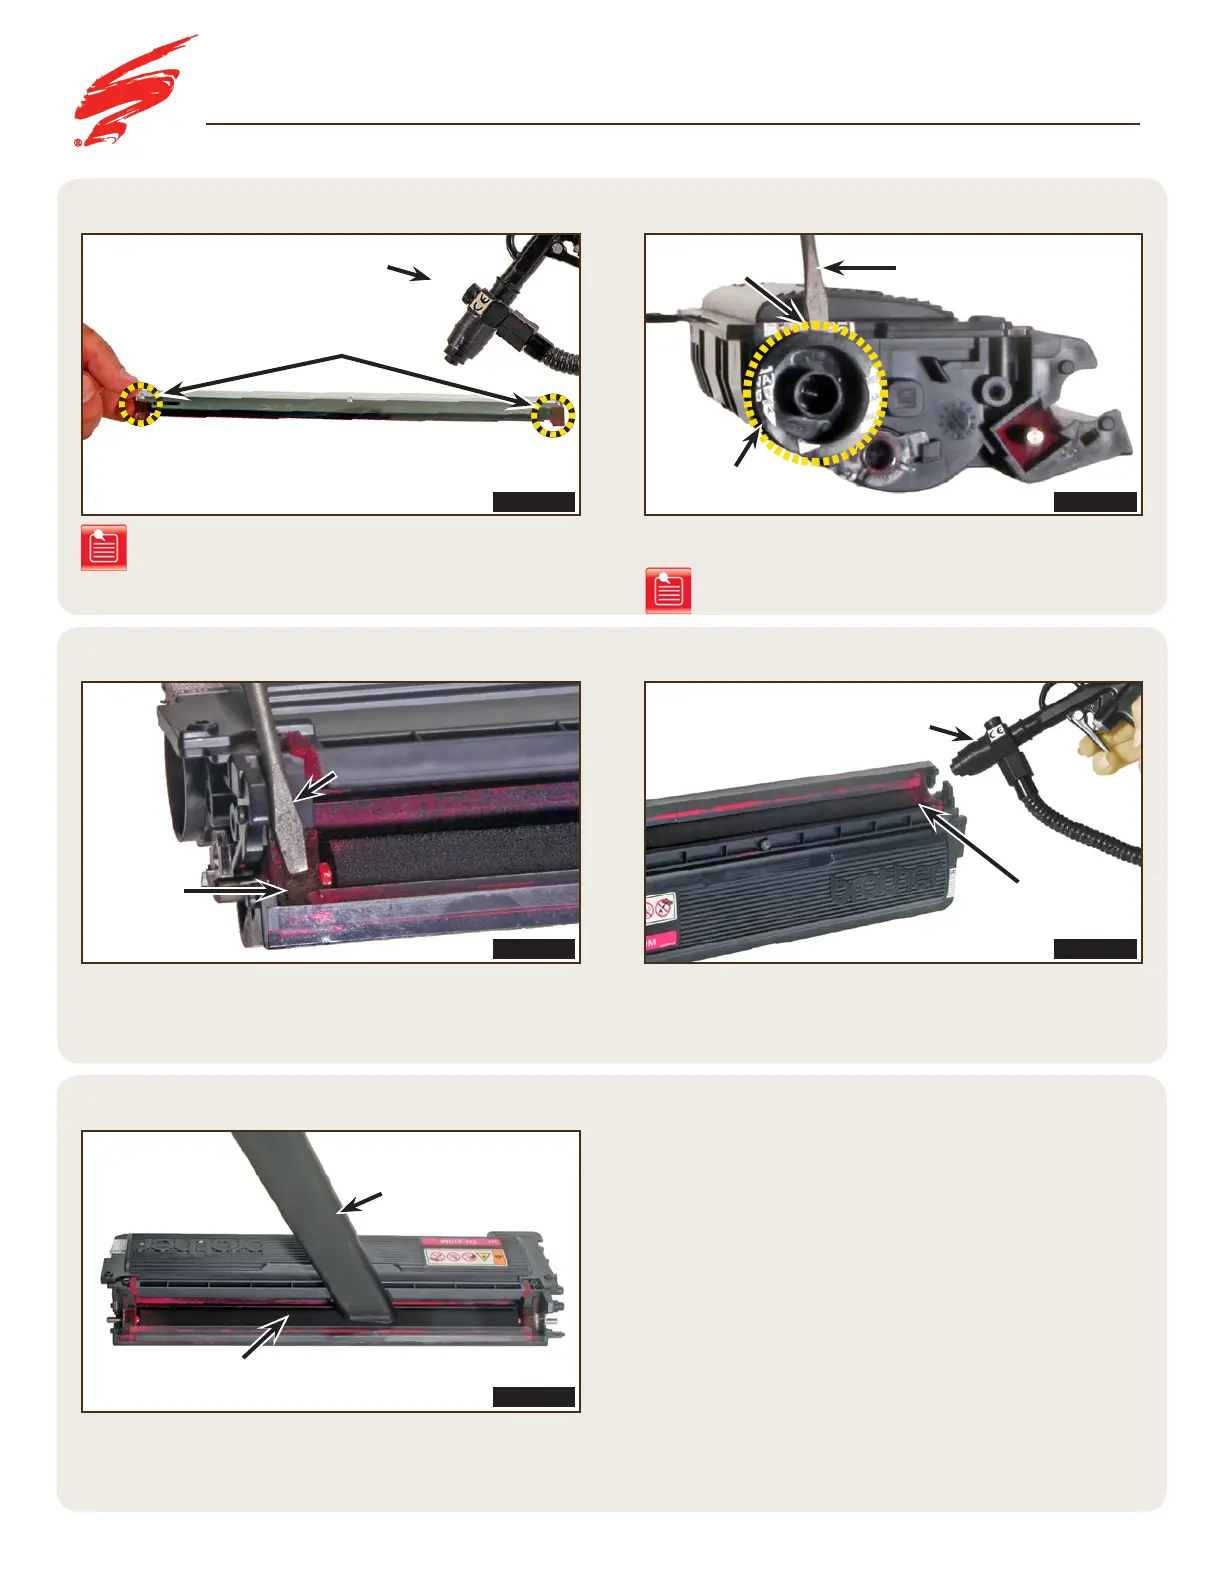
Clean the hopper with dry, filtered, ionized compressed air
(Figure 2.19).
Using a small slotted screwdriver, pry the hopper cap from the
top as shown in Figure 2.17.
With a toner vacuum, gently vacuum the adder roller. Rotate
the roller while vacuuming (Figure 2.20).
Using a small slotted screwdriver, gently fluff the developer
roller end felts so the fibers are standing (Figure 2.18).
DISASSEMBLING THE CARTRIDGE
FIGURE 2.16
FIGURE 2.18
FIGURE 2.20
FIGURE 2.19
FIGURE 2.17
Note: Pry on the top portion of the hopper cap to ensure
the cartridge core is not damaged.
Note:
Blow the doctor blade felts with dry, filtered, ionized
compressed air to remove any debris (Figure 2.16).
Developer
Roller End
Felts
Hopper Cap
Hopper
Adder Roller
Toner Vacuum
Small Slotted
Screwdriver
Small Slotted
Screwdriver
Pry At Top
Compressed Air
Compressed Air
Doctor Blade
Sealing Felts

 Loading...