Page 18
4.2 Wall Mount Bracket
for your FT depends on your installation scenario. With all
clearances considered, and given adequate positioning for
air supply and venting, you will need to determine the best
position to mount the Wall Mount Bracket. The wall must
be concrete, wood, or plywood over studs, and must be
strong enough to hold the boiler!
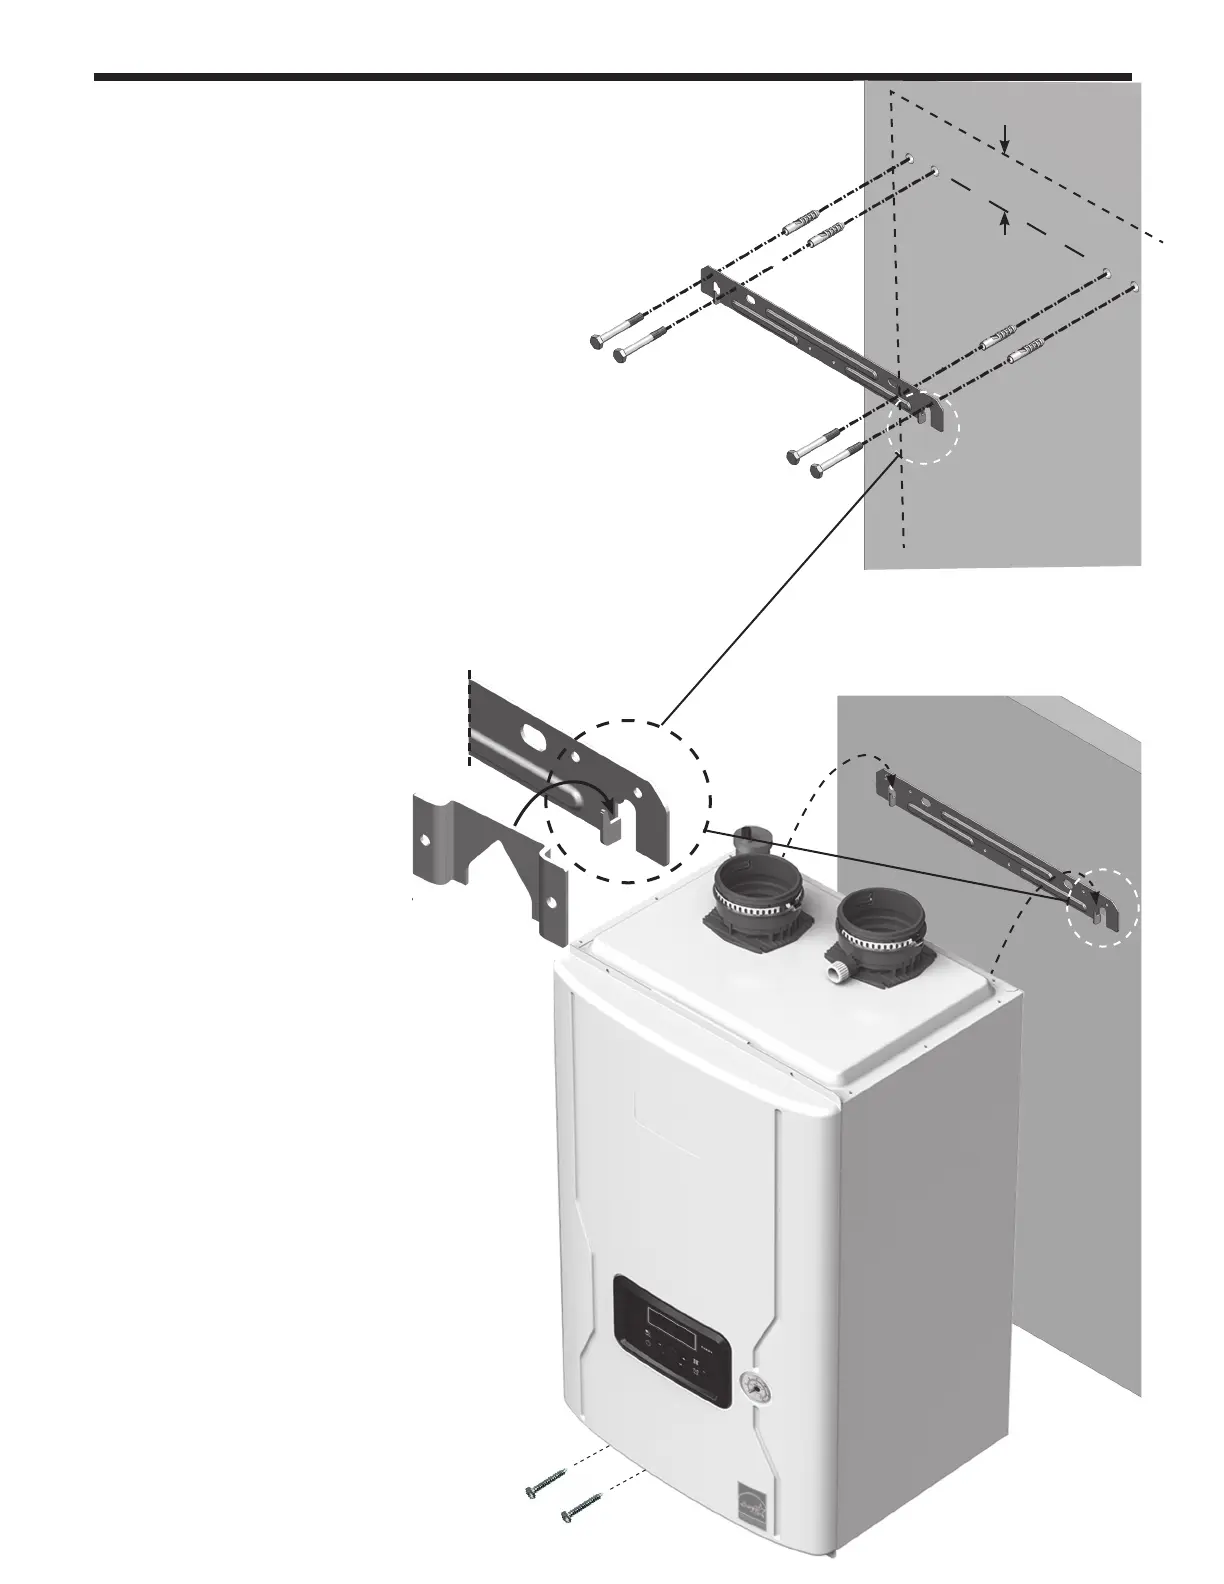
• Start by familiarizing yourself to how the
included Wall Mount Bracket hooks underneath
the two Hangers that are attached to the back of
the boiler. The ‘hooks’ of the Wall Mount Bracket will
be 3” from the Top of the boiler once the boiler is hung.
• Position the Wall Mount Bracket at the location that it will go,
being sure that it is level, and then drill 4 holes (0.47”dia)
with a 1/2” drill bit, into the wall through the Bracket.
• If mounting to a concrete wall, then use the concrete
anchors. If onto wood or 5/8” (16 mm) plywood, then use
the wood screws. Do not hang the FT onto sheetrock unless
it is possible to fasten directly
into the structural studs. If the
included anchors do not suit
your installation, you must use
‘Field Supplied’ anchors that
are appropriate for the wall’s
construction.
Wall Mount
Bracket
Bolts (4)
Wall Mount
Bracket
Anchors
*
(4)
3" to Top
of Unit
Concrete,
Wood,
or 5/8" Plywood
Hangers (2)
(fastened to the back of unit)
4.2.1 The installation height and location
4.2.2 Hang the Boiler
• Lift the boiler up, align the Hangers on the
back of the boiler with the hooks on the Wall
Mount Bracket, and hang the boiler onto the
Wall Mount Bracket. Do a visual inspection to
make sure that the boiler is hanging properly
onto the hooks of the Wall Mount Bracket.
• Fasten the bottom of the boiler to the wall
using 2 suitable wall anchors (eld supplied).