9
operating manual
operating manual Product appearance and specications are subject to change without notice
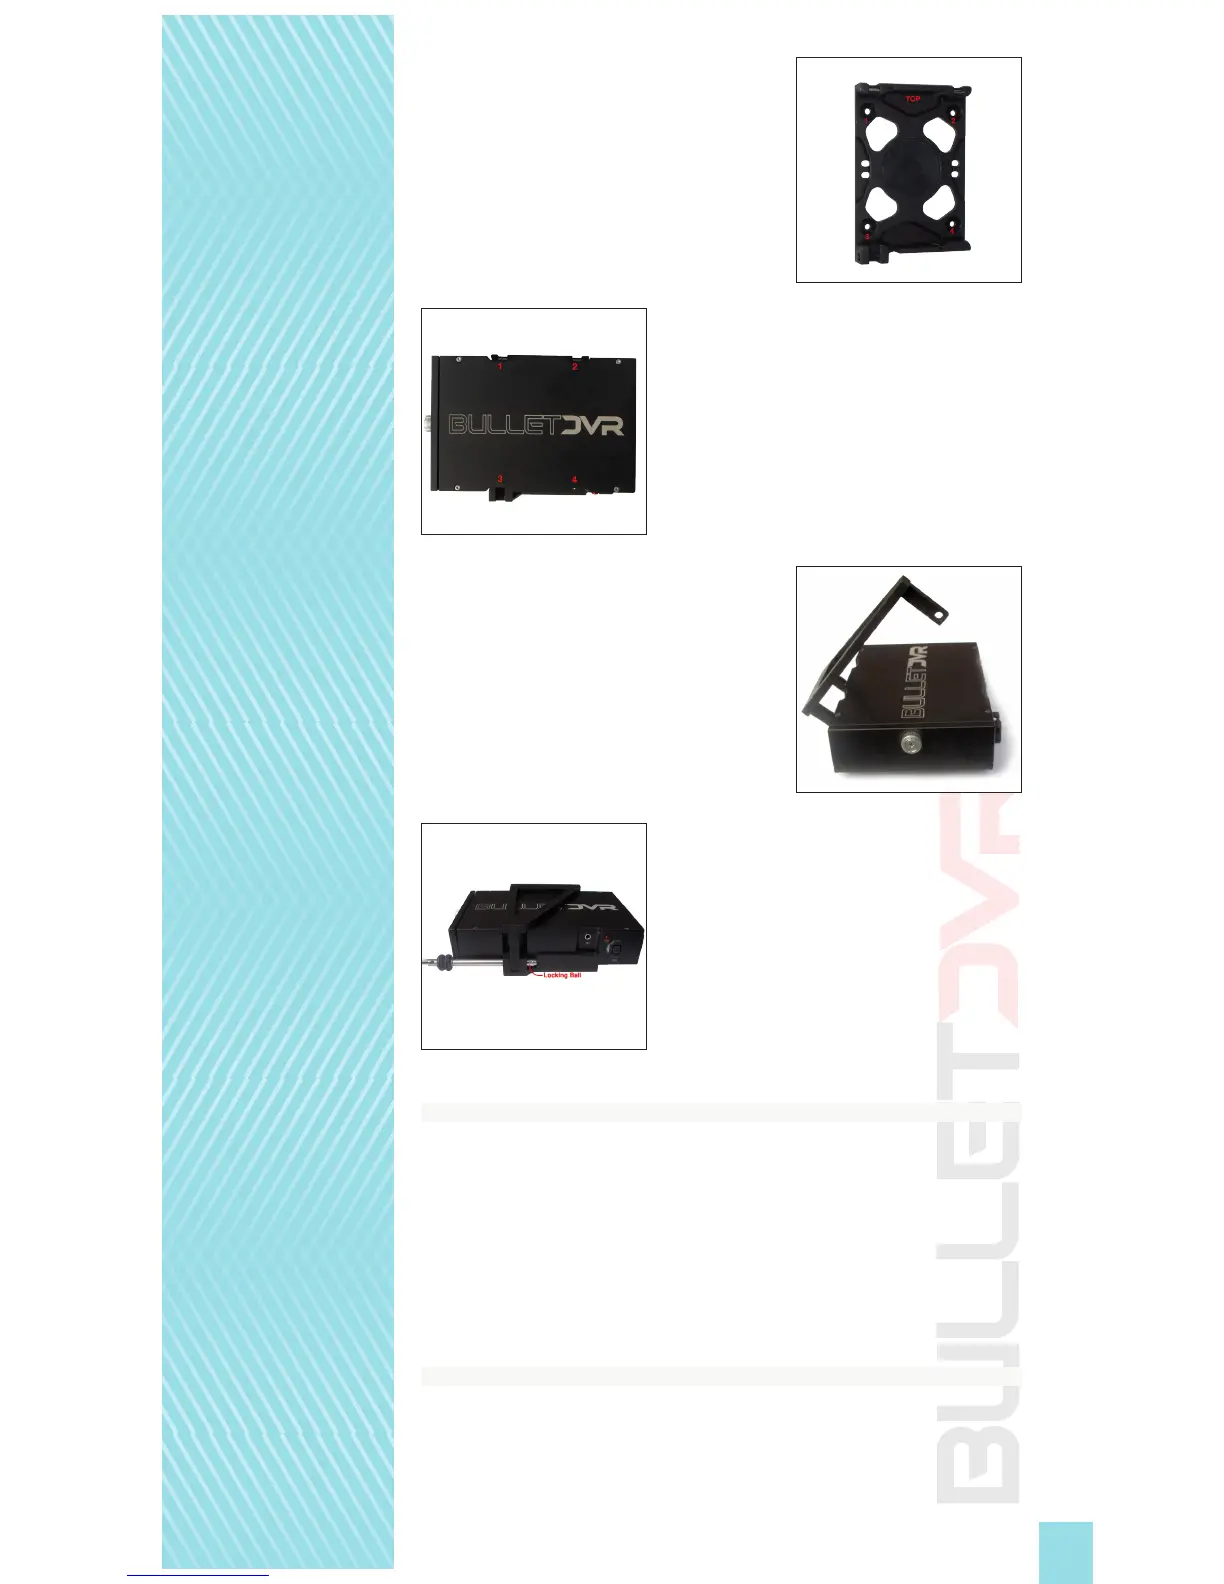
1. Attach the base plate to a at surface on the
vehicle, using the 4 rivets. Mark the 4 corners of
the bracket and drill the receiving panel. If the
thickness of the panel is greater, you may use
longer rivets than the ones supplied with your
kit. Note the orientation of the bracket with the
word “TOP” located on the hinges side.
2. Place the Bullet DVR unit on the base plate,
aligning each of the 4 grooves with the 4
tabs found on the bracket. Make sure the
logo on the DVR is oriented correctly with
the “TOP” marking, which is the side with the
metal hinges.
3. Attach the top plate to the bottom plate, using
the metal hinges.
4. Lock the Bullet DVR unit in the bracket, using
the Quick-Release pin. Align the pin holes
and push the pin all the way in, until the
locking ball is visible on the other side.
Configuring the unit:
When you power up the Bullet DVR, the unit will look for the le device.ini located on
the root directory of the memory card. This le contains all the parameters congured
by the user. When using for the rst time, it will load up the default settings from the
factory. If no device.ini le is found, the unit will use the last known conguration.
There are two ways to change the conguration settings of the device.ini le. It can be
done by installing the conguration utility for Windows PC, or directly from the Bullet
DVR unit, using the built-in menus and buttons on the control panel.
Using the Bullet DVR Configuration utility:
Before you start the program, make sure the Compact Flash memory card is already
inserted into the computer or card reader. Once the card is detected, the utility will be
able to start. You will see a number of icons at the top of the screen. Each of these tabs
will take you into a dierent section of the software.