30
TO REASSEMBLE THE BATTERY,
FOLLOW THE STEPS DESCRIBED
IN REVERSE ORDER.
BEFORE REMOVING THE BAT-
TERY ALWAYS MAKE SURE YOUR
BRINCO IS DISCONNECTED.
IF YOU WANT TO CHARGE YOUR BATTERY WITHOUT REMOVING IT FROM
THE VEHICLE, YOU MUST FOLLOW ONLY STEPS 1 AND 6.
IT IS RECOMMENDED THAT THE BATTERY SCREW IS TIGHTENED USING
A 5 ALLEN KEY PROVIDED IN OUR TOOLKIT, TO PREVENT THE SCREW
FROM COMING LOOSE.
FEMALE
MALE
5
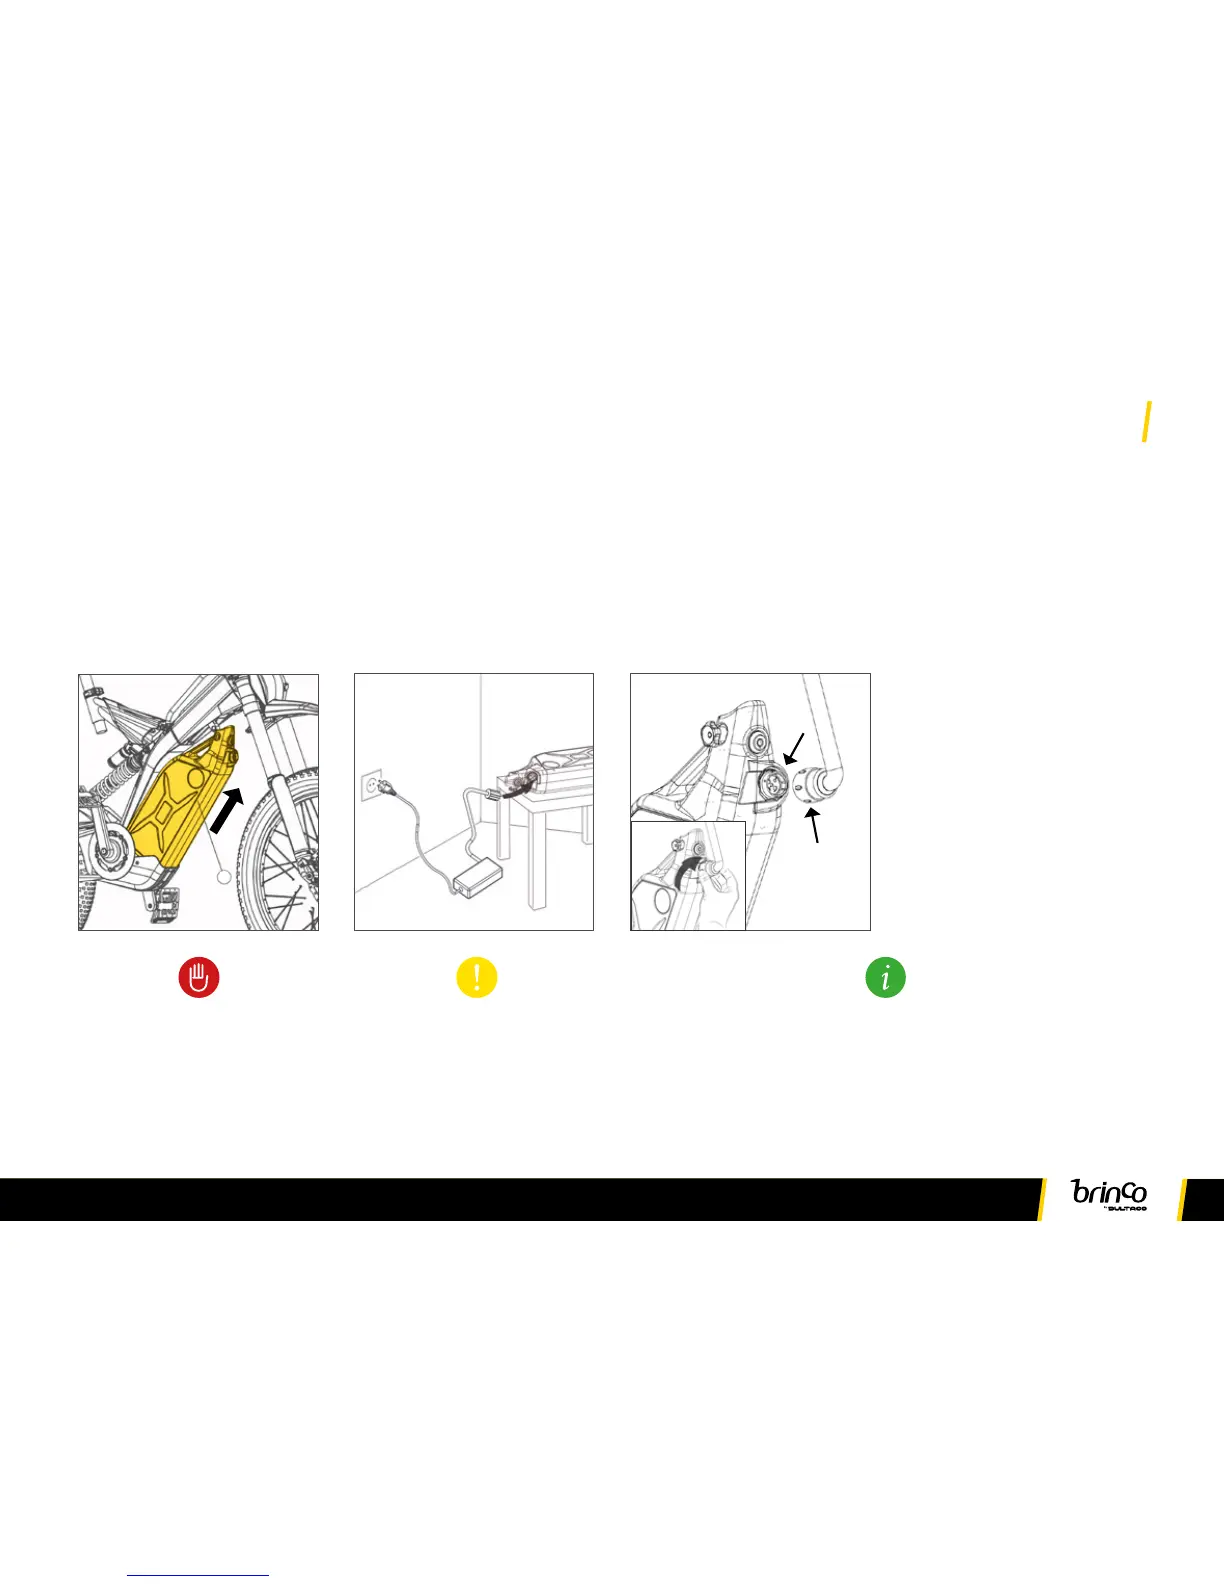
5. Once the battery is
disconnected from the
lower support, lift the
battery to fully remove it.
6. Make sure the battery
is placed horizontally, in
a safe position close to the
socket. Connect the charger
to the battery and to the
electrical network. Charging
will start automatically.
7. When you plug the male
connector to the battery,
either the moto-bike’s or
the charger’s connector, be
careful not to damage it.
Note that both connectors,
male and female, have
notches on the inside that
8. Once the charger is
connected, a verification
test will be done before
it starts to charge
automatically. The next
section explains what the
charger’s warning lights
mean.
[See 3.2.2]
must match. Introduce
the male connector into
the female connector fully
and then rotate its housing
clockwise a quarter turn to
secure it in place.