25
Conversion of control function
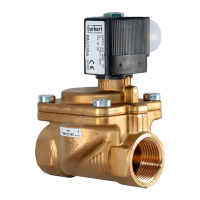
Type 2000, 2002, 2012
→ Remove pistons
22
withsupportingwasher
24
.
→ Removellerpiece
19
with intermediate washer
20
andO-ring
21
(llerpieceisnotrequiredforCFB).
→ ForactuatorsizeGorHandidentication“R”onthetypelabel:
Insertspringseat
34
.
→ Insertpressuresprings
35
.
→ Place intermediate washer
20
and foractuatorsizeC,alsolightlylubricatedO-ring
21
on spindle.
→ Insert pistons
22
,lightlygreasedO-ring(onlyforactuatorsizesDtoH)andsupportingwasher
24
.
→ Wet spindle thread
2
withspecialadhesiveLOCTITE274andscrewonnut
25
.
→ Mount position indicator
26
.
→ InsertnewO-ring
30
intothegrooveoftheactuatorbody.
Donotdamagesealingedgeswhenreplacingtheseal!
→ ForactuatorsizeGandH: Insert washer
40
.
→ Mount cover
31
andscrewtightlywithspecialwrench.
→ Replacegraphiteseal
5
.
→ Only for VA body (VA = stainless steel): Lubricate nipple thread
6
withKlüberpasteUH196-402.
→ Clamp body
1
.
NOTE!
Damage to the seat contour!
▶ Duringinstallation,takecarethatthereisnodamagetotheseatcontour.
▶ Observetighteningtorquesaccordingto“Table6”.
→ Screw in nipple
6
with actuator in valve body
1
.
→ Check the valve for function and leaks.
Tighteningtorques:
Material of nipple
thread
Diameter Tightening torques
(Nm)
Brass or stainless
steel
15 45
20 50
25 60
32 65
40 65
50 70
65 70
Table 6: Valve body tightening torques
 Loading...