20
Replacing the valve seat
Type 2000, 2002, 2012
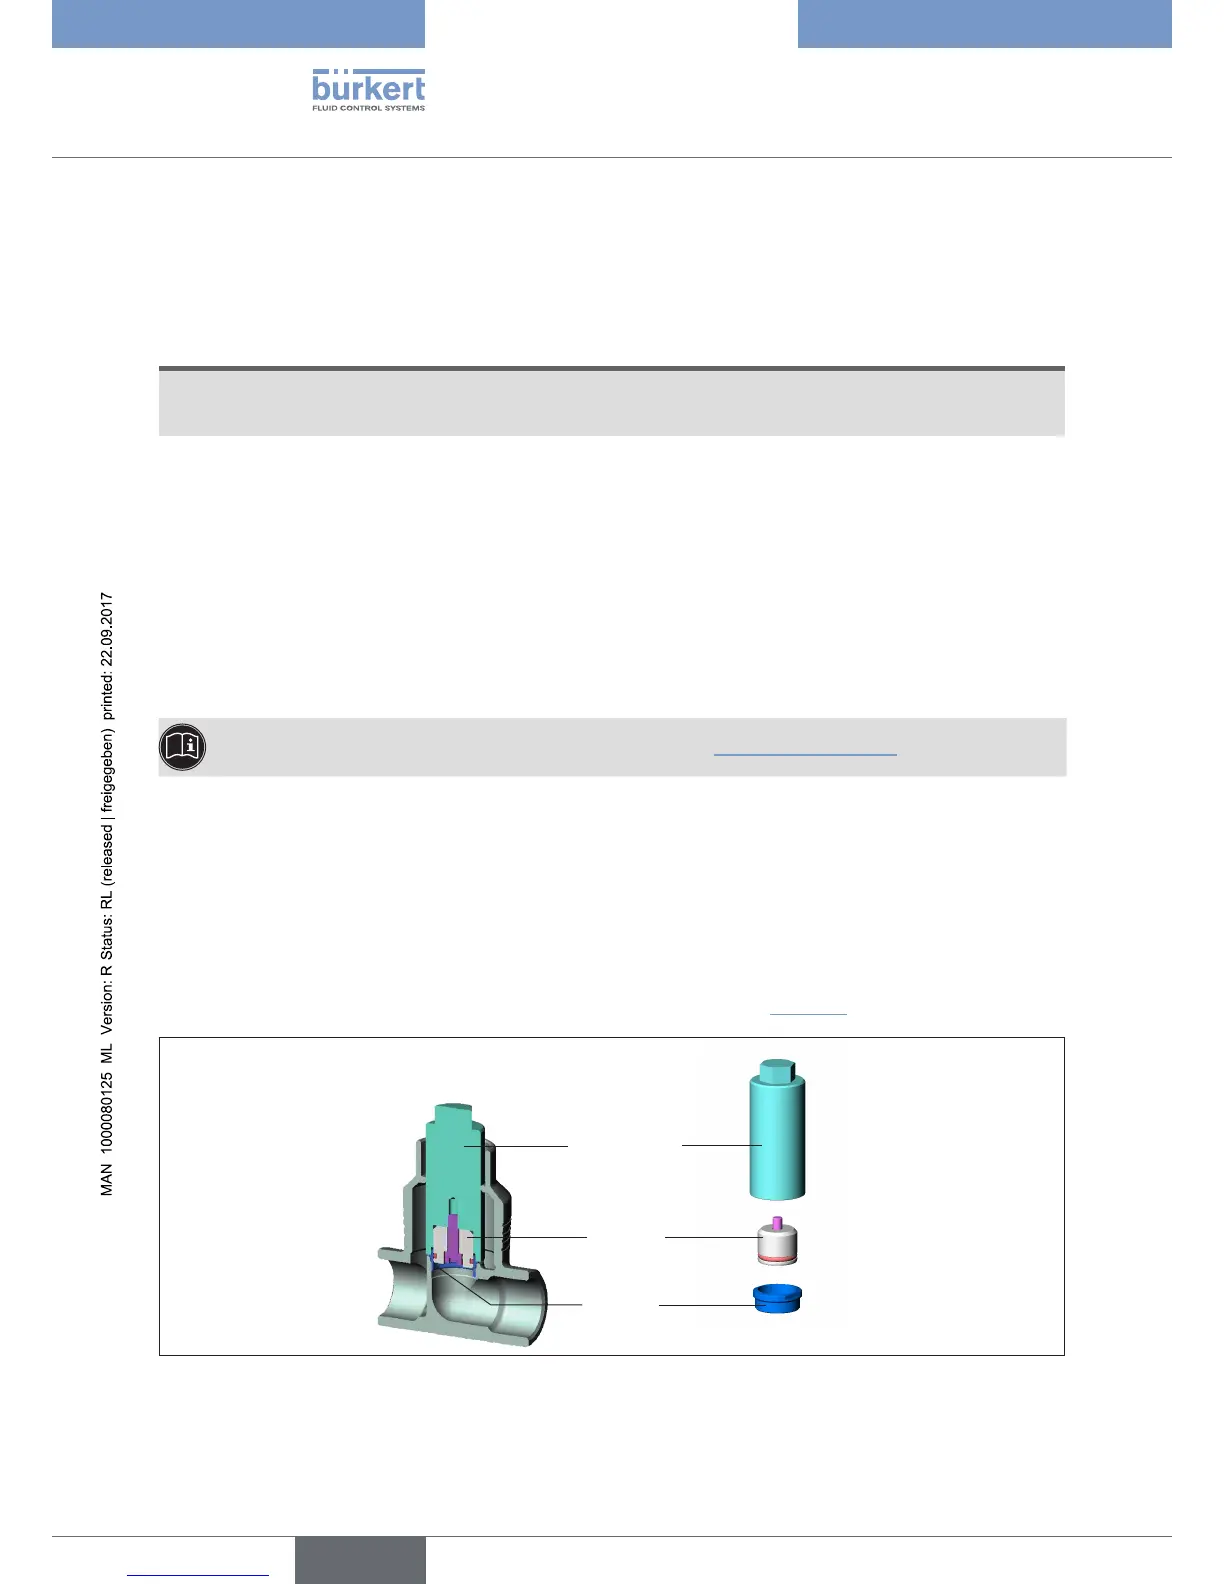
8 REPLACING THE VALVE SEAT
Remove the actuator from the valve body
→ Clampthevalvebodyinaholdingdevice.
NOTE!
Damage to the seat seal or the seat contour!
▶ Whenremovingtheactuator,ensurethatthevalveisinopenposition.
→ ControlfunctionAandI:pressurizethelowercontrolairconnectionwithcompressedair(5bar):valve
opens.
→ Usingasuitableopen-endwrench,placethewrenchatonthetube.
→ Unscrew the actuator from the valve body.
→ Carefullyremoveoldgraphitesealfromthevalvebody.
Replacing valve seat
→ Unscrewoldvalveseatusingtheinstallationtoolandopen-endwrench.
Information on the assembly tool can be found in chapter “10Installationtools”.
→ Cleanthreadandsealingsurfaceinthebodyusingcompressedair.
→ Select tool insert and screw into the installation tool.
→ Attach new valve seat to the installation tool.
→ Greasethreadwithalubricant(e.g.KlüberpasteUH196-402).
→ Place attached valve seat on the body thread and screw on by hand.
→ Usingatorquewrench,tightentothespeciedtighteningtorque(see“Table5”).
Installation tool
Toolinsert
(accordingtonominal
width of seat)
Valve seat
Figure 6: Replacing the valve seat