19
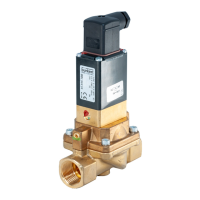
Replacing the valve set
Type 2000, 2002, 2012
→ Calk pin bores on both sides of the swivel plate with chisel or prick punch.
→ Carefullyremoveoldgraphiteseal
5
from the body
1
.
→ Insertnewgraphiteseal
5
.
→ Only for VA body (VA = stainless steel): Lubricate nipple thread
6
withKlüberpasteUH196-402.
→ OnlyforType2002:Usesealingtape.
NOTE!
Damage to the seat contour!
▶ Duringinstallation,takecarethatthereisnodamagetotheseatcontour.
▶ Observetighteningtorquesaccordingto“Table4”.
→ ForcontrolfunctionAandI: Pressurize lower control air connection with compressed air (5 bar).
→ Screw in valve actuator with nipple
6
into the body.
→ OnlyforcontrolfunctionA(CFA): Rescrew cover
31
with special wrench.
→ Check the valve for function and leaks.
Tighteningtorquesforscrewingthenippleintothevalvebody
DN (mm) Tightening torques (Nm) DN (mm) Tightening torques (Nm)
15 45 40 65
20 50 50 70
25 60 65 70
32 65
Table 4: Valve body tightening torques