→ Make sure the direct welding holder is mounted onto the pipe
or on the vessel.
→ Make sure the product and the holder are not damaged.
→ Make sure all O-rings are in place in their appropriate grooves,
and are not damaged.
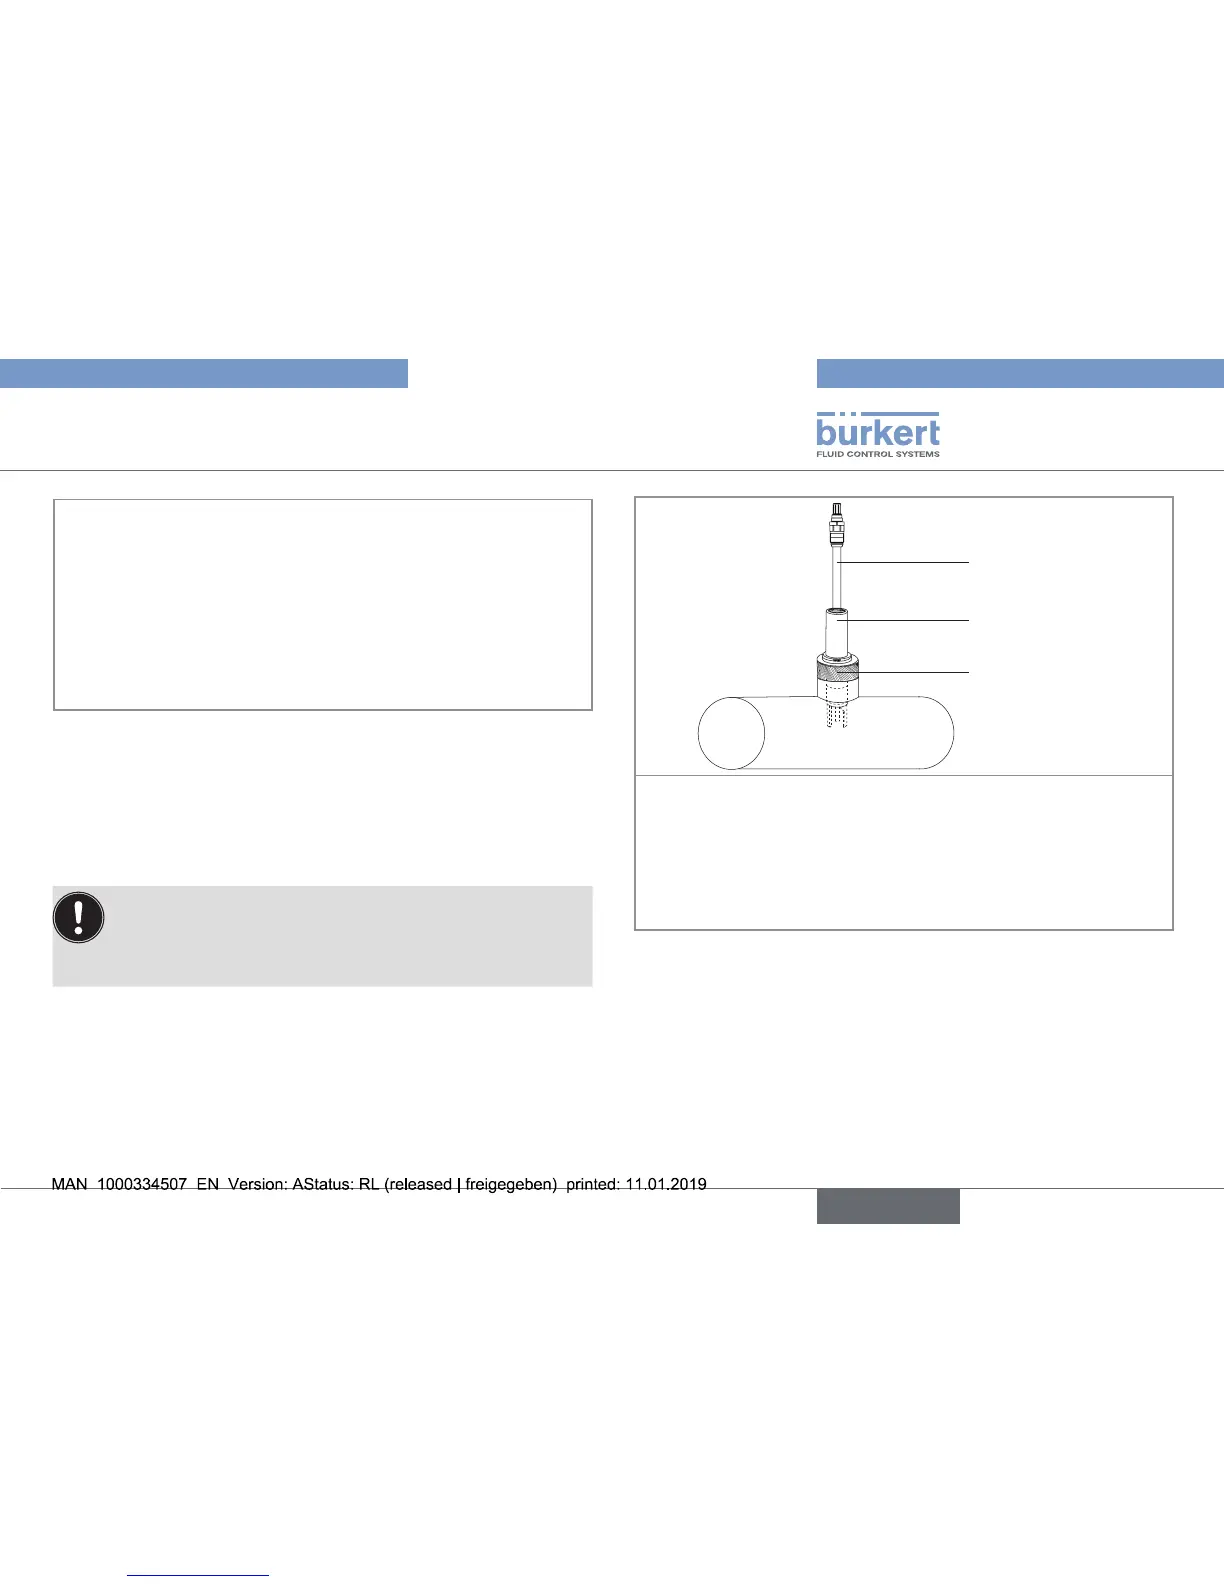
→ Insert the seal pusher 2 into the holder 3.
→ Screw the product 1 into the seal pusher 2 using a tightening
torque of 2...3 N·m (1.48...2.21 lbf·ft).
Fig. 13: Installation of a 8221 with a PG13.5 connection onto a
direct welding holder onto a pipe or on a vessel
7.9. Product with a PG13.5 connection
onto a G1¼'' threaded hygienic
holder
• To avoid any mechanical damage to O-rings during
assembly, lightly grease them.
• After assembly, clean the product of any remaining drops
of grease.
2
1
3
(not delivered)
→ Make sure the product and the holder are not damaged.
→ Make sure all O-rings are in place in their appropriate grooves,
and are not damaged.
→ Make sure the holder 2 is mounted onto an adaptor 3 welded
onto the pipe or on the vessel.
→ Screw the product 1 in the holder 2.
Fig. 14: Installation of a 8221 with a PG13.5 connection onto a
holder with G1¼'' connection onto a pipe or on a vessel
25
Installation
Type 8221