29
3) JoiningPipe-
a) Startassemblyoftheventsystemattheboiler.Lubricatethebrowngasketintheboilerventcollarwithafewdropsof
water.
b)Pushthemaleendoftherstttingintotheboilercollaruntilitbottomsout.Themaleendofcuttablesectionsshould
go1”intothecollaruntiltheinsertionmark(madeinStep2dabove)iscovered.Onotherttings,thebeadonthe
malepipewillbebottomoutonthecollar(Figure7.32b).
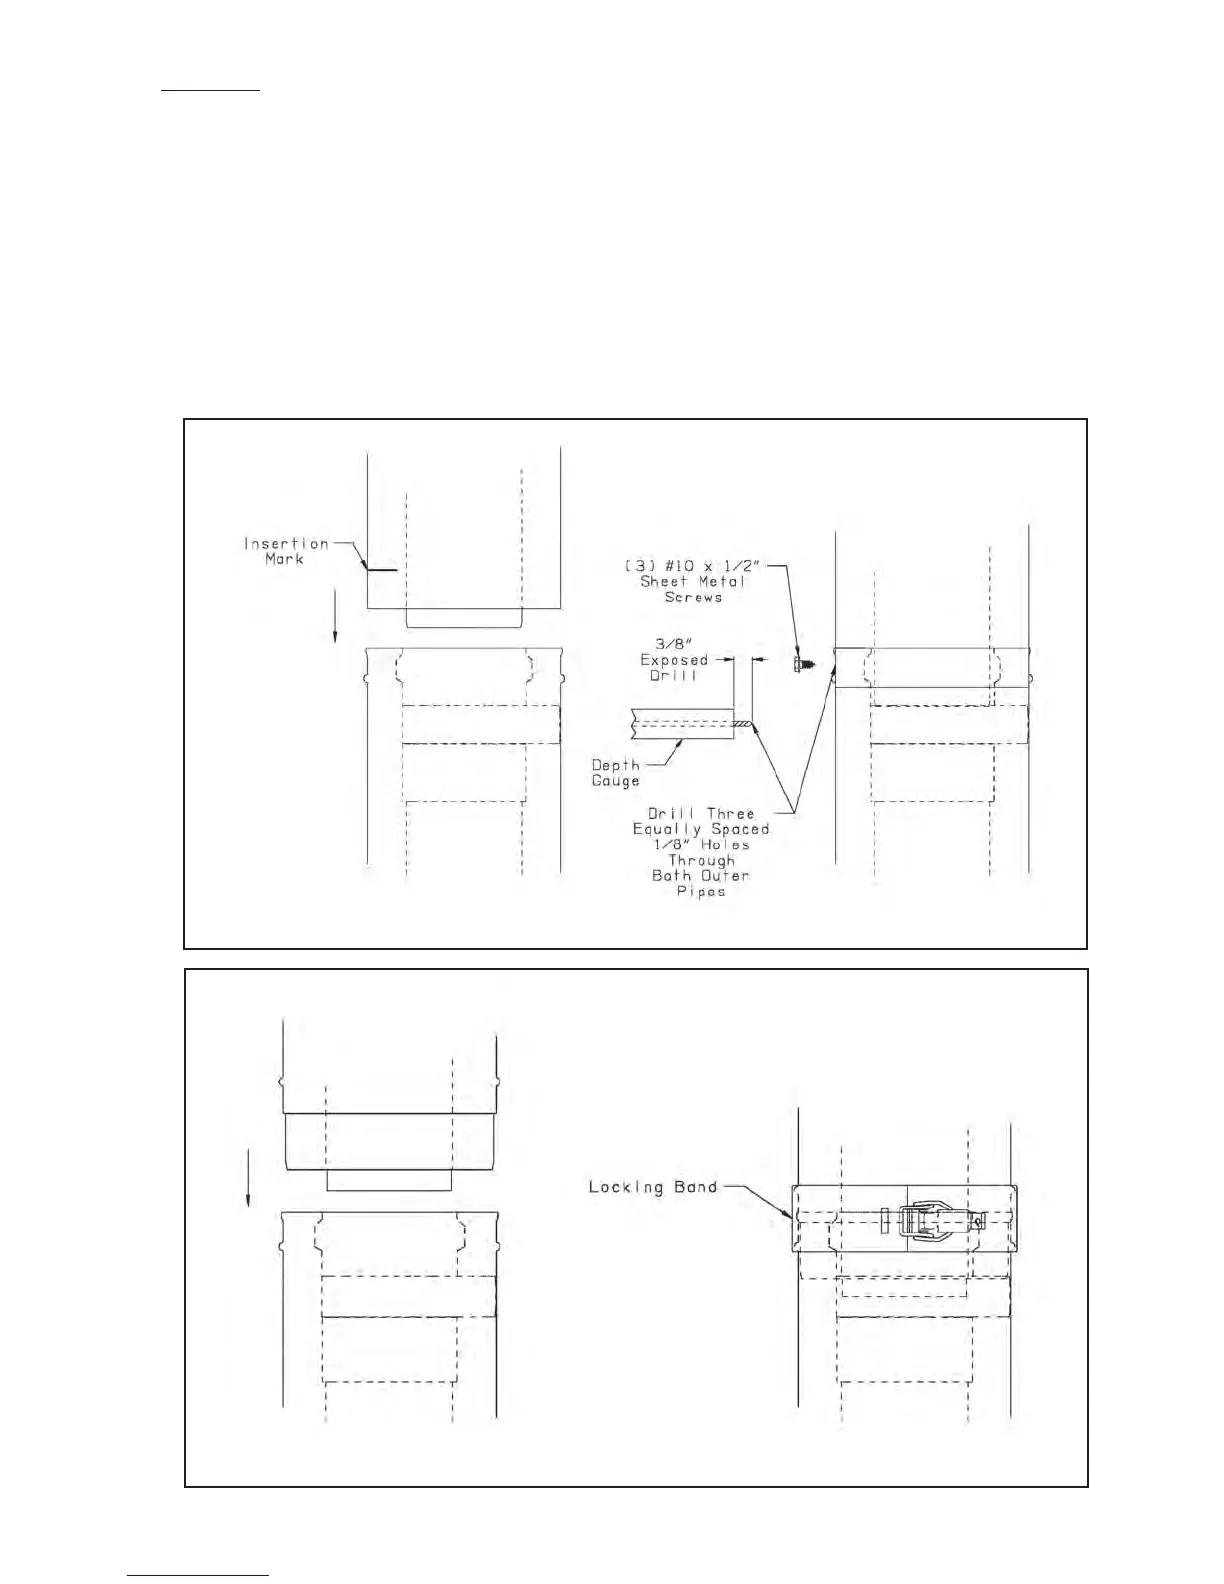
c)Themaleendofcuttablettingsmustbeheldtothecollarwiththree#10x1/2”sheetmetalscrews.Drilla1/8hole
throughbothouterpipestostartthisscrew.Use a drill stop or other means to ensure that the drill bit does not
penetrate more than 3/8” into the outer pipe. Do not use a sheet metal screw longer than 1/2” (Figure7.32a).
d)Uselockingbands(providedwithallttings)tosecurenon-cuttablepipe,aswellasttings,totheboilercollar
(Figure7.32b).
e) Usethesamemethodtojoinallremainingventcomponentsexceptfortheterminal.
Figure 7.32a: Joining Cuttable Pipe
Figure 7.32b: Joining Non-Cuttable Pipe