37
3) AssemblyofMetal-FabCorr/GuardVentSystem:
a) Corr/GuardGeneralNotes:
• DonotcutCorr/Guardventcomponents.
• RefertoCorr/Guardinstallationinstructionsforpropermethodsofsupport.
• OrientCorr/Guardcomponentssothatthemalesendsofallttingspointinthedirectionoftheboiler.
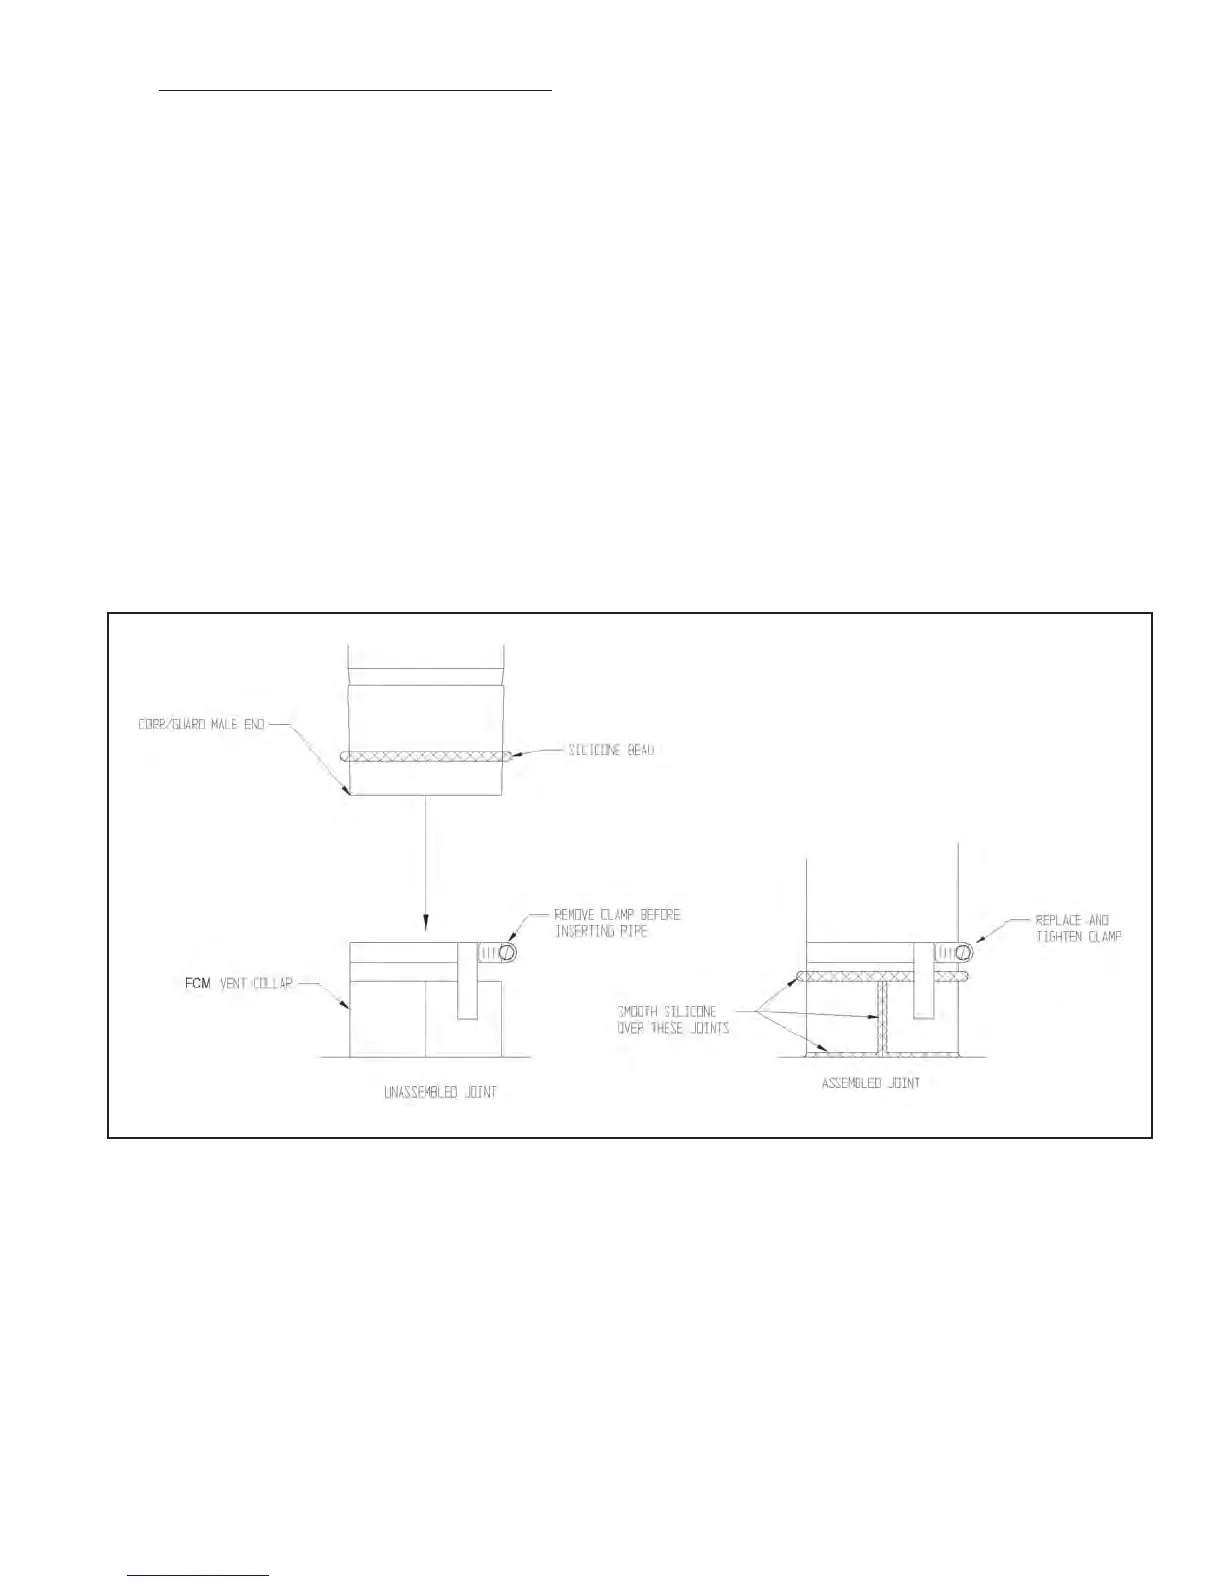
b) Startassemblyoftheventsystemattheboiler.RemovethehoseclampshippedontheFCMventcollar.Bendthethree
hoseclamptabsonthiscollaroutwardslightly.
c)Cleantheexteriorofthemaleendoftherstpieceofpipeandtheinsideoftheventcollarontheboiler.Removedirt,
grease,andmoisturefromthesurfacestobesealed.Drysurfacesorallowtodrythoroughly.
d)Onthemaleendofthepipe,applya¼”widebeadofsiliconeapproximately½”fromtheendofthepipe(seeFigure
7.47).
e)Insertthemaleendofthepipeintotheboilerventcollaruntilitbottomsout.
f) Applyanadditionalbeadofsiliconeovertheoutsideofthejointandsmoothout.
g)Replaceandtightentheclampontheventcollar.
h)AssembleremainingCorr/GuardcomponentsinaccordancewiththeCorr/Guardinstallationinstructions.
i) Allowthesiliconetocureperthesiliconemanufacturer’sinstructionsbeforeoperatingtheboiler.
Figure 7.47: Corr/Guard Connection to Vent Collar