128
107774-01 - 9/17
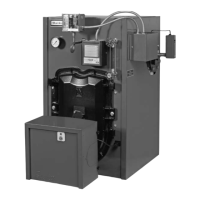
i. Unplug the ignition, ground, and ame rod wiresfromtheignitionelectrodeandtheamerod(Figure14.1).
j. Use a 10 mm wrench to remove the four nutssecuringtheredoortotheheatexchanger(Figure14.1).Carefully
remove the door/blower/gas valve assembly from the heat exchanger, being careful not to damage the refractory
insulation on the inside of the door (see Refractory Warning on next page) or the electrodes.
k. Inspect the heat exchanger combustion chamber and vacuum any debris found on the coil surfaces. If necessary,
the coils may be brushed with a nonabrasive, nonmetallic brush. Do not use cleaning agents, solvents, acid or alkali
products of any type to clean the heat exchanger .
l. Inspect the target wall and re door insulation. If either shows signs of damage, it must be replaced.
m. Inspect the burner for heat damage or other deterioration. Use a non-metallic brush or source of compressed air
to clean off dust or debris from ports.
n. Inspect the ignition electrode and ame rod for deposits. Clean any found with steel wool. Do not use sand paper
or Emory cloth for this cleaning. Inspect the ceramic portion of both of these parts for cracks and replace if any are
found. Verify that the ignition electrode gap is within the range shown in Figure 14.2.
o. Inspect the blower gas valve assembly, looking for dust, lint, or other debris that may have been drawn into this
assembly.Excessivedepositsmaybevacuumedout.Verifythat“appers”inventurimovefreely.
Inspect all rubber and plastic components on the blower/gas valve assembly, looking for deterioration. Replace
blower and/or gas valve if deterioration is found.
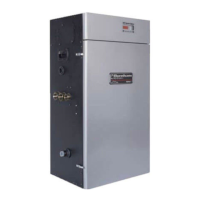
p. Inspect and clean the condensate trap. Place a bucket under the condensate cleanout cap on the bottom of the
boiler (see Figure 2.1) to catch water in the trap as well as the ball and ball support. Unscrew the cap, being careful
not to lose the ball or ball support. Flush any debris found in the trap with water – do not use other cleaning agents.
Reassemble the trap as shown in Figure 14.3.
q. Reinstall the re door/blower/gas valve assembly, following the above steps in reverse order.
r. Inspect the vent system to verify that:
• All gaskets and joints between the boiler heat exchanger and terminal are leak tight.
• All supports are intact and vent system is properly pitched
• All pipe is in good condition. Look for damage such as cracks, heat distortion, discoloration, and embrittlement.
Ifanysuchdamageisfound,thepipemustbereplacedandthecauseofthedamageidentied.
• Vent/Intake terminals are in good condition, free from blockages, and still correctly located relative to doors,
windows, decks, etc.
• Thereisnogasoline,ammableliquids/vapors,orhalogenbasedproductsstoredinthevicinityofthe
vent or inlet terminals. Also verify that there are no chemical products containing chlorine, chloride based salts,
chlorouorocarbons,paintremovers,cleaningsolvents,ordetergentsstoredneartheairintaketerminal.
WARNING
Asphyxiation Hazard. Do not operate the boiler without the ball and ball support in place. Doing so could
result in ue gas leakage into the indoors resulting in personal injury or death from Carbon Monoxide (CO)
poisoning.
NOTICE
Attempting to clean the heat exchanger or trap with anything other than water could result in condensate
backup, causing the boiler to shut-down.
CAUTION
Do not over tighten re door mounting nuts. Doing so could break the re door mounting studs. If any of
these studs are damaged, the heat exchanger must be replaced. Use of a short 10 mm box wrench will
reduce the risk of damaging these studs.
XIV. Service and Maintenance (continued)