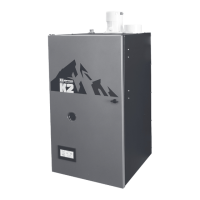
47
107774-01- 9/17
VII. Venting E. Assembly of CPVC/PVC Vent Systems (continued)
WARNING
Asphyxiation Hazard. CPVC/PVC vent piping and ttings rely on glued joints for proper sealing. Follow
all manufacturer instructions and warnings when preparing pipe ends for joining and using the primer
and the cement.
When PVC is used with the concentric vent kit, a 30” CPVC straight section and elbow must be used
prior to connection of the vent system to this terminal. If the vent system is too short to permit this, use
an FGV CPVC terminal.
Do not operate boiler without the rain cap in place.
Method of securing and sealing terminals to the outside wall must not restrain the expansion of vent
pipe.
6. InstallationofDiversiTechLowProleTerminal(TerminalOptionC) – See Figure 7.31:
a. Use vent plate as a guide to locate the openings for the vent and air intake pipes, as well as to locate the holes for the
mounting screws.
b. Drill two 3-1/8 holes through the wall for the vent and intake pipes.
c. Drill four 3/16 holes for the mounting screws.
d. Install the vent and intake pipe sections passing through the wall. Cut the pipes so that they protrude the following
distances from the surface on which the vent plate will be mounted:
• Vent: Between 1-3/4 and 2-1/4”
• Intake: Between ¼ and 1”
e. Seal pipe penetrations in wall with RTV (silicone sealant).
f. Mount the vent plate using the #8 x 2” screws and anchors provided with this kit.
g. Seal the vent plate to the wall with RTV.
h. Apply a bead of RTV around the OD of the vent pipe near its end.
i. Slide the vent cap over the vent pipe and secure to the wall plate with the #8 x 2” screws provided.
7. Installation of IPEX FGV or DiversiTech CVENT Concentric Vent Terminal (Terminal Options D,E,I & J) - This terminal
may be used for either horizontal or vertical venting. See Figure 7.33 for horizontal installation or Figure 7.34 for vertical
installation. When PVC is used for venting, a 30” CPVC straight section and CPVC elbow must be used prior to connection
of the vent system to this terminal. If the vent system is too short to permit this, use the IPEX FGV CPVC terminal:
a. For horizontal installations at the planned location cut a round hole in the exterior wall 1/2” larger than the “C’ dimension
indicated on Figure 7.32 for the size terminal being used. (See Section VII - B of this manual for permitted terminal
locations).
b. For vertical installations, cut a hole in the roof large enough to clear the concentric terminal at the location of the terminal
(see Section VII - C of this manual for permitted terminal locations).
c. Ifdesired,theterminalcanbeshortened.SeeFigure7.32forspecicinformationonmakingtheterminalkitshorterbased
on the kit size being used. Cut the pipe squarely and de-burr both the OD and ID of the cut edges.
d. CementtheinnerpipesectionofPVCpipesuppliedwiththiskittotheWyettingusingaprimerandcementlistedfor
use with PVC.
e. Cement the outer pipe to the Wye, being careful, to keep the inner and outer pipes concentric.
f. Slip the partially assembled terminal through the wall or ceiling from the inside and for horizontal installations orient so
that the side outlet on the Wye is on or above the horizontal plane.
g. For horizontal installations, seal the gap between the OD of the “outer pipe” and the exterior side of the wall with RTV
sealant.
h. Cement the rain cap onto the inner pipe. If desired, the rain cap can be attached to the inner pipe with the supplied
stainless steel screw and nut so that it can be later removed for cleaning and inspection. If this is done, drill a
3/16”clearance hole in the rain cap and inner pipe in the location shown on Figure 7.32 for the size terminal kit being used
andafxscrewandnut.Donotovertighten.Aeldsuppliedrodentscreenmayalsobeinstalledontheendoftherain
cap.
i. Forverticalinstallations,usearoofashingandstormcollartopreventmoisturefromenteringthebuilding.Sealtheroof
ashingtotheroofusinggenerallyacceptedpracticeforthetypeofroofontheinstallation.Installthestormcollarafter
verifying that the bottom of the rain cap will be at least 12” above the normal snow line. Apply RTV to seal the storm
collars to the terminal.