54
107774-01 - 9/17
VII. Venting F. Assembly of DuraVent PolyPro Vent Systems (continued)
6. Installation of DuraVent PolyPro Horizontal Concentric Vent Terminal (Terminal Option D) -
Install PolyPro Horizontal Concentric Termination Kit #3PPS-HK (Figure 7.39) as follows:
a. At the planned location cut a 5-1/8” round hole for the 3” terminal in the exterior wall. (See Section VII - A of this
manual for permitted terminal locations).
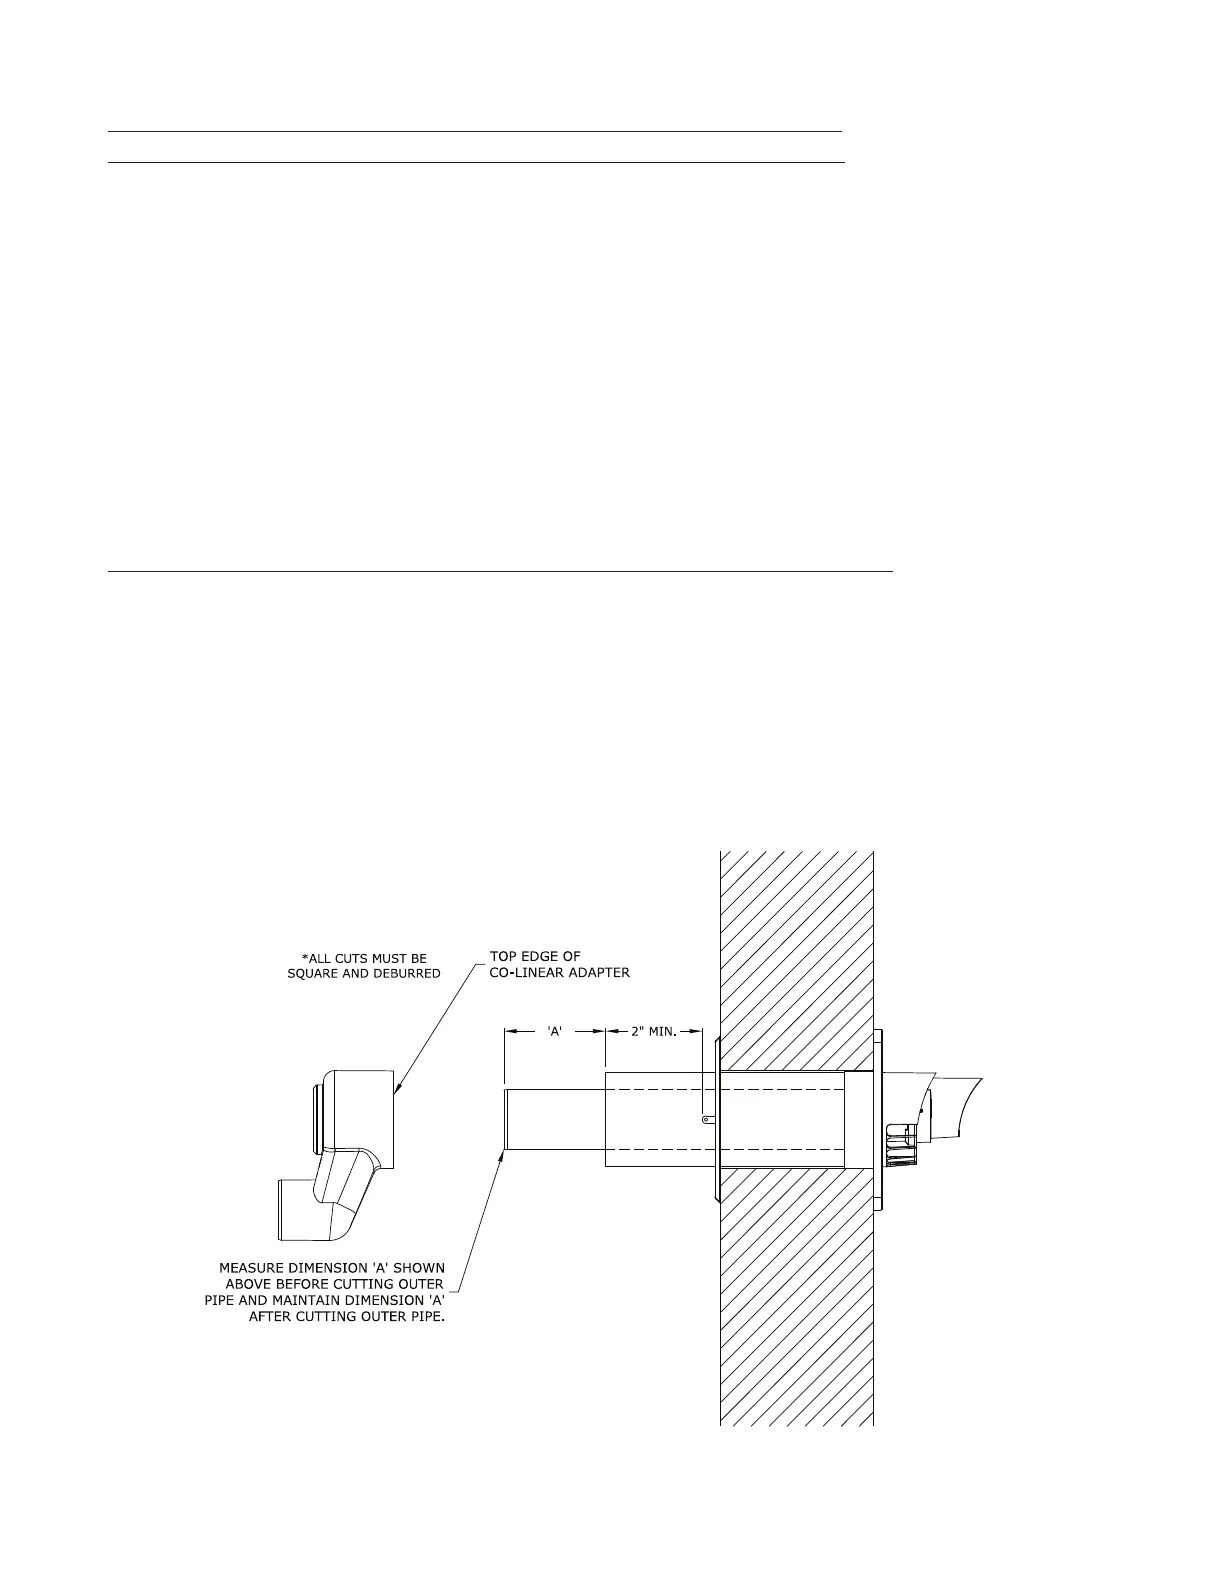
b. If desired, the terminal can be shortened. Mark the desired location of the cut on the outer pipe no closer than 2” from the
edge of the tab on the interior wall plate. Prior to cutting outer pipe measure dimension ‘A’ of the inner pipe as shown in
Figure 7.38 and maintain this dimension after cutting the outer pipe. All cuts must be square and de-burred.
c. Attach the exterior wall plate and seal all around with weather resistant RTV.
d. Slide the cap through the exterior wall plate and hole from the outside of the building and orient the termination so the air
intake slots face down. The cap must be installed level or sloped 1/8” per foot away from the appliance.
e. Seal the termination to the exterior wall plate with weather resistant RTV.
f. Slide the interior wall plate over the termination and attach to the wall from inside the room.
g. Attach the interior wall plate to the termination with the provided hardware.
h. Install gaskets into co-linear adapter.
i. Attach co-linear adapter to horizontal termination and orient so that the side outlet on the adapter is on or above the
horizontal plane.
7. Vertical Installations using PolyPro Vertical Concentric Termination Kit #3PPS-VK (Figure 7.40):
a. Cut a hole in the roof large enough to clear the concentric terminal at the location of the terminal (see Section VII - A of
this manual for permitted terminal locations).
b. Usearoofashingandstormcollartopreventmoisturefromenteringthebuilding.SeeFigure7.40forthemodelnumber
oftheashingtobeuseddependingonthetypeofroof.Sealtheroofashingtotheroofusinggenerallyaccepted
practice for the type of roof on the installation.
c. Slidetheverticalterminationintotheashingfromaboveuntilseatedontheashing.
d. Plumb the termination and mount the support bracket to the structure.
e. Install gaskets into co-linear adapter.
f. Attach co-linear adapter to vertical termination.
Figure 7.38: Cutting Duravent PolyPro Horizontal Concentric Vent Terminal
 Loading...