Page 10
Scan modes (cont)
3: Use the TUNE- or TUNE+ (26,46) buttons to select
between LOCAL (Strong local stations only) or DX (All
available stations).
4: Press ENTER button (45) to save the setting and
MENU to exit.
Stereo / mono mode
Sometimes Stereo radio stations can suffer from
interference (static & crackles) to reduce this problem
you can enable MONO mode.
1: Press the MENU button (24).
2: When the ‘SCAN UP’ option appears press either
TUNE- or TUNE+ (26,46) button and locate ‘AUDIO’,
press the ENTER button (45).
3: Use the TUNE- or TUNE+ (26,46) buttons to select
between STERO or MONO.
4: Press ENTER button (45) to save the setting and
MENU to exit.
Display modes
Every time you press the “INFO” button (23) on the
remote control, the display will cycle through the
following display modes: The information is displayed
on the lower segment of the LCD display.
Audio Mode (St/Mono)
Program Name
Radio Text
Time
Date
Program Type
Radio text
As with DAB, broadcasters can include a scrolling text
that displays information about the current program. If
radio text is not available then the display will show ‘NO
TEXT’.
Program type
This describes the “Style” or “genre” of music that is
being broadcast e.g. “Rock “or “Classical”.
Program name
Displays the frequency of the current station.
Audio mode
Displays the current FM mode of STEREO or MONO.
Display modes (cont)
Time & date
The time & date can be set automatically from the DAB
or FM broadcast or set manually. Follow the steps on
page 12 to set manually.
Advanced audio adjustment
EQ modes
1: Press the EQ button (33) on the remote control
repeatedly to cycle through the available sound EQ
presets of: FLAT, JAZZ, ROCK, POP & CLASSIC.
Bass / Treble adjustment
1: Press the BASS button (30) ‘BASS’ will appear on the
display with a number next to it denoting the Bass
level. Use the VOL +/- buttons (38,39) to increase or
decrease the Bass level.
2: Press the TREBLE button (31) ‘TRE’ will appear on the
display with a number next to it denoting the Treble
level. Use the VOL +/- buttons (38,39) to increase or
decrease the Treble level.
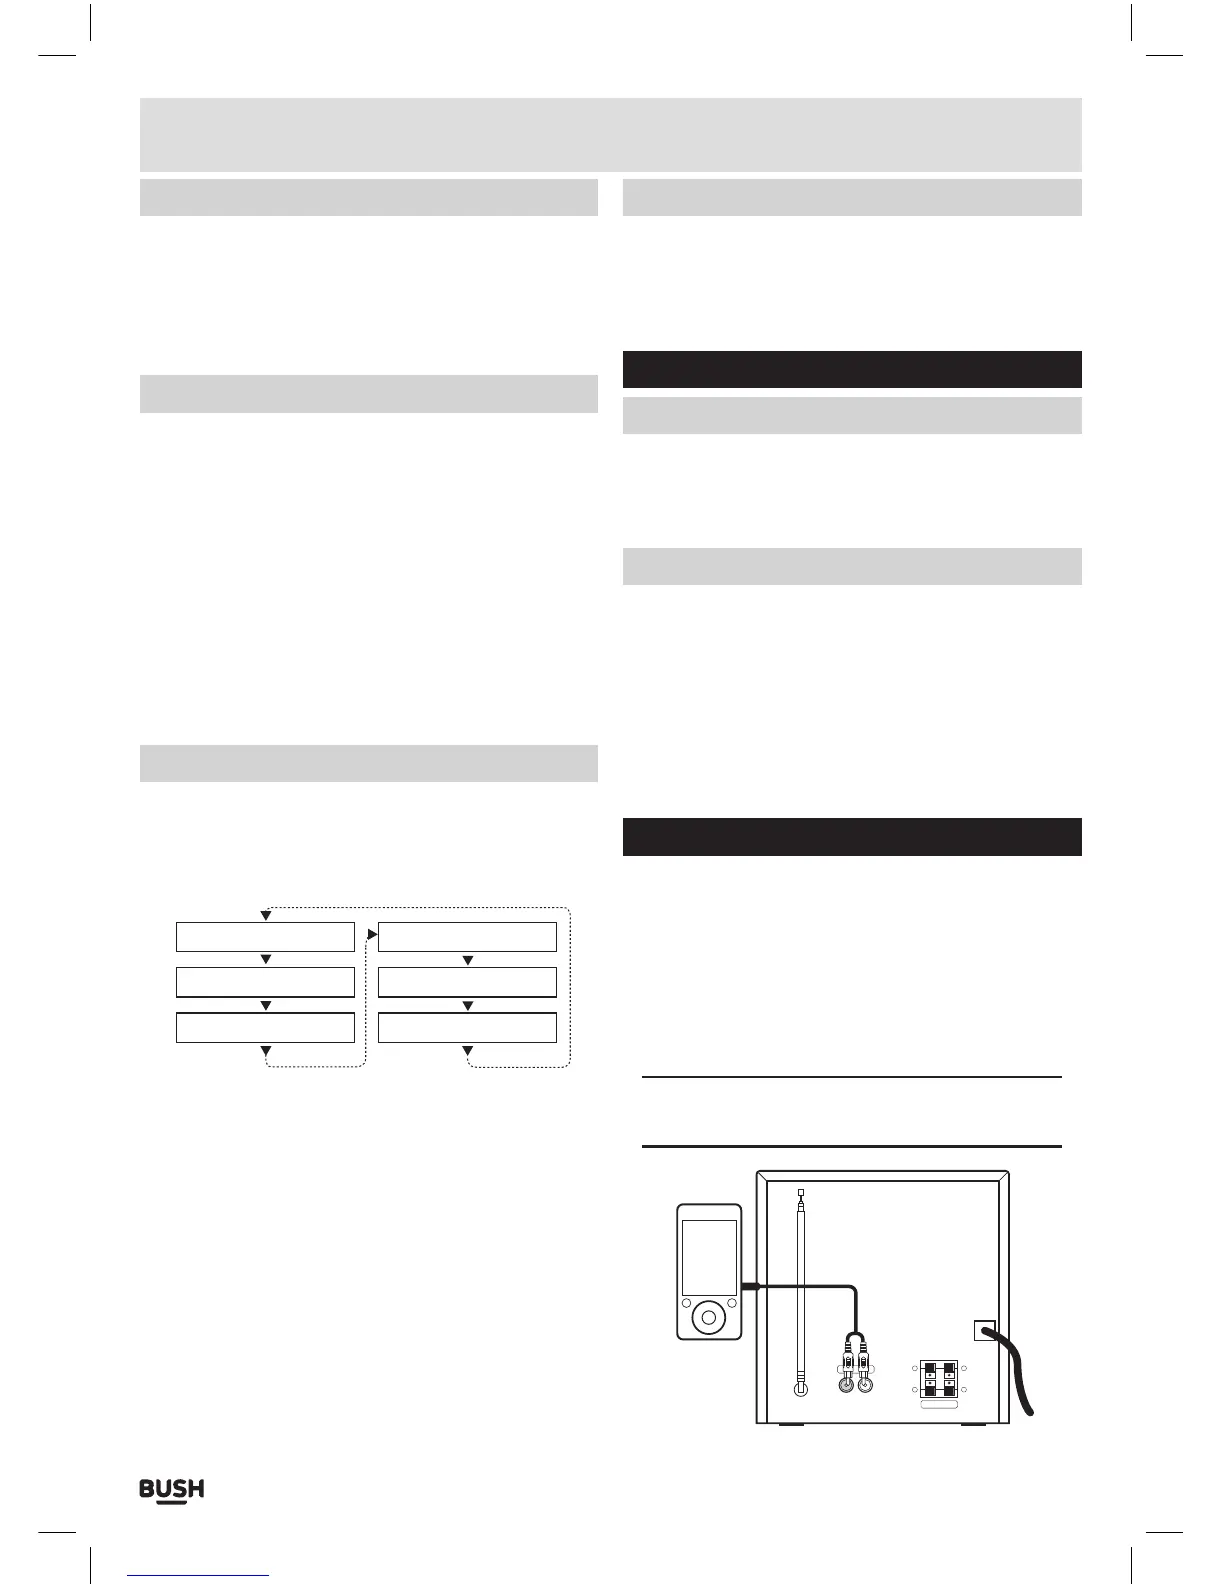
Connecting an external audio source
Follow the steps below to connect the unit to an
external audio device using a 3.5mm to PHONO audio
cable (not supplied).
1: Connect the 3.5mm plug end of the cable (not
supplied) to an audio sources headphone / Line
output and the RED & WHITE sockets to the LINE IN
input (18) sockets on the rear of the unit.
NOTE: You must match the RED plug to the RED
socket and the WHITE plug to the WHITE socket.
R
SPEAKER
+
-
L
+
-
LINE-IN
User instructions
 Loading...