29
31
32
33
34
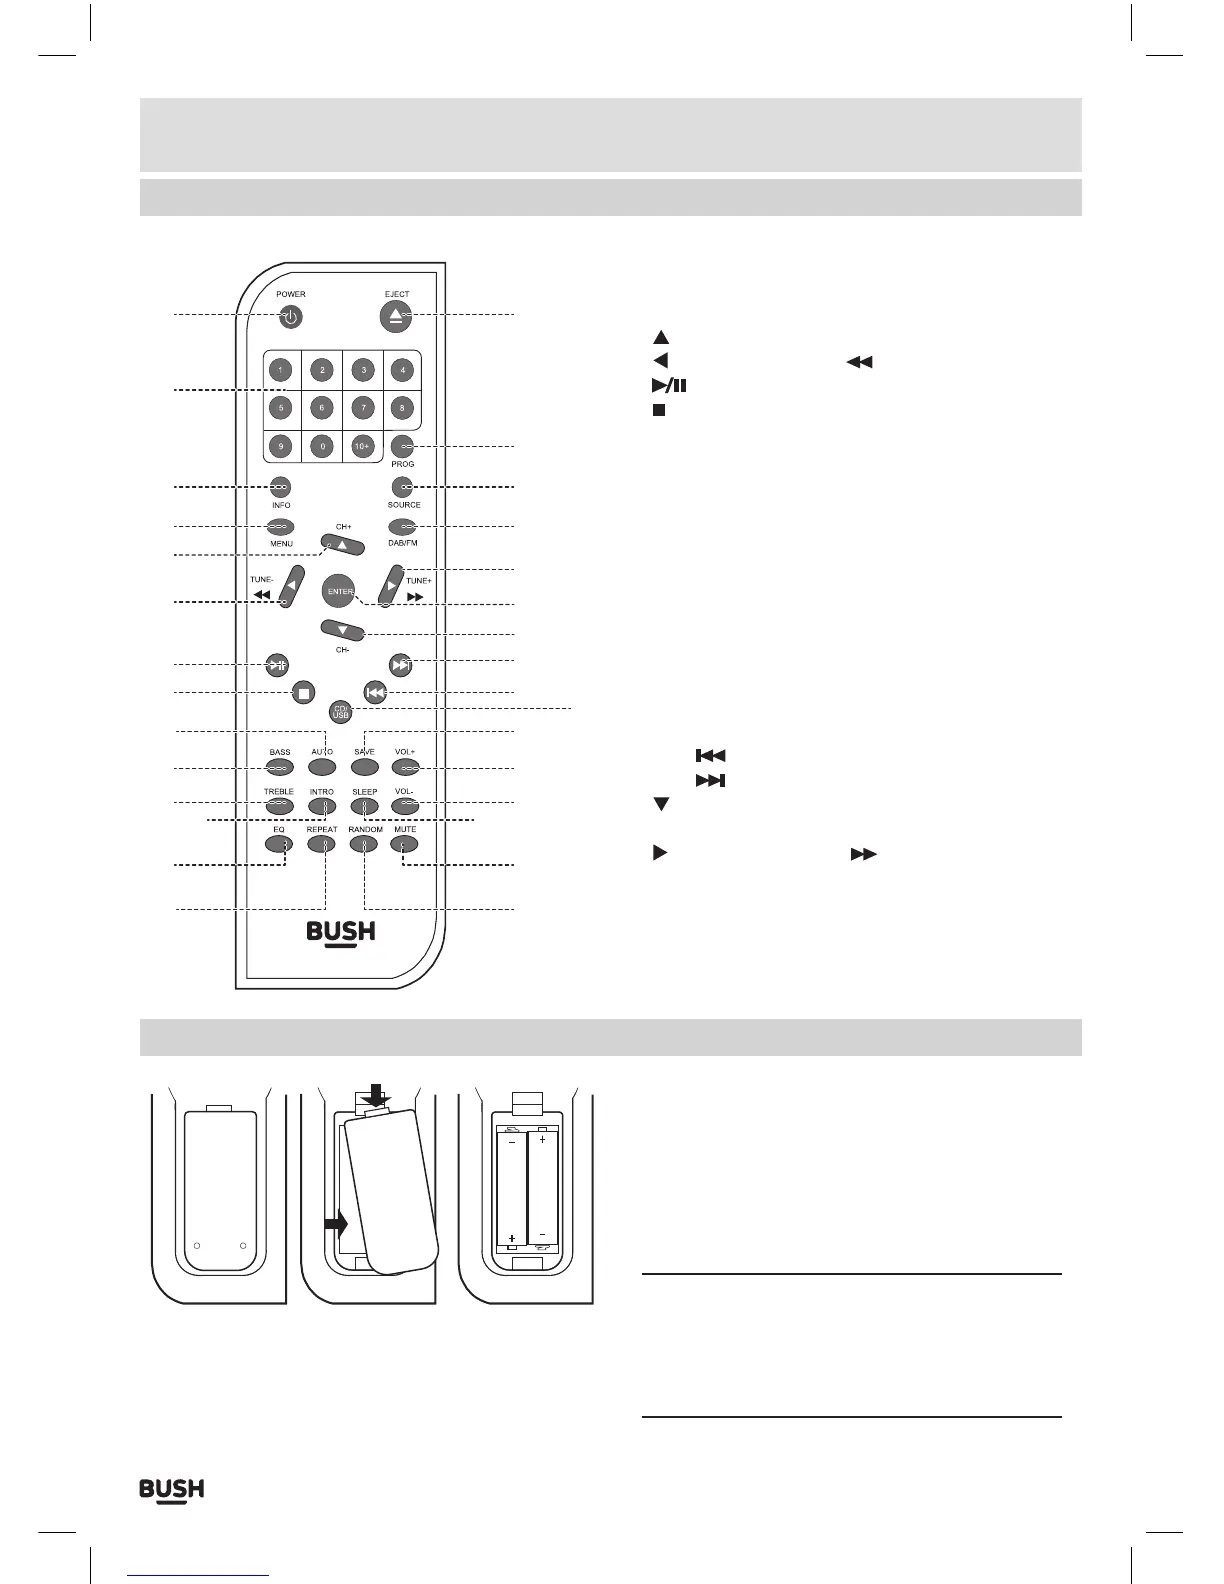
21: STANDBY button
22: NUMERIC buttons
23: INFO button
24: MENU button
25:
NAVIGATION/ CH+ button
26:
NAVIGATION/TUNE-/ button
27:
PLAY/PAUSE button
28:
STOP button
29: AUTO button
30: BASS button
31: TREBLE button
32: INTRO button
33: EQ button
34: REPEAT button
35: RANDOM button
36: MUTE button
37: SLEEP button
38: VOL- button
39: VOL+button
40: SAVE button
41: CD/USB source button
42: SKIP
button
43: SKIP
button
44:
NAVIGATION/ CH- button
45: ENTER button
46:
NAVIGATION/TUNE+/ button
47: DAB/FM button
48: SOURCE button
49: PROG button
50: EJECT button
Installation
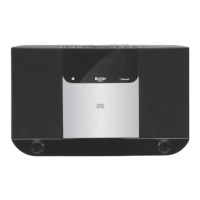
Remote control battery installation
Before use, the remote control will need batteries
fitting.
1: Remove the battery compartment lid as shown.
2: Fit 2 x AAA batteries as shown. Take care to match
the polarities of the remote to the batteries. EG: the +
sign on the battery matches the + sign on the remote
control battery compartment.
3: Replace the battery compartment lid and proceed
to use.
NOTE: Leaking batteries may damage the battery
compartment and the remote as a whole, so they
should be removed from the compartment when
becoming flat or when the remote is not to be
used with batteries for some time.