11
4 Replacing Assembly Units
4.3 Replacing the Slipping Clutches
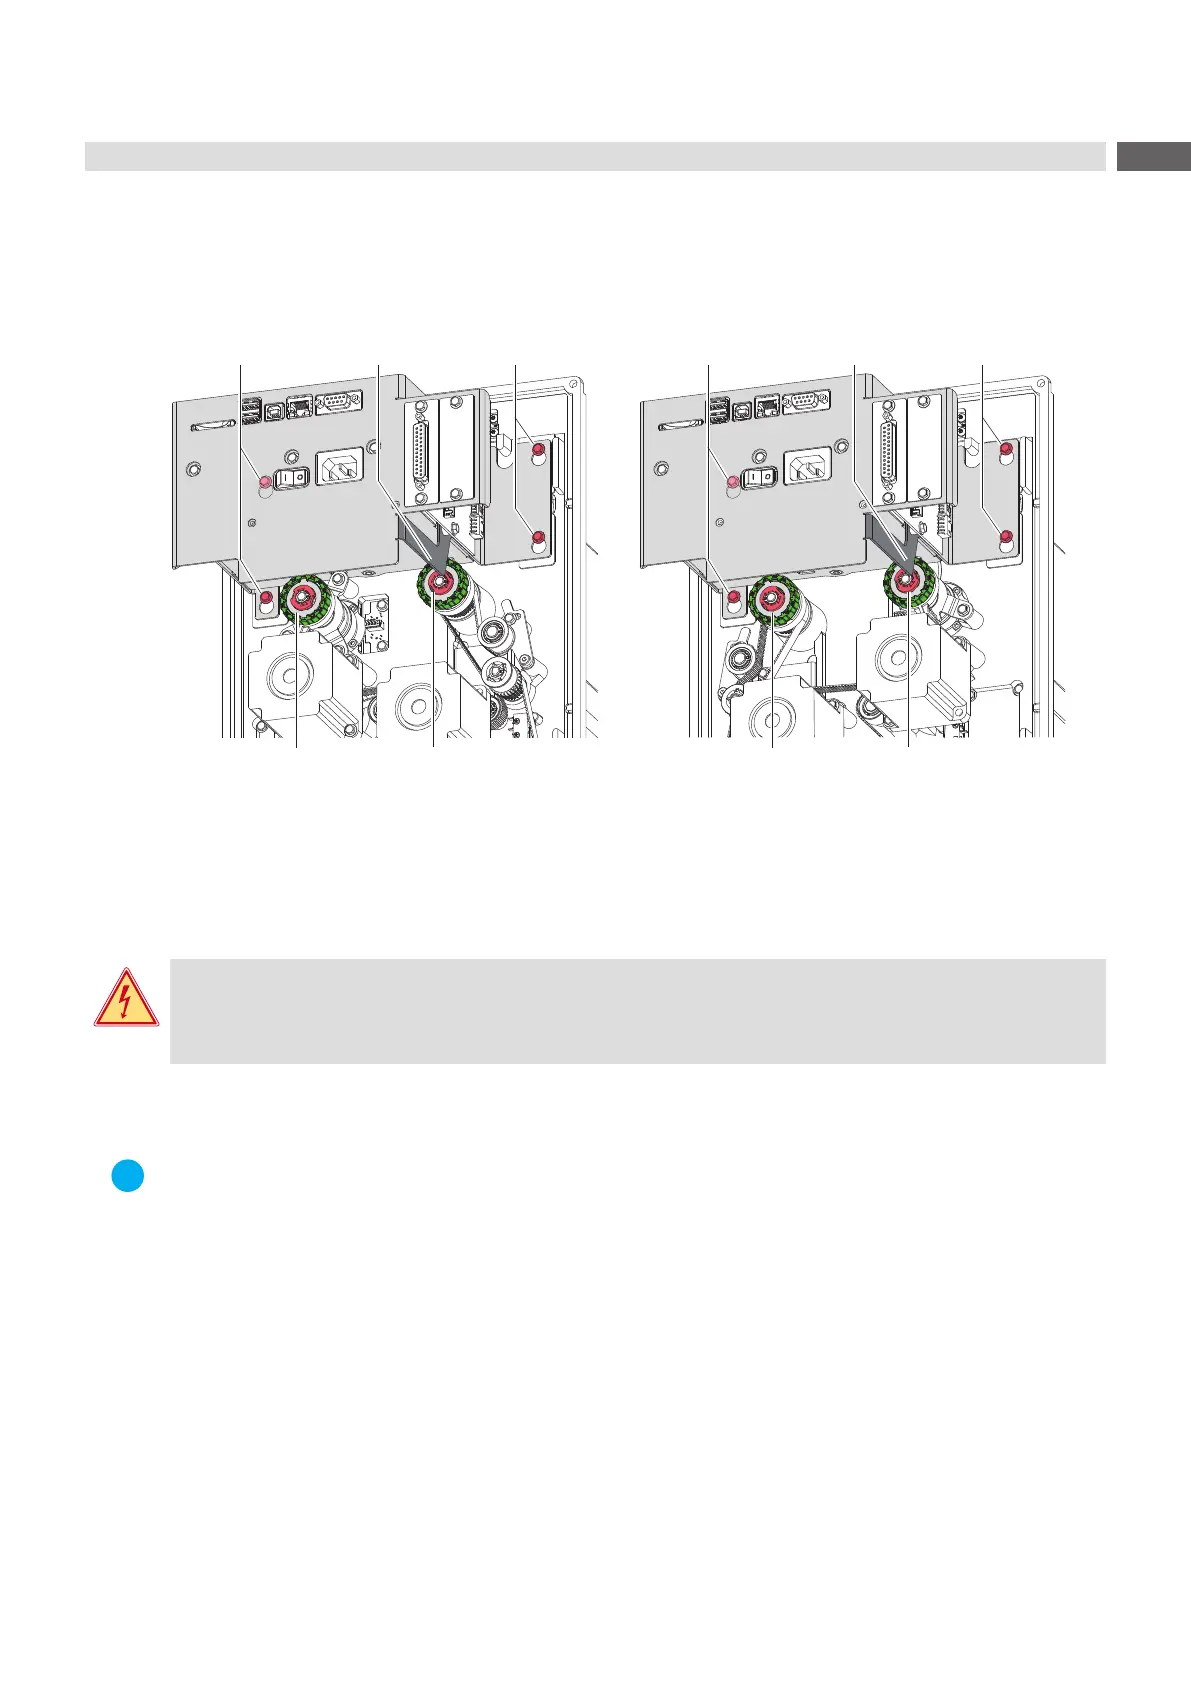
The rewinder for the transfer ribbon is coupled to the main drive using a slipping clutch (2L, 2R).
The supply hub of the transfer ribbon is braked with a slipping clutch (1L, 1R) during printing.
Replace a slipping clutch when it can no longer be set 5.1 on page 16.
Removal and installation of a slipping clutch is also required for replacement of a winder.
2L
3
3 4
1R
3
3 4
PX QL PX QR
Figure 6 Slipping clutches
Preparation
Danger!
Risk of death via electric shock!
Before opening the rear cover, disconnect the device from the mains supply and wait at lease one
minute until the power supply unit has discharged.
Unplug the printer from the electrical outlet.
Remove the rear cover of the printer.
Note!
The clutch (2L) on the rewinder of PX QL and the brake (1R) on the unwinder of PX QR cannot be replaced
when the electronics unit (4) is mounted.
Loosen 4 screws (3).
Lift the electronics unit until the described clutches are accessible.
After clutch replacement push the electronics unit to the normal position and x it with the screws (3).
 Loading...