25
5 Adjustments
5.5 Adjusting the Automatic Ribbon Saver
The ribbon saver reduces the consumption of transfer ribbon by lifting the printhead while feeding blank label areas.
The printhead will be lifted by eccentrics and the ribbon unwinder will be blocked by a magnetic clutch.
Print phase Saver phase
Eccentrics Printing position
-> Printhead is pressed down
Saving position
-> Printhead is lifted
Magnetic clutch Off
-> Ribbon unwinder can be turned
On
-> Ribbon unwinder is blocked
Table 3 Phases of the saver mode
5.5.1 Setting the Eccentrics
A misalignment of the eccentrics can cause a reduction of the saver effect in the saver phase or a deterioration of the
print image and a stagnant ribbon transport in the print phase.
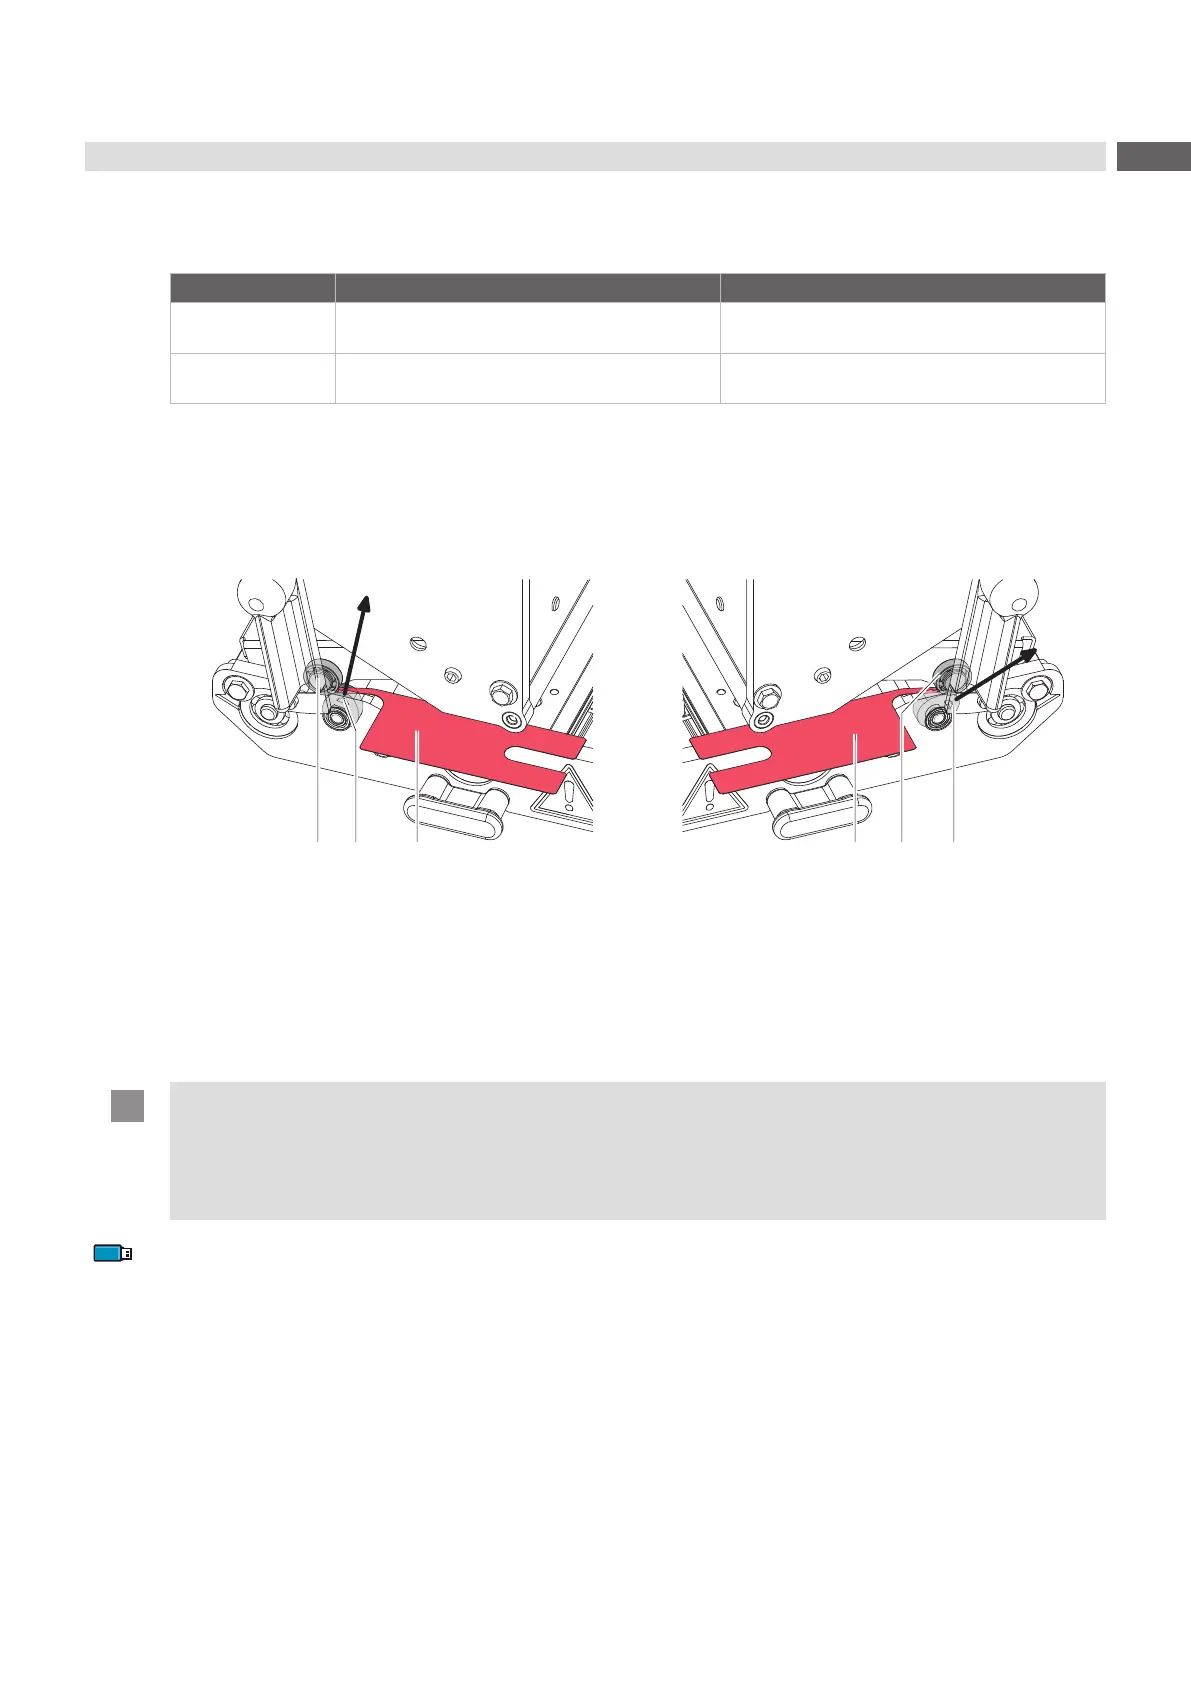
PX QL PX QR
Figure 22 Checking the eccentrics position
1. Remove the label material.
2. Lock the printhead.
3. Switch on the printer.
The ribbon saver will be synchronized. After this the eccentrics are in the print position.
4. Check the orientation of the eccentrics.
Attention!
Risk of ribbon saver malfunction.
In the print position the peak of the eccentric (2) at PX QL and at PX QR must
• point upwards and
• stand on the right of the ball bearing (1) Figure 22.
Access to the following functions only with service key installed!
5. If the peak of the eccentric points downwards invert the setting of Setup > Ribbon > Invert eccentric position.
6. Check the distance between ball bearing (1) and eccentric (2) with the 0,1 mm gauge (3).
If necessary select Setup > Ribbon > Saver eccentric position and adjust the angle setting of the eccentric.
7. Check the setting by changing between print and saver position using the function Setup > Ribbon > Toggle ribbon
saver.
 Loading...