6 6
2 Preparation
2.1 Tools
Do not use any worn of damaged tools.
Only use tools and testing devices that are suitable for the task at hand.
cab special tools:
• Test collar for transfer ribbon winder (cab Part-No. 5540932)
• Distance caliber 0,1 mm (cab Part-No. 5961064)
Standard tools:
• Screw driver Torx, size TX 10
• Allen key 1,5 mm
• Allen key 2,5 mm (included)
• Phillips-head screwdriver, size 1
• Snap ring pliers ZGG 0
• Snap ring pliers ZGG 1
• Socket wrench 5
• Socket wrench 5,5
• Cylindrical dynamometer (spring scale), 0 - 10 N
• Digital circuit analyzer
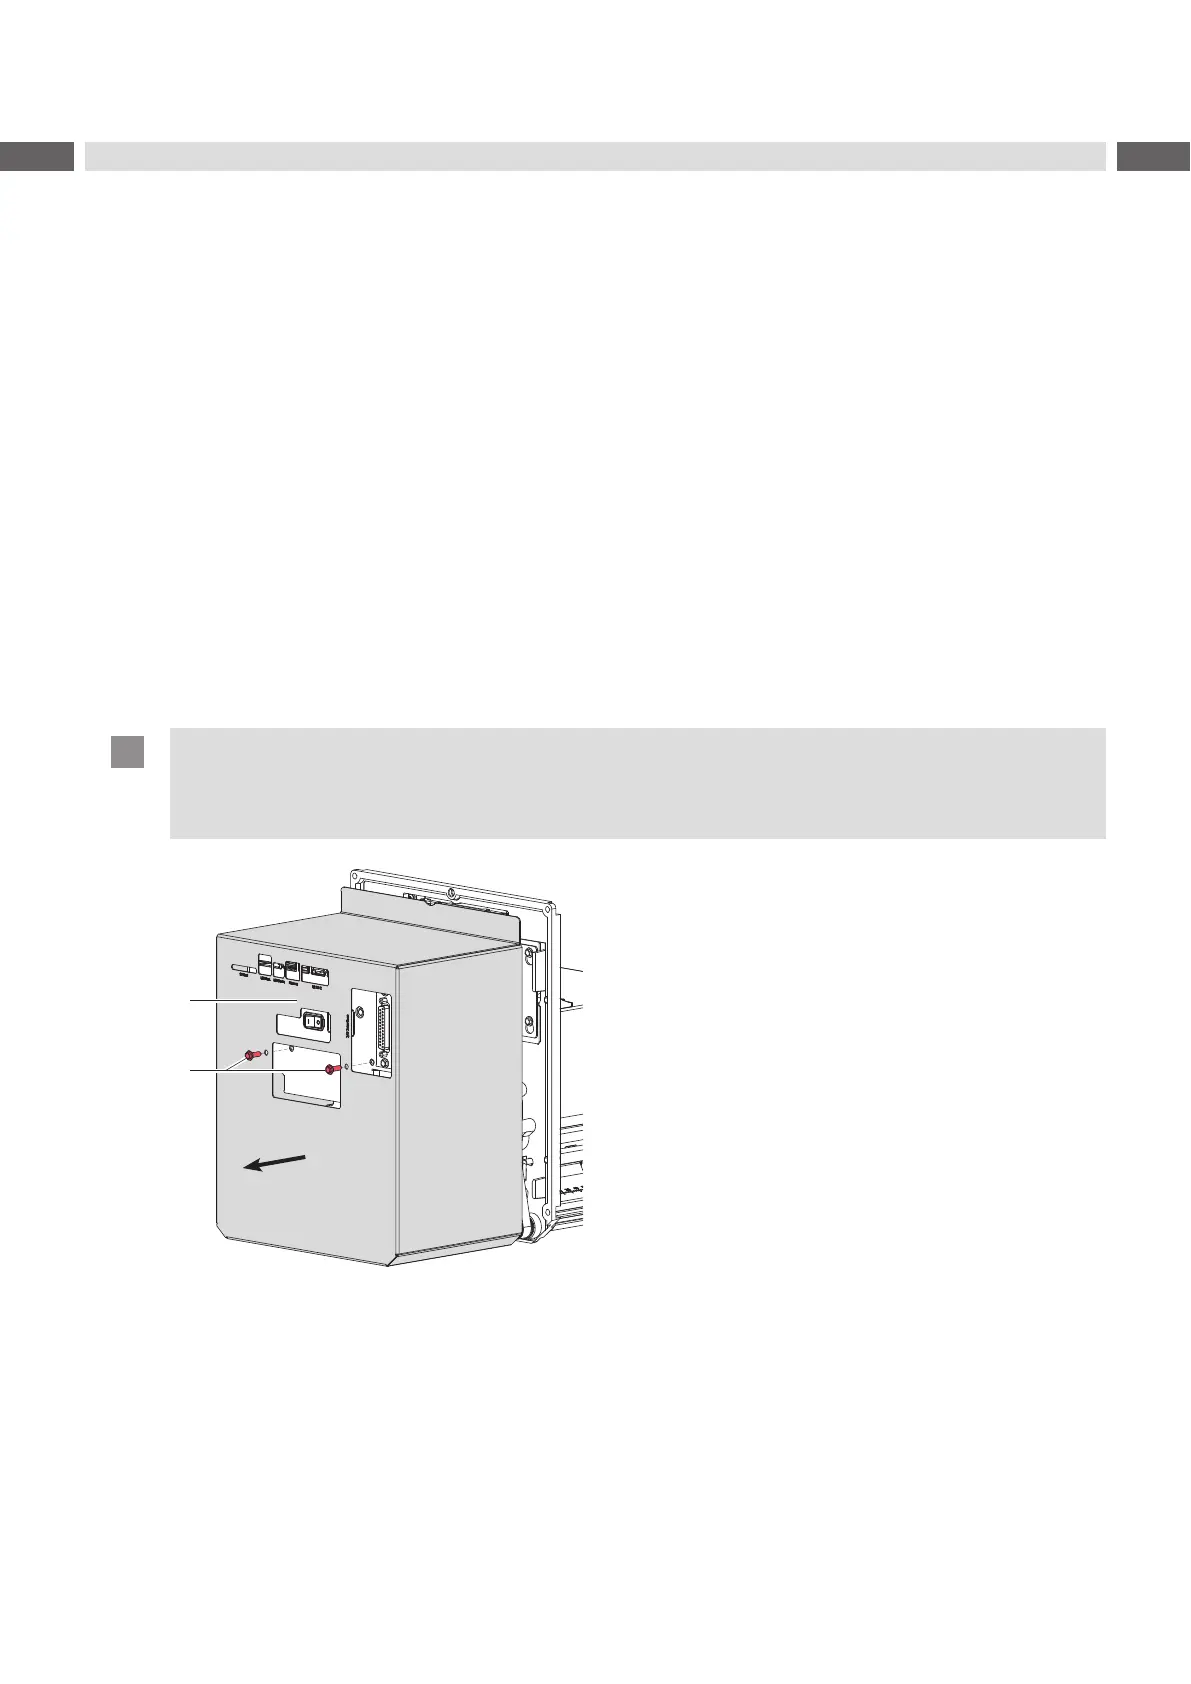
2.2 Removing and Installing the Rear Cover
Attention!
The rear cover or cables can be damaged via careless handling.
Move cable out of the risk area.
Put cover into the guiding complete.
1
2
Figure 1 Removing and installing the rear cover
Removing the cover:
1. Loosen two screws (2).
2. Remove the cover (1) in the arrow direction.
Installing the cover:
1. Move cover (1) against the arrow direction to the device.
2. Make sure that all cables are out of the risk area at the edges of cover.
3. Move the cover (1) complete in the circumferential guiding.
4. Fix the cover (1) with the screws (2) and tighten the screws.
 Loading...