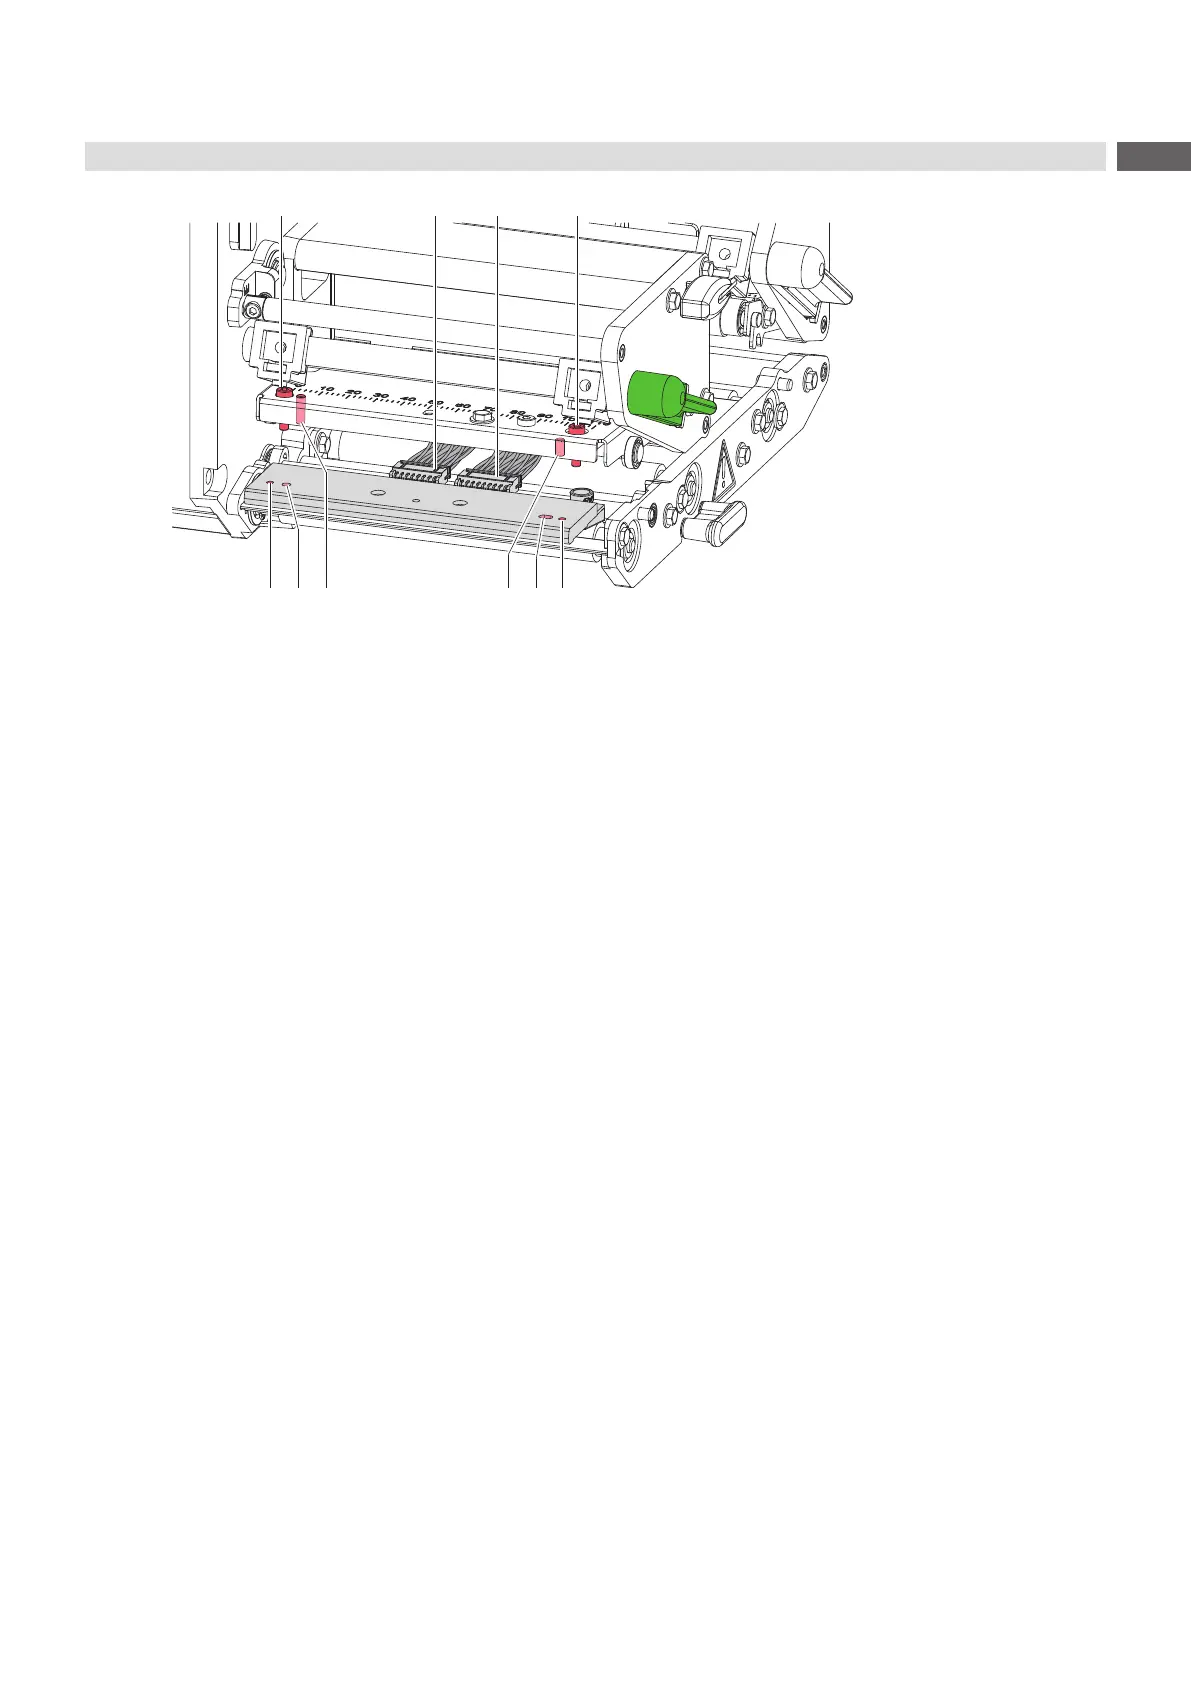
9
4 Replacing Assembly Units
6
6
7 8
Figure 4 Replacing the printhead
Dismounting the Printhead
1. Remove the media from the printer.
2. Lock the printhead.
3. Loosen two screws (6).
4. Open the printhead locking and if necessary remove the printhead from the pins (9).
5. First unplug the power cable (8), followed by the data cable (7).
Mounting the Printhead
1. First connect the data cable (7), followed by the power cable (8).
2. Place the printhead into the printhead assembly and insert the pins (9) into the holes (4).
3. Press down the printhead carriage and x the printhead with the screws (6) at the carriage using the threaded
holes (3).
4. Clean the heating line with the cleaning cloth included in the contents of delivery.
5. Reload labels and transfer ribbon.
 Loading...