SHOOTING STYLES AND CONFIGURATION
47
EN
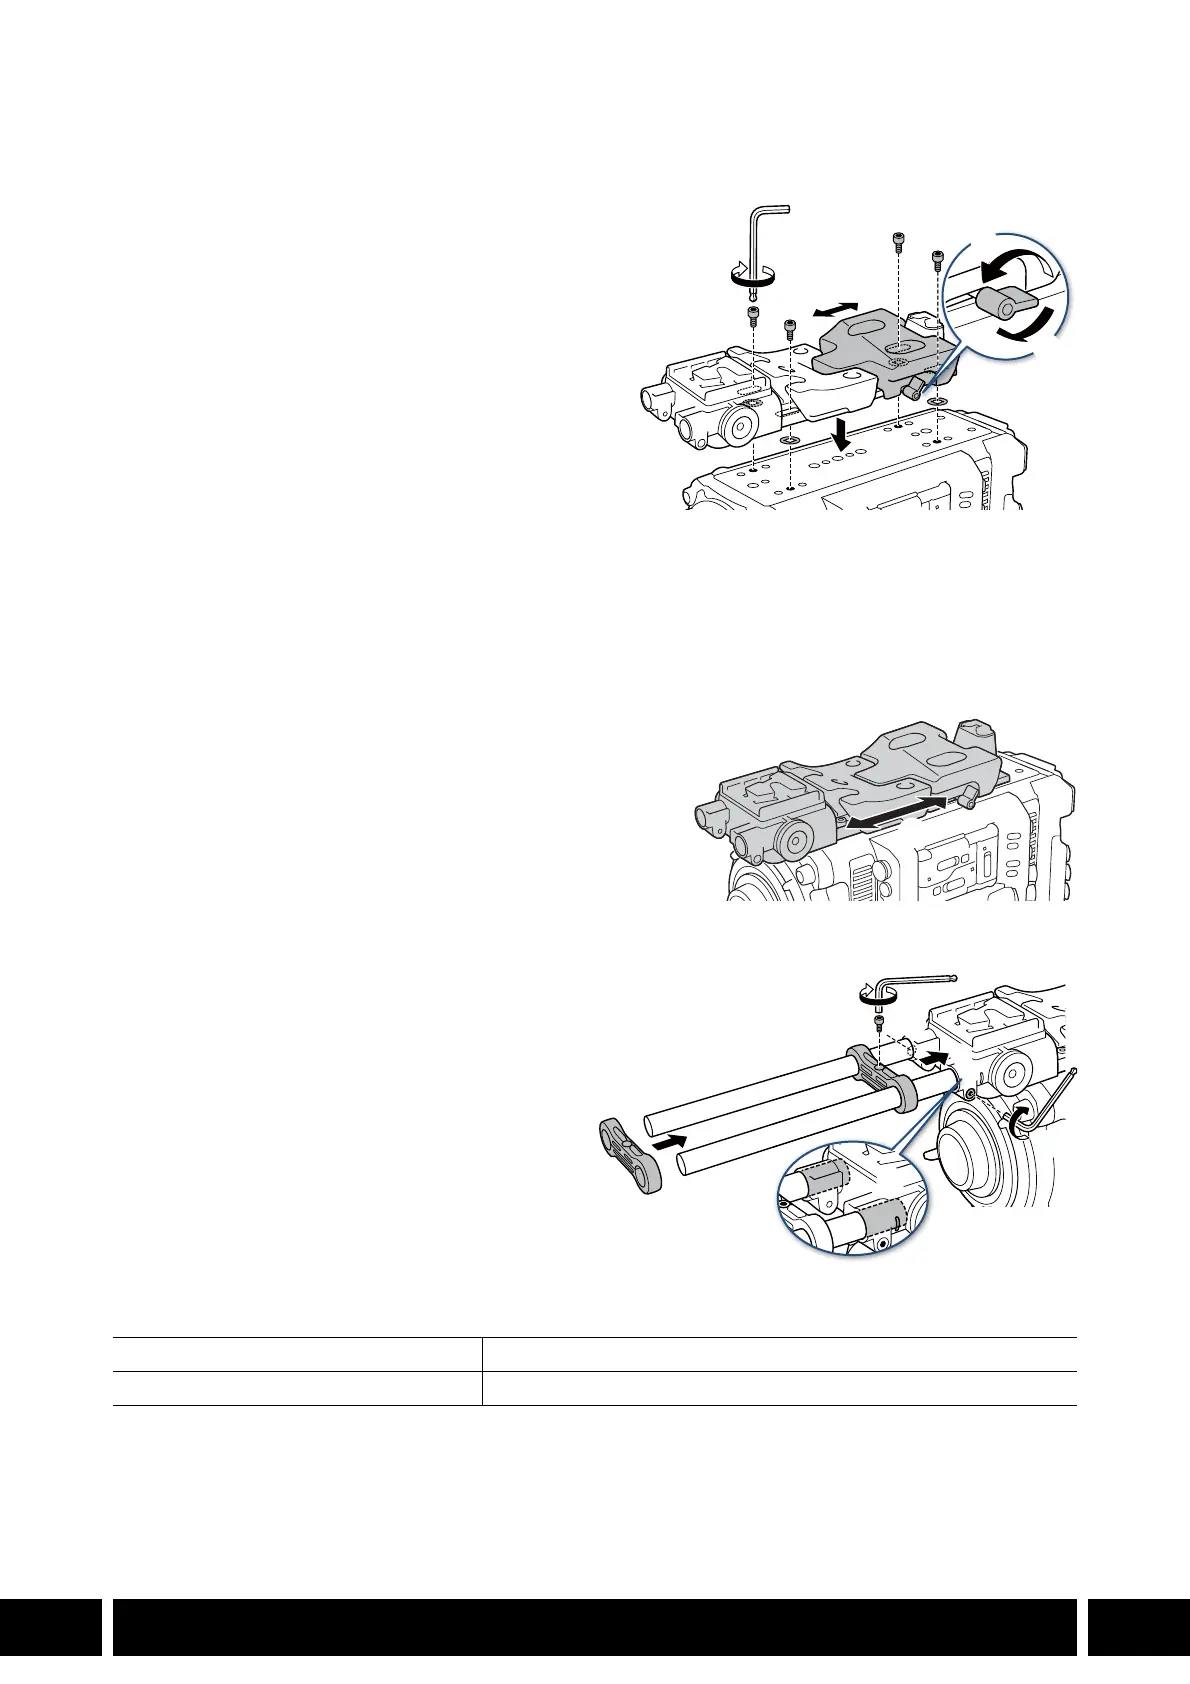
Attaching and Adjusting the Support Unit
1. Turn off the camera.
2. Turn the shoulder pad screw counter-
clockwise and loosen it (햲).
3. Adjust the shoulder pad position (front/back;
햳).
4. Turn the shoulder pad screw clockwise to
secure the shoulder pad in place (햴).
• If the screw is facing down, pull the screw and
turn it so that it faces diagonally upward.
5. Insert one of the supplied 0.64 cm, 1/4" bolts
into a camera mount through-hole and affix a
supplied bolt retainer to the underside of the
bolt.
• Repeat for the other three through holes.
6. Attach the shoulder support to the bottom of the camera (햵) and use the hex wrench for
0.64 cm, 1/4" screws to partially tighten the 4 supplied fixation bolts for a provisional fix.
7. Adjust the shoulder pad (front/back) to the desired
position and then fasten the bolts firmly (햶).
Attaching the Accessory Rods
1. Pass the rods through the rod stoppers
and use the hex wrench for M4 bolts to
fasten one of the supplied M4 bolts to the
rod stopper to fix the rods (햲).
2. Insert the assembled rods into the
shoulder support (햳) and fasten the other
supplied M4 bolt to secure the rod
assembly in place (햴).
• Make sure the rods go past the side slits.
Specifications
* All dimensions and weights are approximate.
Dimensions* (W x H x D) 111 x 47 x 496 mm (4.4 x 1.9 x 19.5 in.)
Weight* (without connector cover) 930 g (2.1 lb.)
햲
햴
햳
햵