Network Setting (Windows)
Specifying the frame type using the printer Control Panel
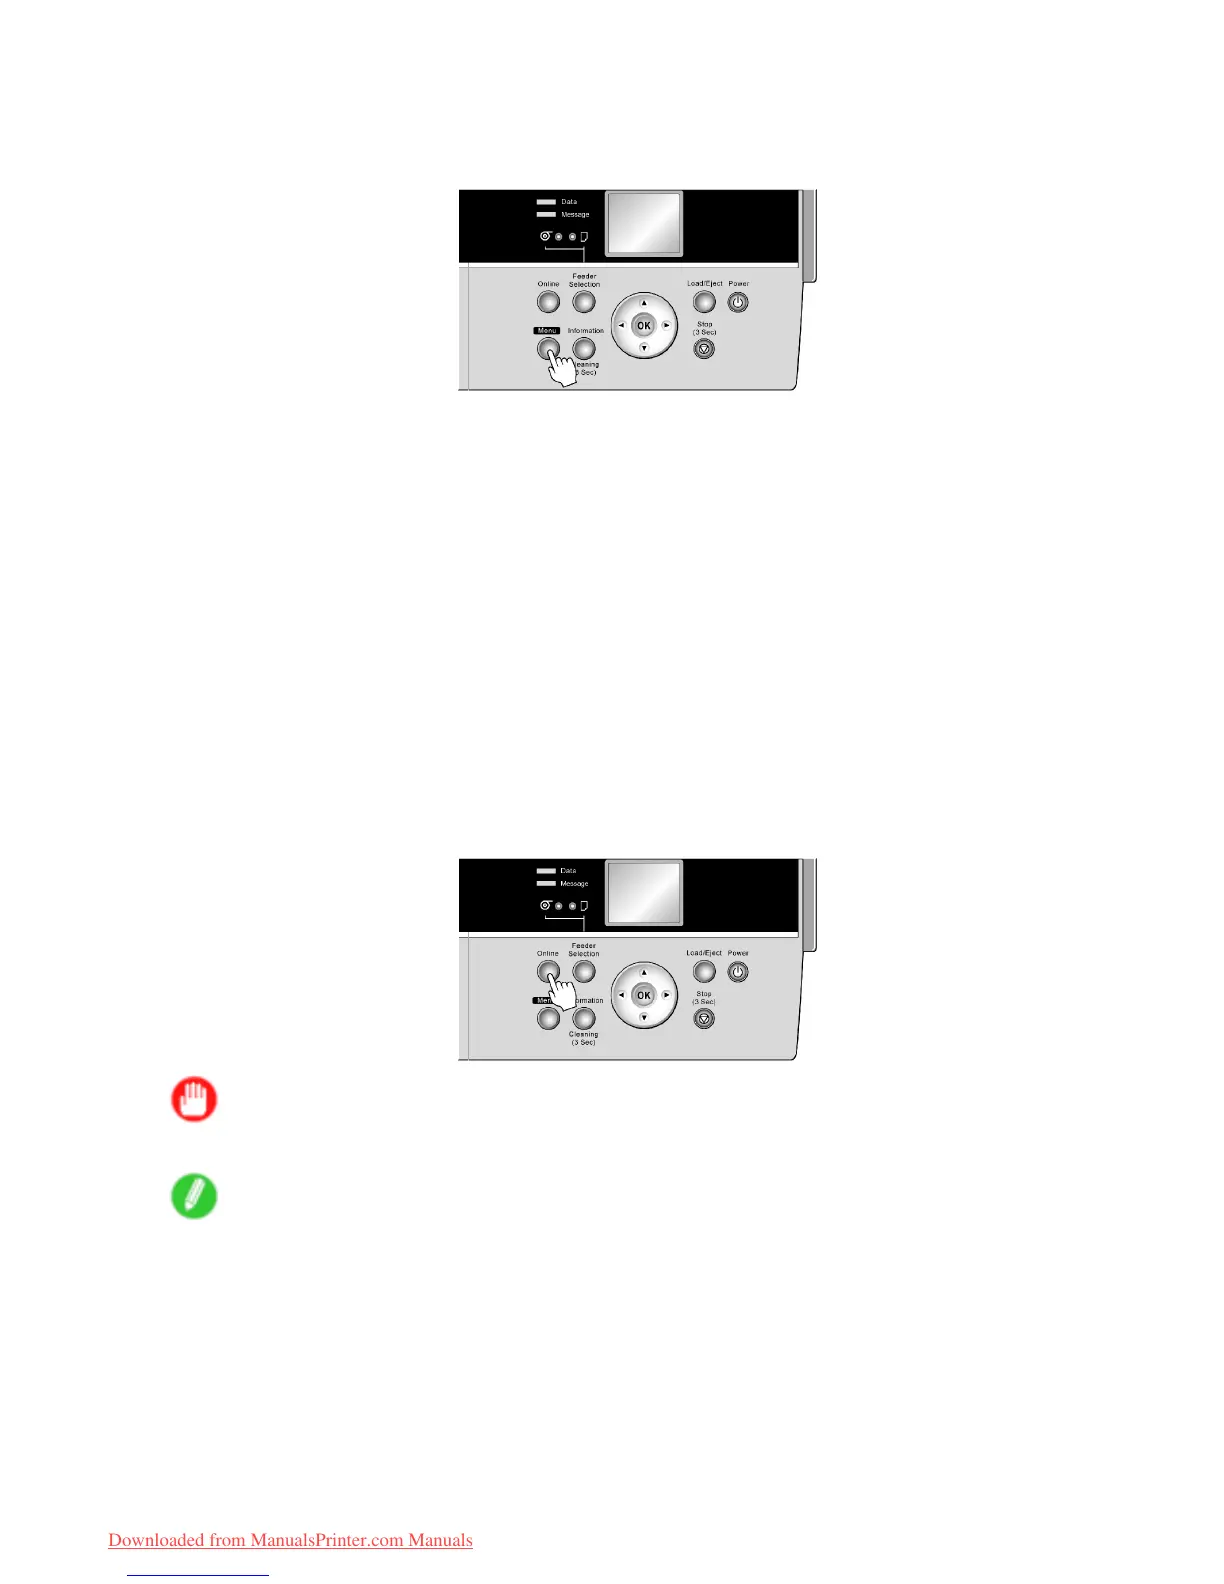
1. Press the Menu button to display MAIN MENU .
2. Press ▲ or ▼ to select Interface Setup , and then press the ► button.
3. Press ▲ or ▼ to select NetW are , and then press the ► button.
4. Press ▲ or ▼ to select NetW are , and then press the ► button.
5. Press ▲ or ▼ to select On , and then press the OK button.
The display reverts to the NetW are menu.
6. Press ▲ or ▼ to select Frame T ype , and then press the ► button.
7. Press ▲ or ▼ to select the frame type to use, and then press the OK button.
The display reverts to the NetW are menu.
8. Press ▲ or ▼ to select Print Service , and then press the ► button.
9. Press ▲ or ▼ to select the desired print service, and then press the OK button.
The display reverts to the NetW are menu.
10. Press the Online button to bring the printer online.
If any of the settings is changed, a conrmation message is displayed. In this case, press
the OK button.
Important
• Be sure to complete step 10. This will activate the values you have entered.
Note
• T o cancel the setup process, hold down the Stop button for a second or more.
Network Setting 487
Downloaded from ManualsPrinter.com Manuals
 Loading...